

Before we jump into today’s project, I wanted to let you know that I sometimes use affiliate links to share my favorite products. Don’t worry, these links won’t cost you a dime – they’re just little crafty helpers behind the scenes that help support me if you use them to make a purchase! Let’s dive into today’s creative journey together!
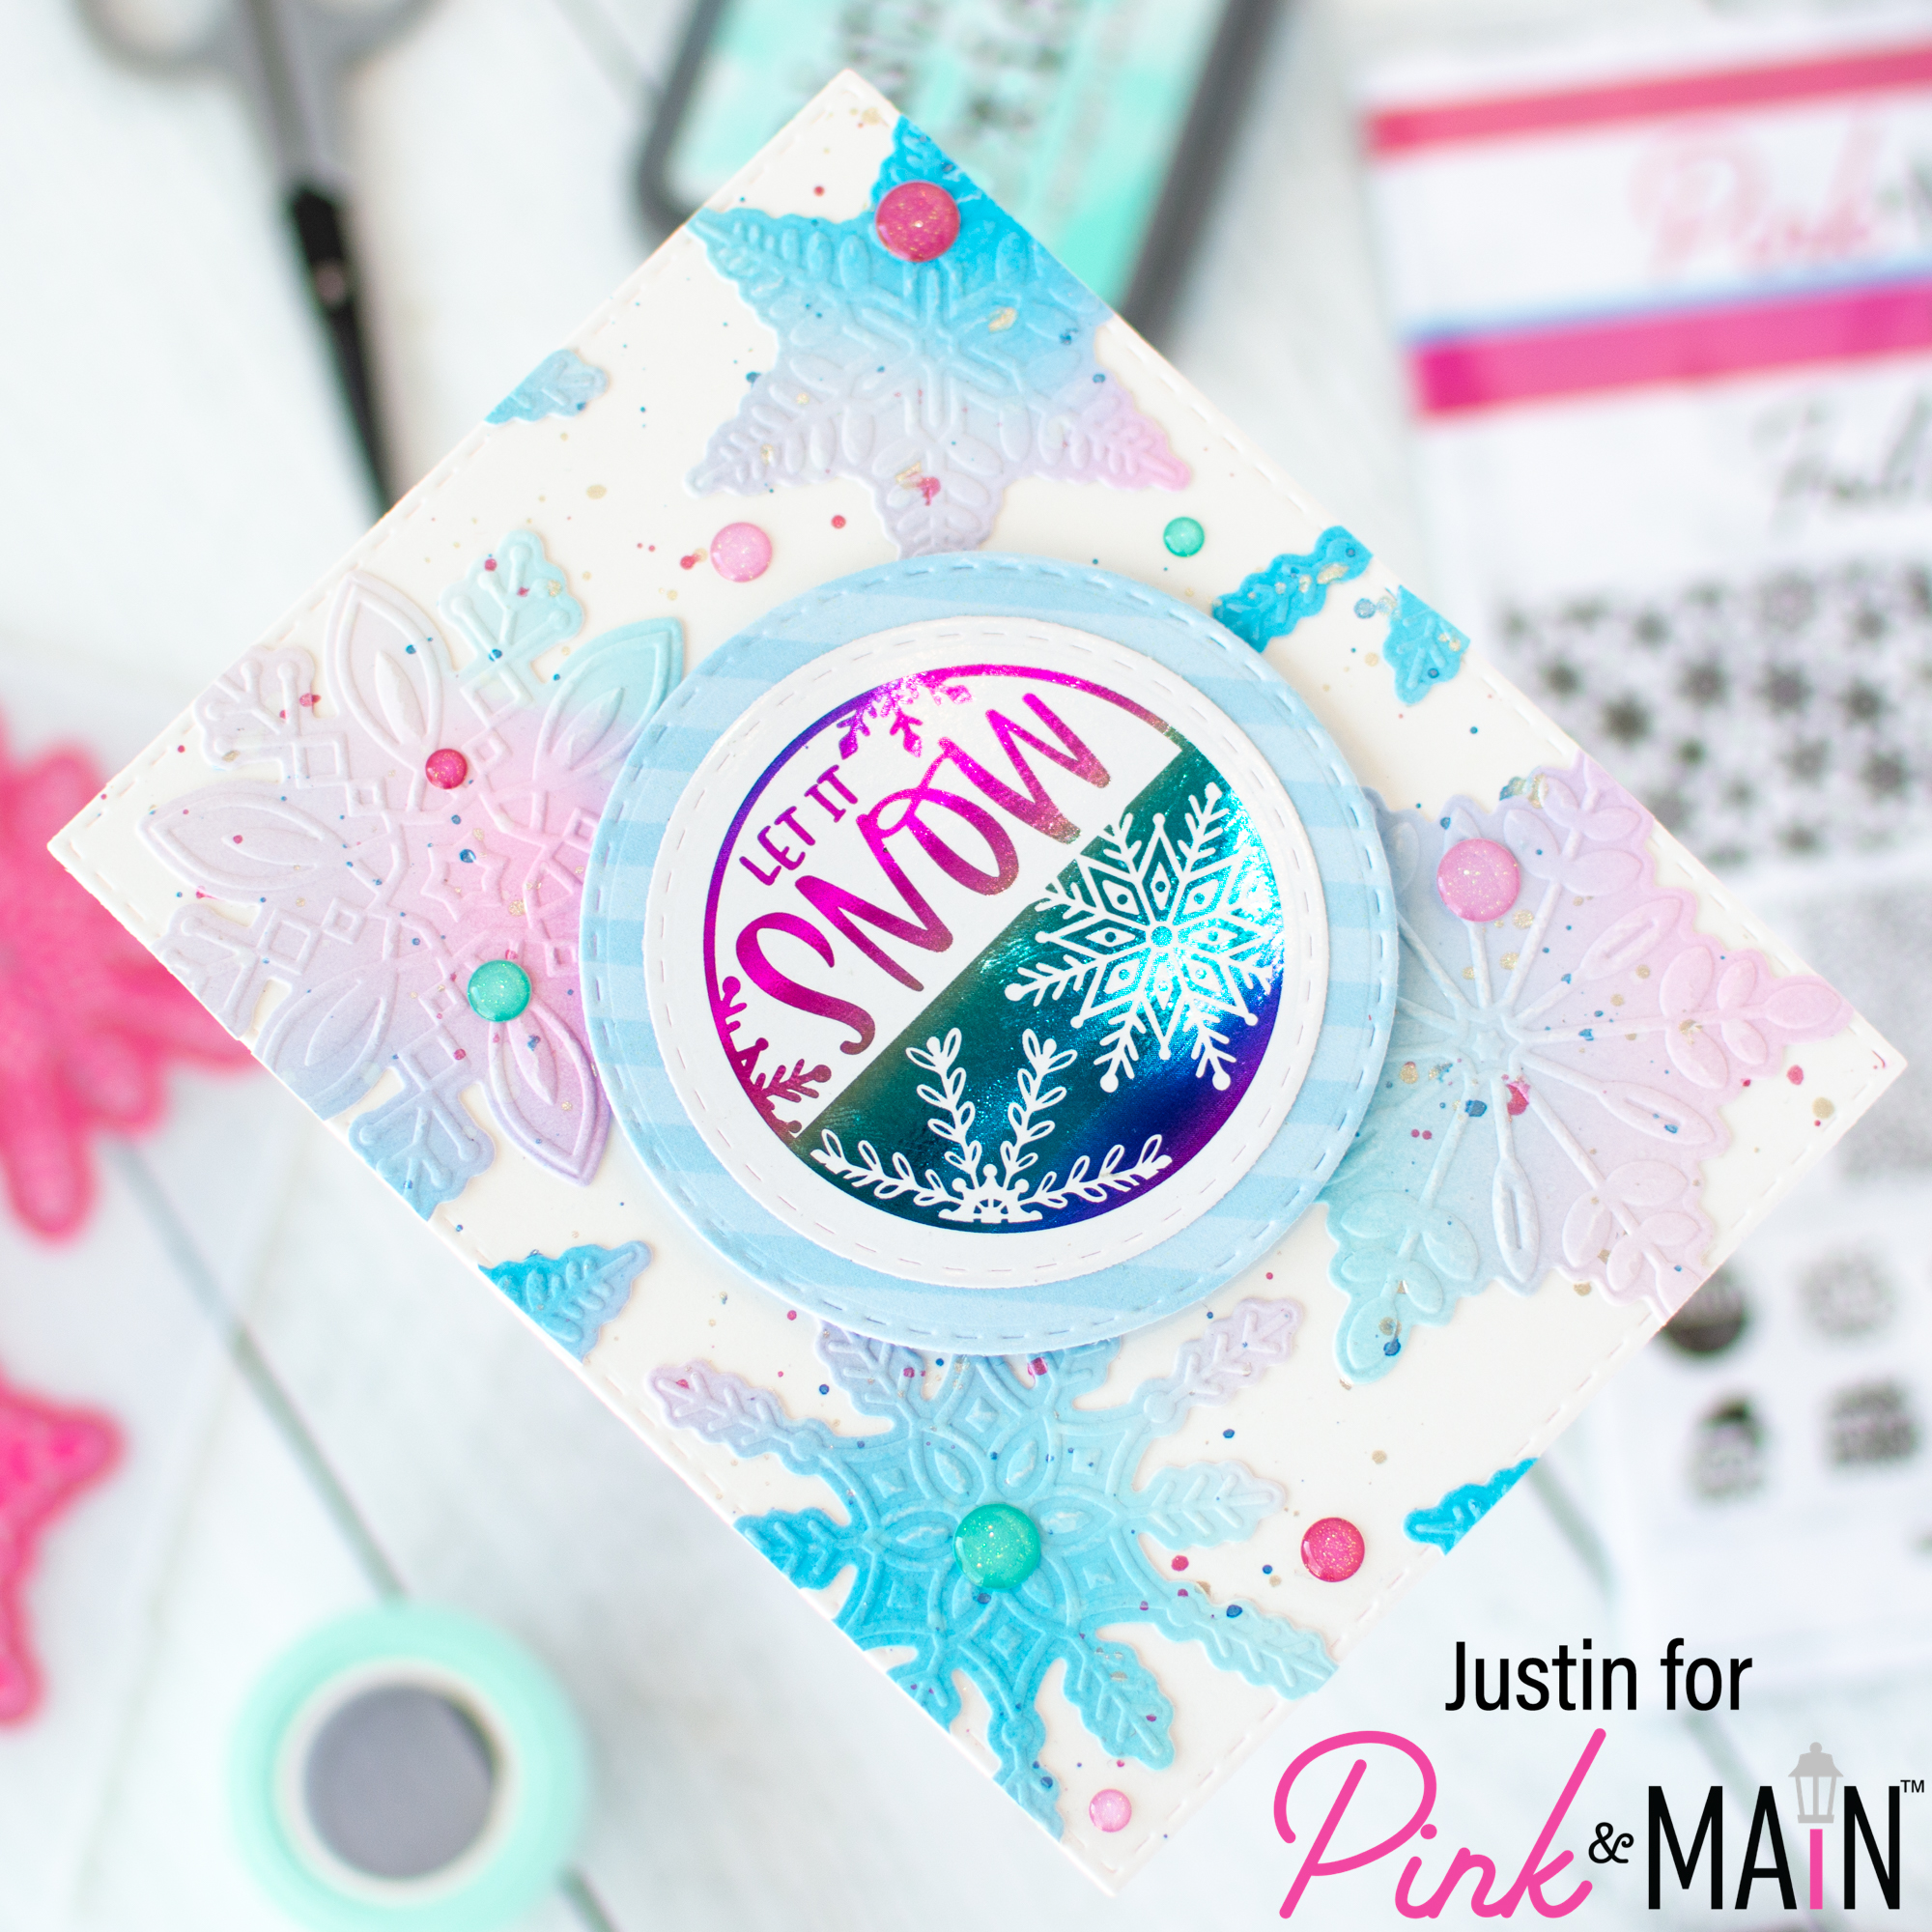
Hello friends! Today, I have some really fun snowflake inspired crafting to share with you using some new products from the November Release! I am featuring the new Snowflakes Cut & Emboss Folder and Let It Snow Foilable Kit! Let’s get into the details!
Pink & Main Products Used:
Snowflakes Cut & Emboss Folder
Let It Snow Foilable Kit
Pink – Teal Ombré CheerFoil
Stitched Rectangle Dies Set 1
Stitched Circle Dies
Crafty Friends Glitter Enamel Dots
Foam Tape
Liquid Adhesive
Mini Minc
Other Key Products Used:
Distress Oxide Inks: Kitsch Flamingo, Salvaged Patina & Salty Ocean
Metallic Watercolor Accents
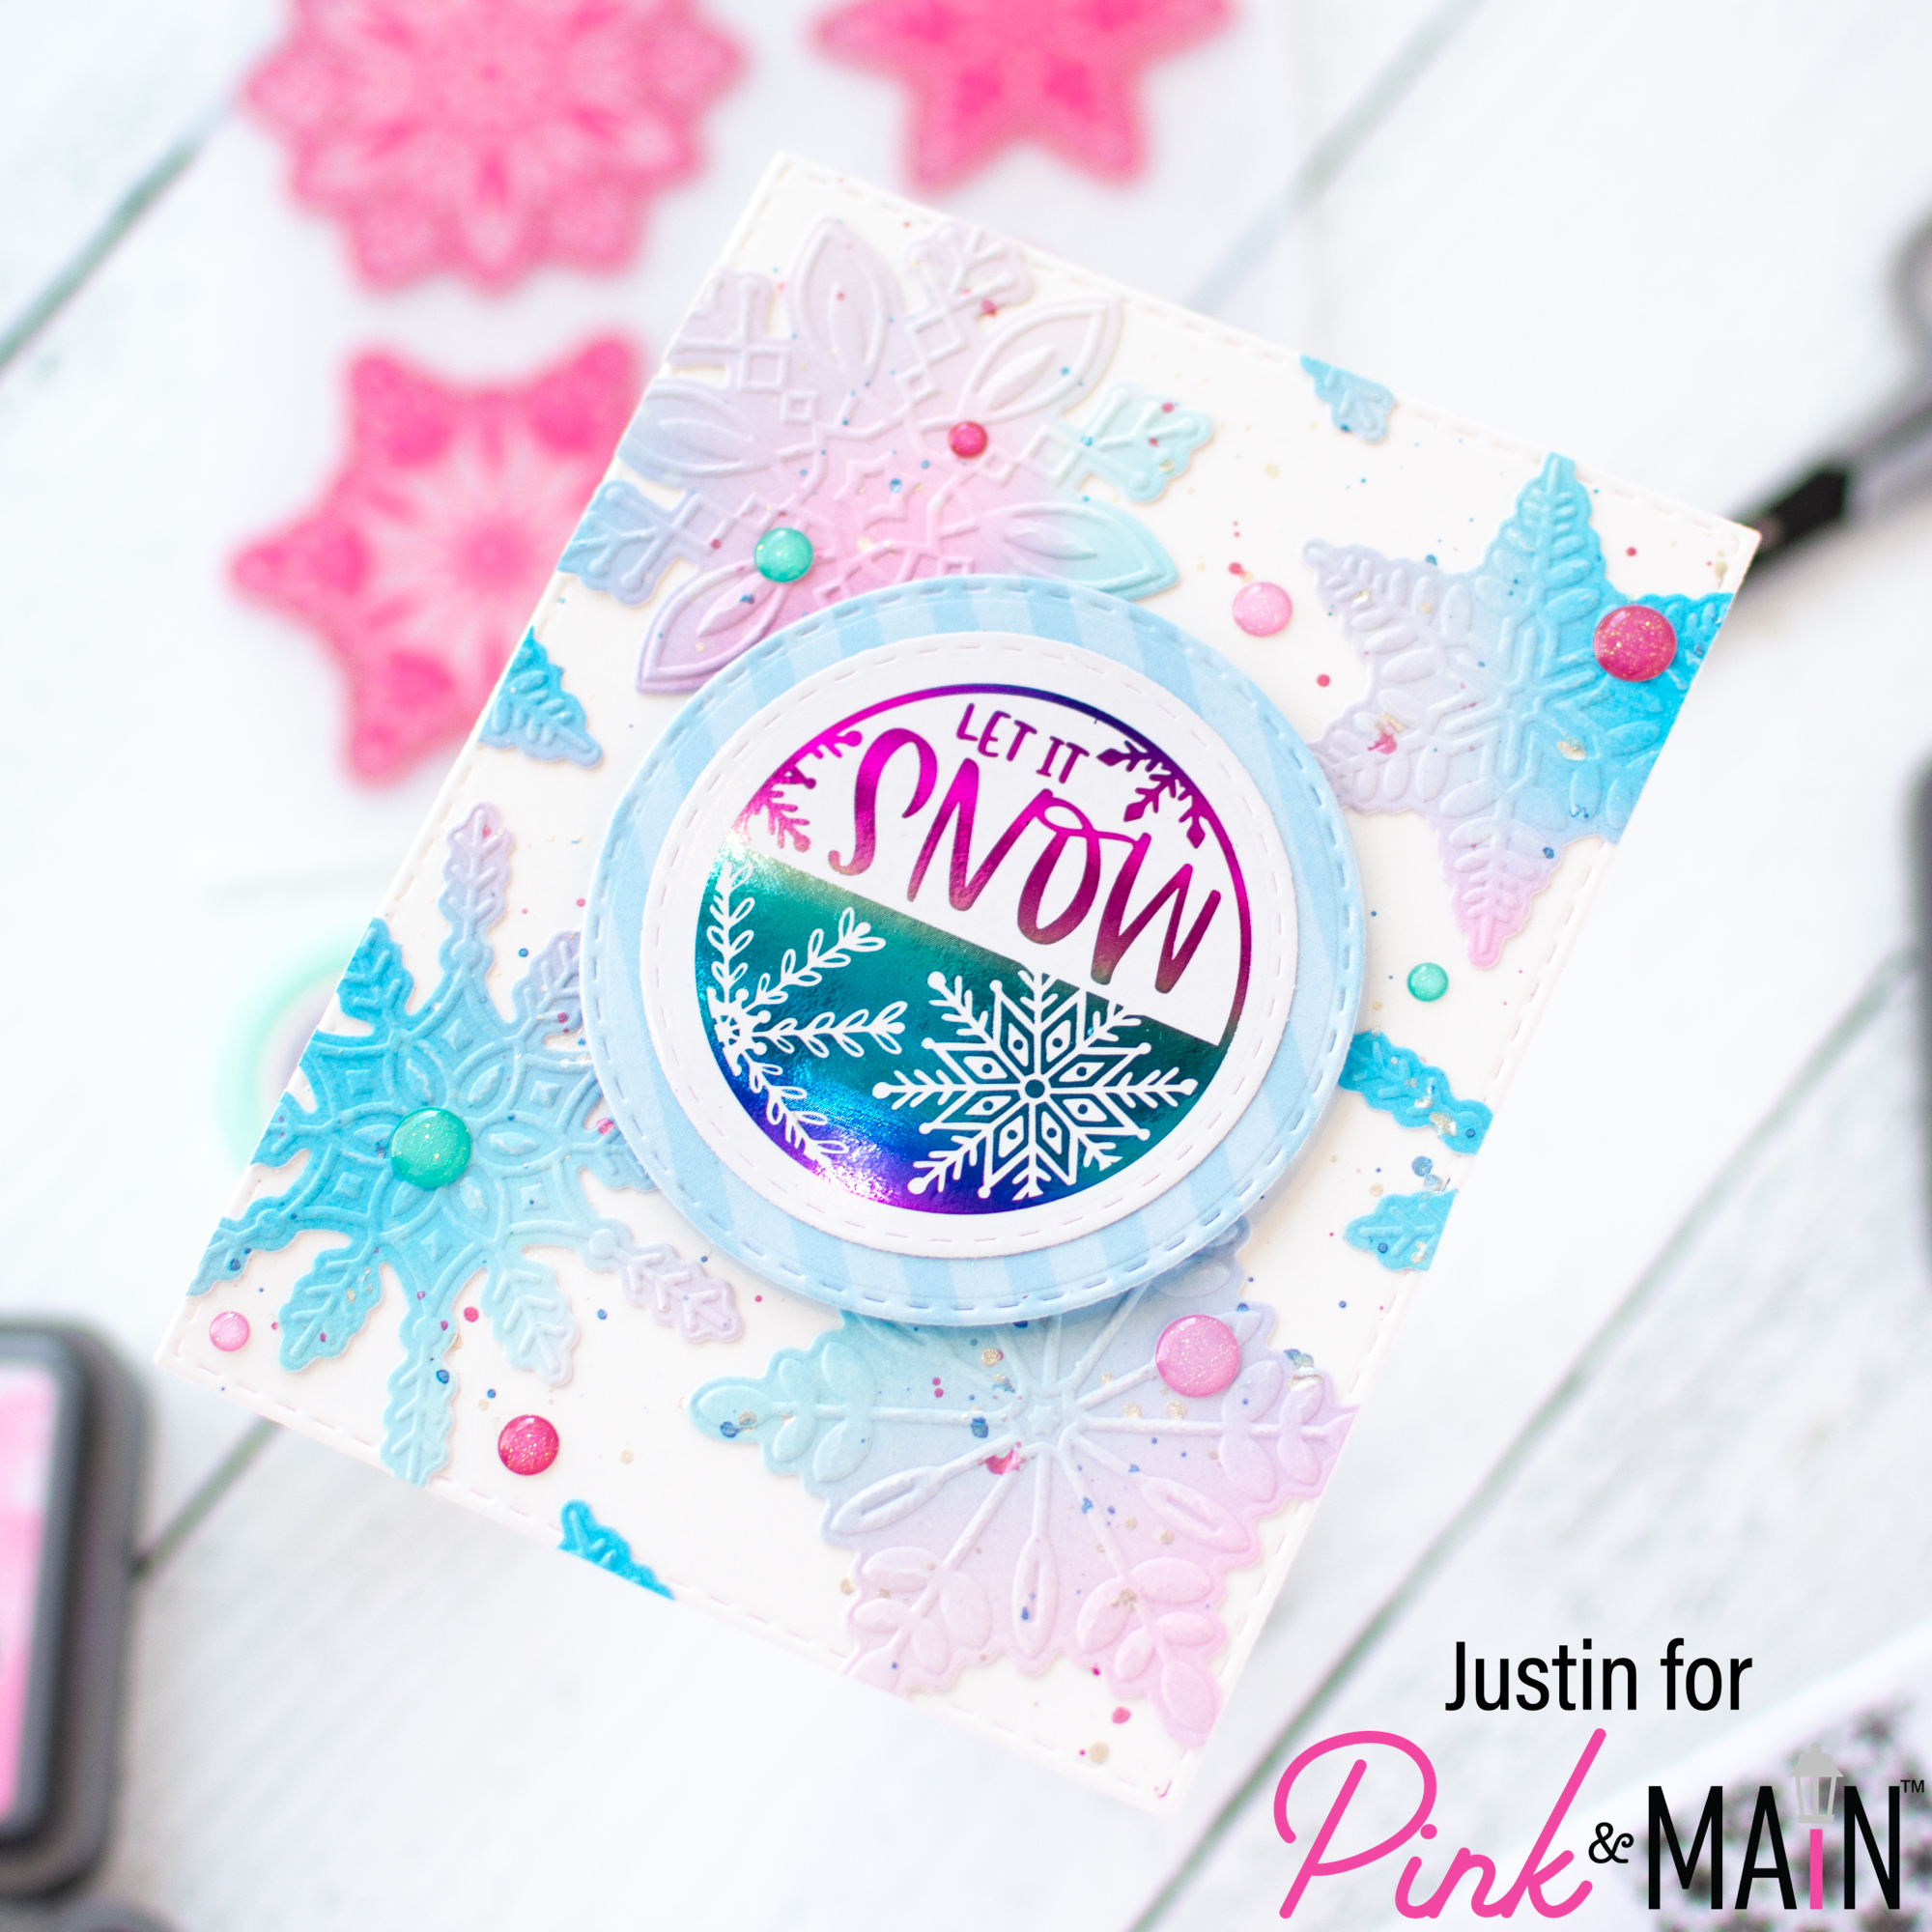
One of my absolute favorite ways to use the shapes from the Cut & Emboss Folders is to create a background with them! I took a 6″ x 6″ piece of blending cardstock and blended a mix of Kitsch Flamingo, Salvaged Patina & Salty Ocean Distress Oxide Inks, and then cut them out with the Snowflakes Cut & Emboss Folder.
I arranged the Snowflakes to a panel of white cardstock, cut with the largest die in the Stitched Rectangles Set 1 Die Set, and adhered them in place. I trimmed the excess of the the snowflakes off the edges, and then used the little bits to fill in some gaps elsewhere on the card. I splattered the whole panel with silver, pink and blue metallic watercolor, and let it dry.
I used the Let It Snow Foilable Kit and used the Mini Minc Machine to foil it with the Pink – Teal Ombré CheerFoil. I die cut the sentiment with one of the Stitched Circle Rectangle Dies, and then matted it with a slightly larger stitched circle die cut from the Every Occasions Stripes and Dots paper pad.
I adhered my sentiment unit with foam tape to the center of my card, applied some Crafty Friends Glitter Enamel Dots, and adhered my entire panel to an A2-sized card base! My wintery card was finished!
Thank you so much for stopping by the blog today! I hope this card leaves you with all the inspiration and NONE of the winter blues that snowflakes can bring!
Don’t forget that for more crafty inspiration, you can follow me on Instagram, subscribe to my channel on YouTube, and check out my personal blog as well!
Thanks again for stopping by!
Justin
Be sure to follow me on Instagram at @justanotebyjustin and subscribe to my YouTube Channel for even more crafting inspiration!
Note: This blog does use affiliate links when possible. Please know that I only recommend products that I love and think you’ll love too!
Did you know that I have written a special blog post that I rank all of the current Distress Oxide colors?
Check it out if you haven’t yet! I have had a lot of great response from people who have used this list to start their Distress Oxide Journey!
Leave a Reply