

Before we jump into today’s project, I wanted to let you know that I sometimes use affiliate links to share my favorite products. Don’t worry, these links won’t cost you a dime – they’re just little crafty helpers behind the scenes that help support me if you use them to make a purchase! Let’s dive into today’s creative journey together!
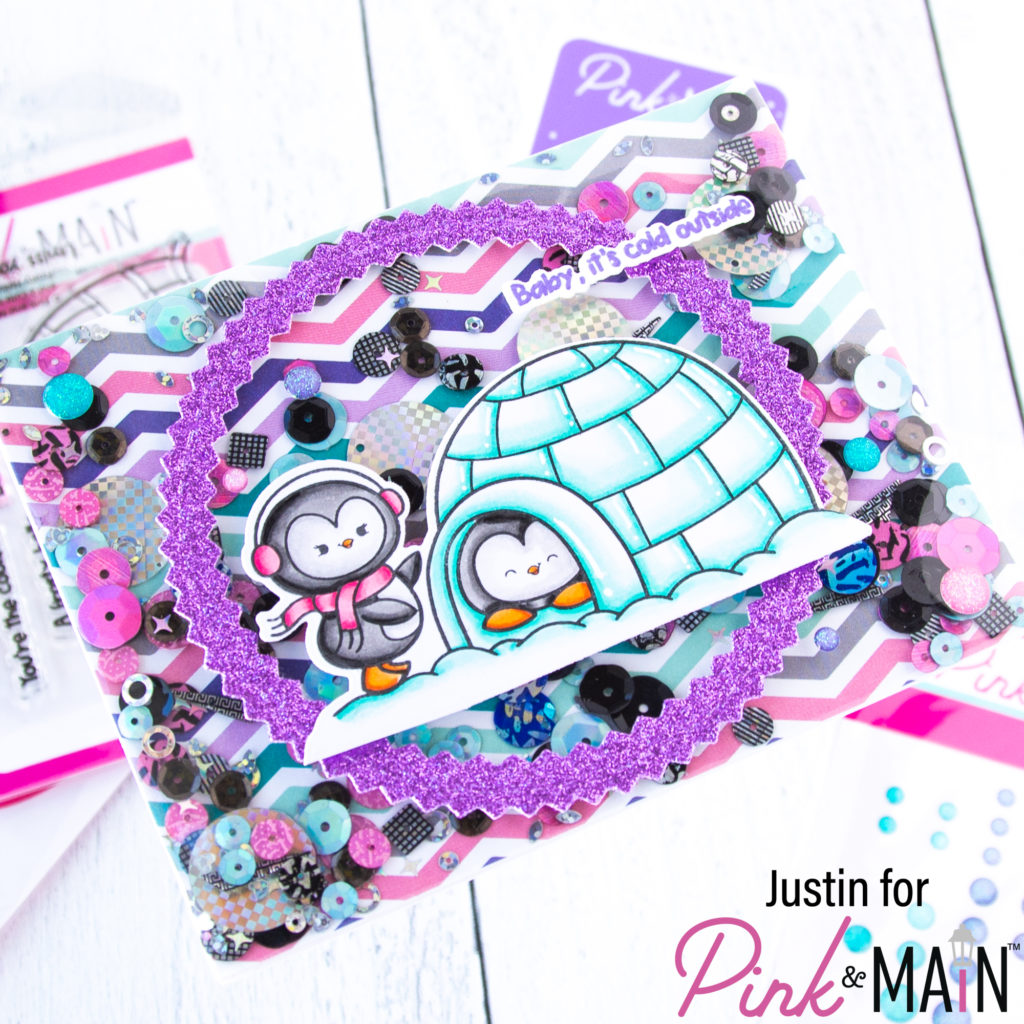
Hello everyone! Today I am sharing a colorful shaker card creation that I made using the new Frosty Hello Stamp Set by Pink & Main! I just love this cute little 3″ x 4″ stamp set with these igloo penguins!
Below is a list of products that I used to create this card!
Pink & Main Products Used:
Frosty Hello Stamp Set
Frosty Hello Coordinating Dies
Zig Zag Circle Dies
Summer Glitter Paper
Night Sky Premium Dye Ink Pad
Snow Day Glitter Enamel Dots
Winter Wonderland Paper Pad (Retired)
Other Products Used:
Copic Markers
Acetate
Shaker Bits
Double Sided Tape
Now let’s get into the details of how I put this card together!
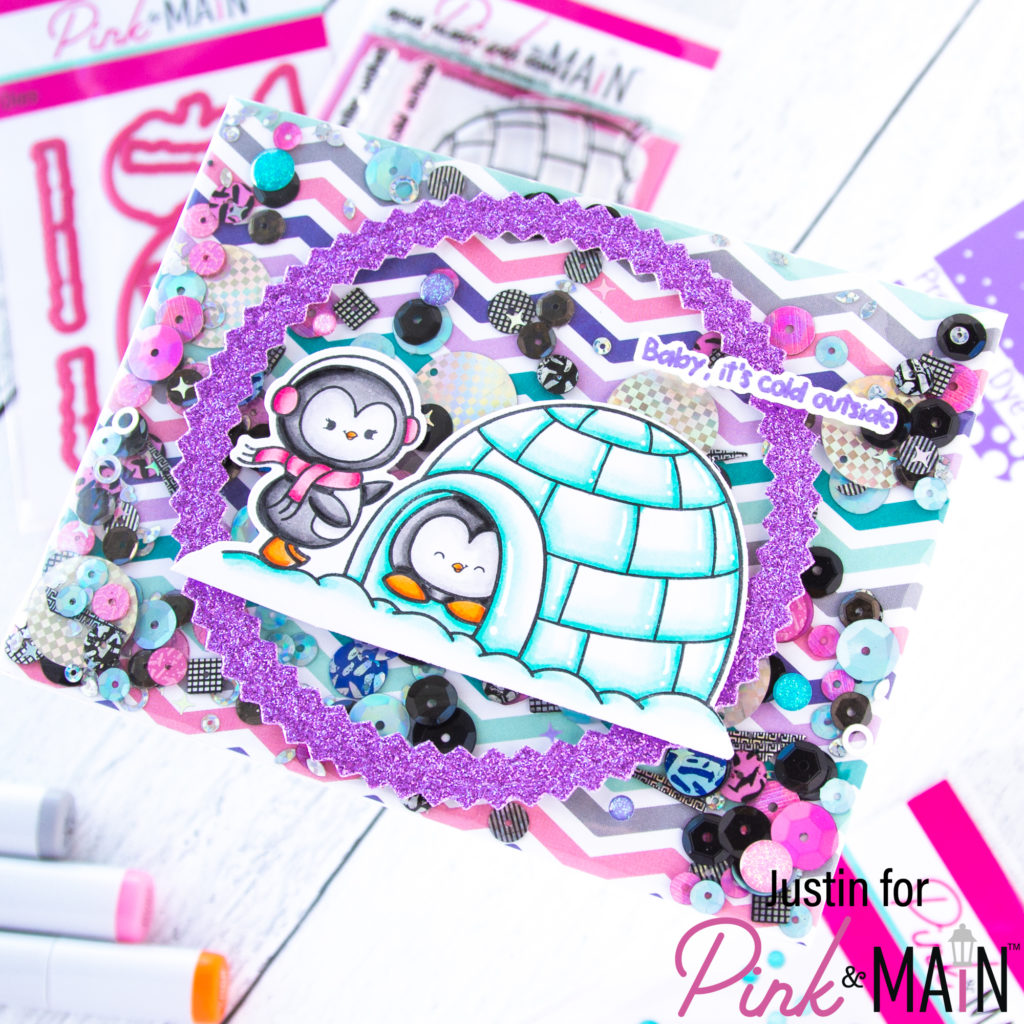
To start this card, I colored up my image from the Frosty Hello Stamp Set with my Copic Markers and used the Coordinating Dies to cut the images out. I set the image aside for later. I also stamped out my sentiment in Night Sky Ink on to white paper, used the coordinating dies to cut the sentiment out, and saved that as well.
Using the Summer Glitter Paper Pack and the Zig Zag Circle Dies, I die cut a large glittery purple zig zag circle frame. I set this aside for later as well.
I took a piece of patterned paper from the Winter Wonderland Paper Pack and trimmed it down to 4.25″ x 5.5″. Next, using acetate from stamp packaging, I cut a piece of acetate down to about 4.75″ x 6″. I lined the back of my patterned paper panel with double sided tape on each side. I placed the acetate on top of the front of the panel, and cut diagonal slits in each of the corners to assist with folding. I removed 3 of the backs of the double sided tapes, folded the acetate over to the backside of the panel, and then carefully trimmed off any overhanging bit.
Before sealing the 4th side, I poured in my shaker elements, and then removed the backing on the tape and sealed that 4th side, trimming any excess acetate. I then used the double sided tape once again on the back of the shaker panel to adhere it to an A2-sized card base.
I adhered the glittery purple zig zag circle to my panel using liquid adhesive, and then adhered my image and sentiment using foam tape. I finished off my card by placing a couple Snow Day Glitter Enamel Dots. My card was done!
Thank you so very much for stopping by and checking out my card! I hope these cute penguins inspire your next wintery creation!
Thank you again for stopping by!
Justin
Be sure to follow me on Instagram at @justanotebyjustin and subscribe to my YouTube Channel for all my crafting projects!
Note: This blog does use affiliate links when possible. Please know that I only recommend products that I love and think you’ll love too!
Leave a Reply