

This post uses affiliate links to products I love at no additional cost to you! By clicking the links in this post, I earn a small commission should you make a purchase. Thank you in advance!
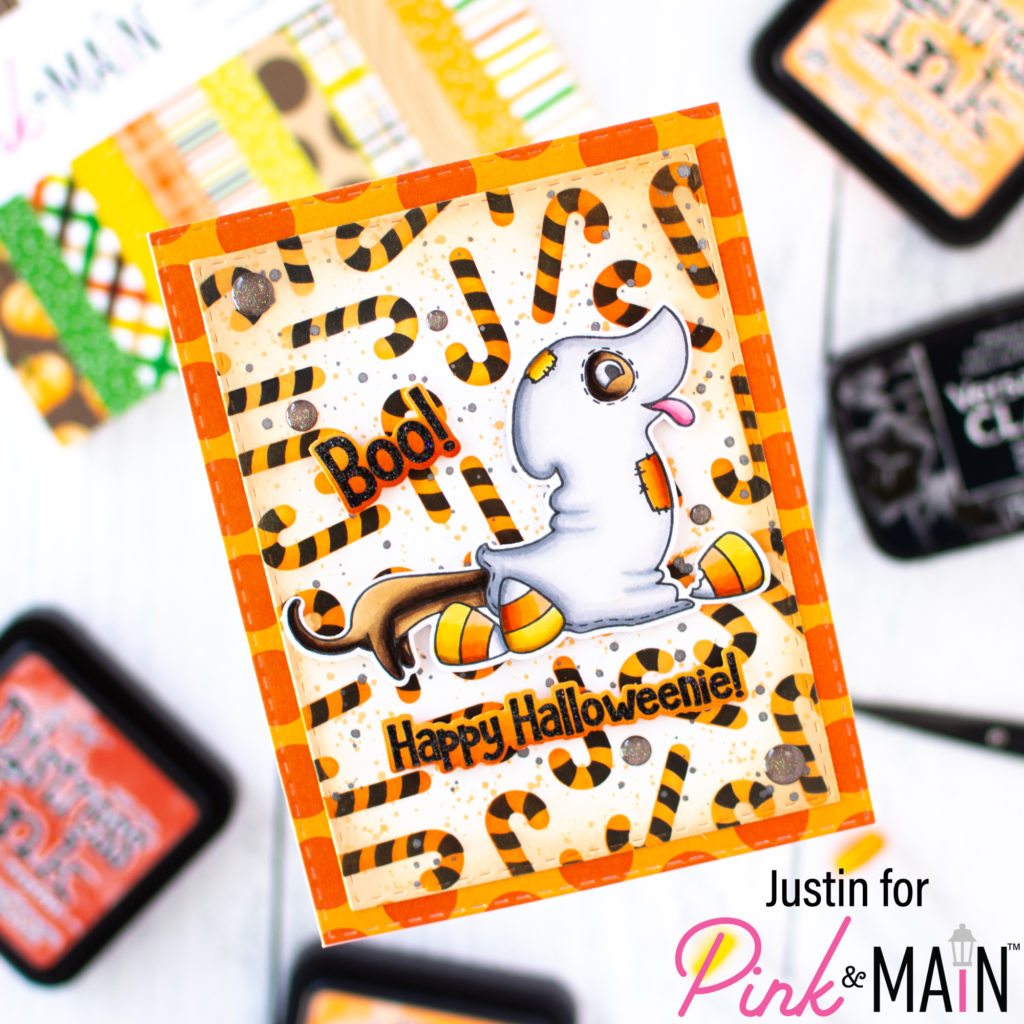
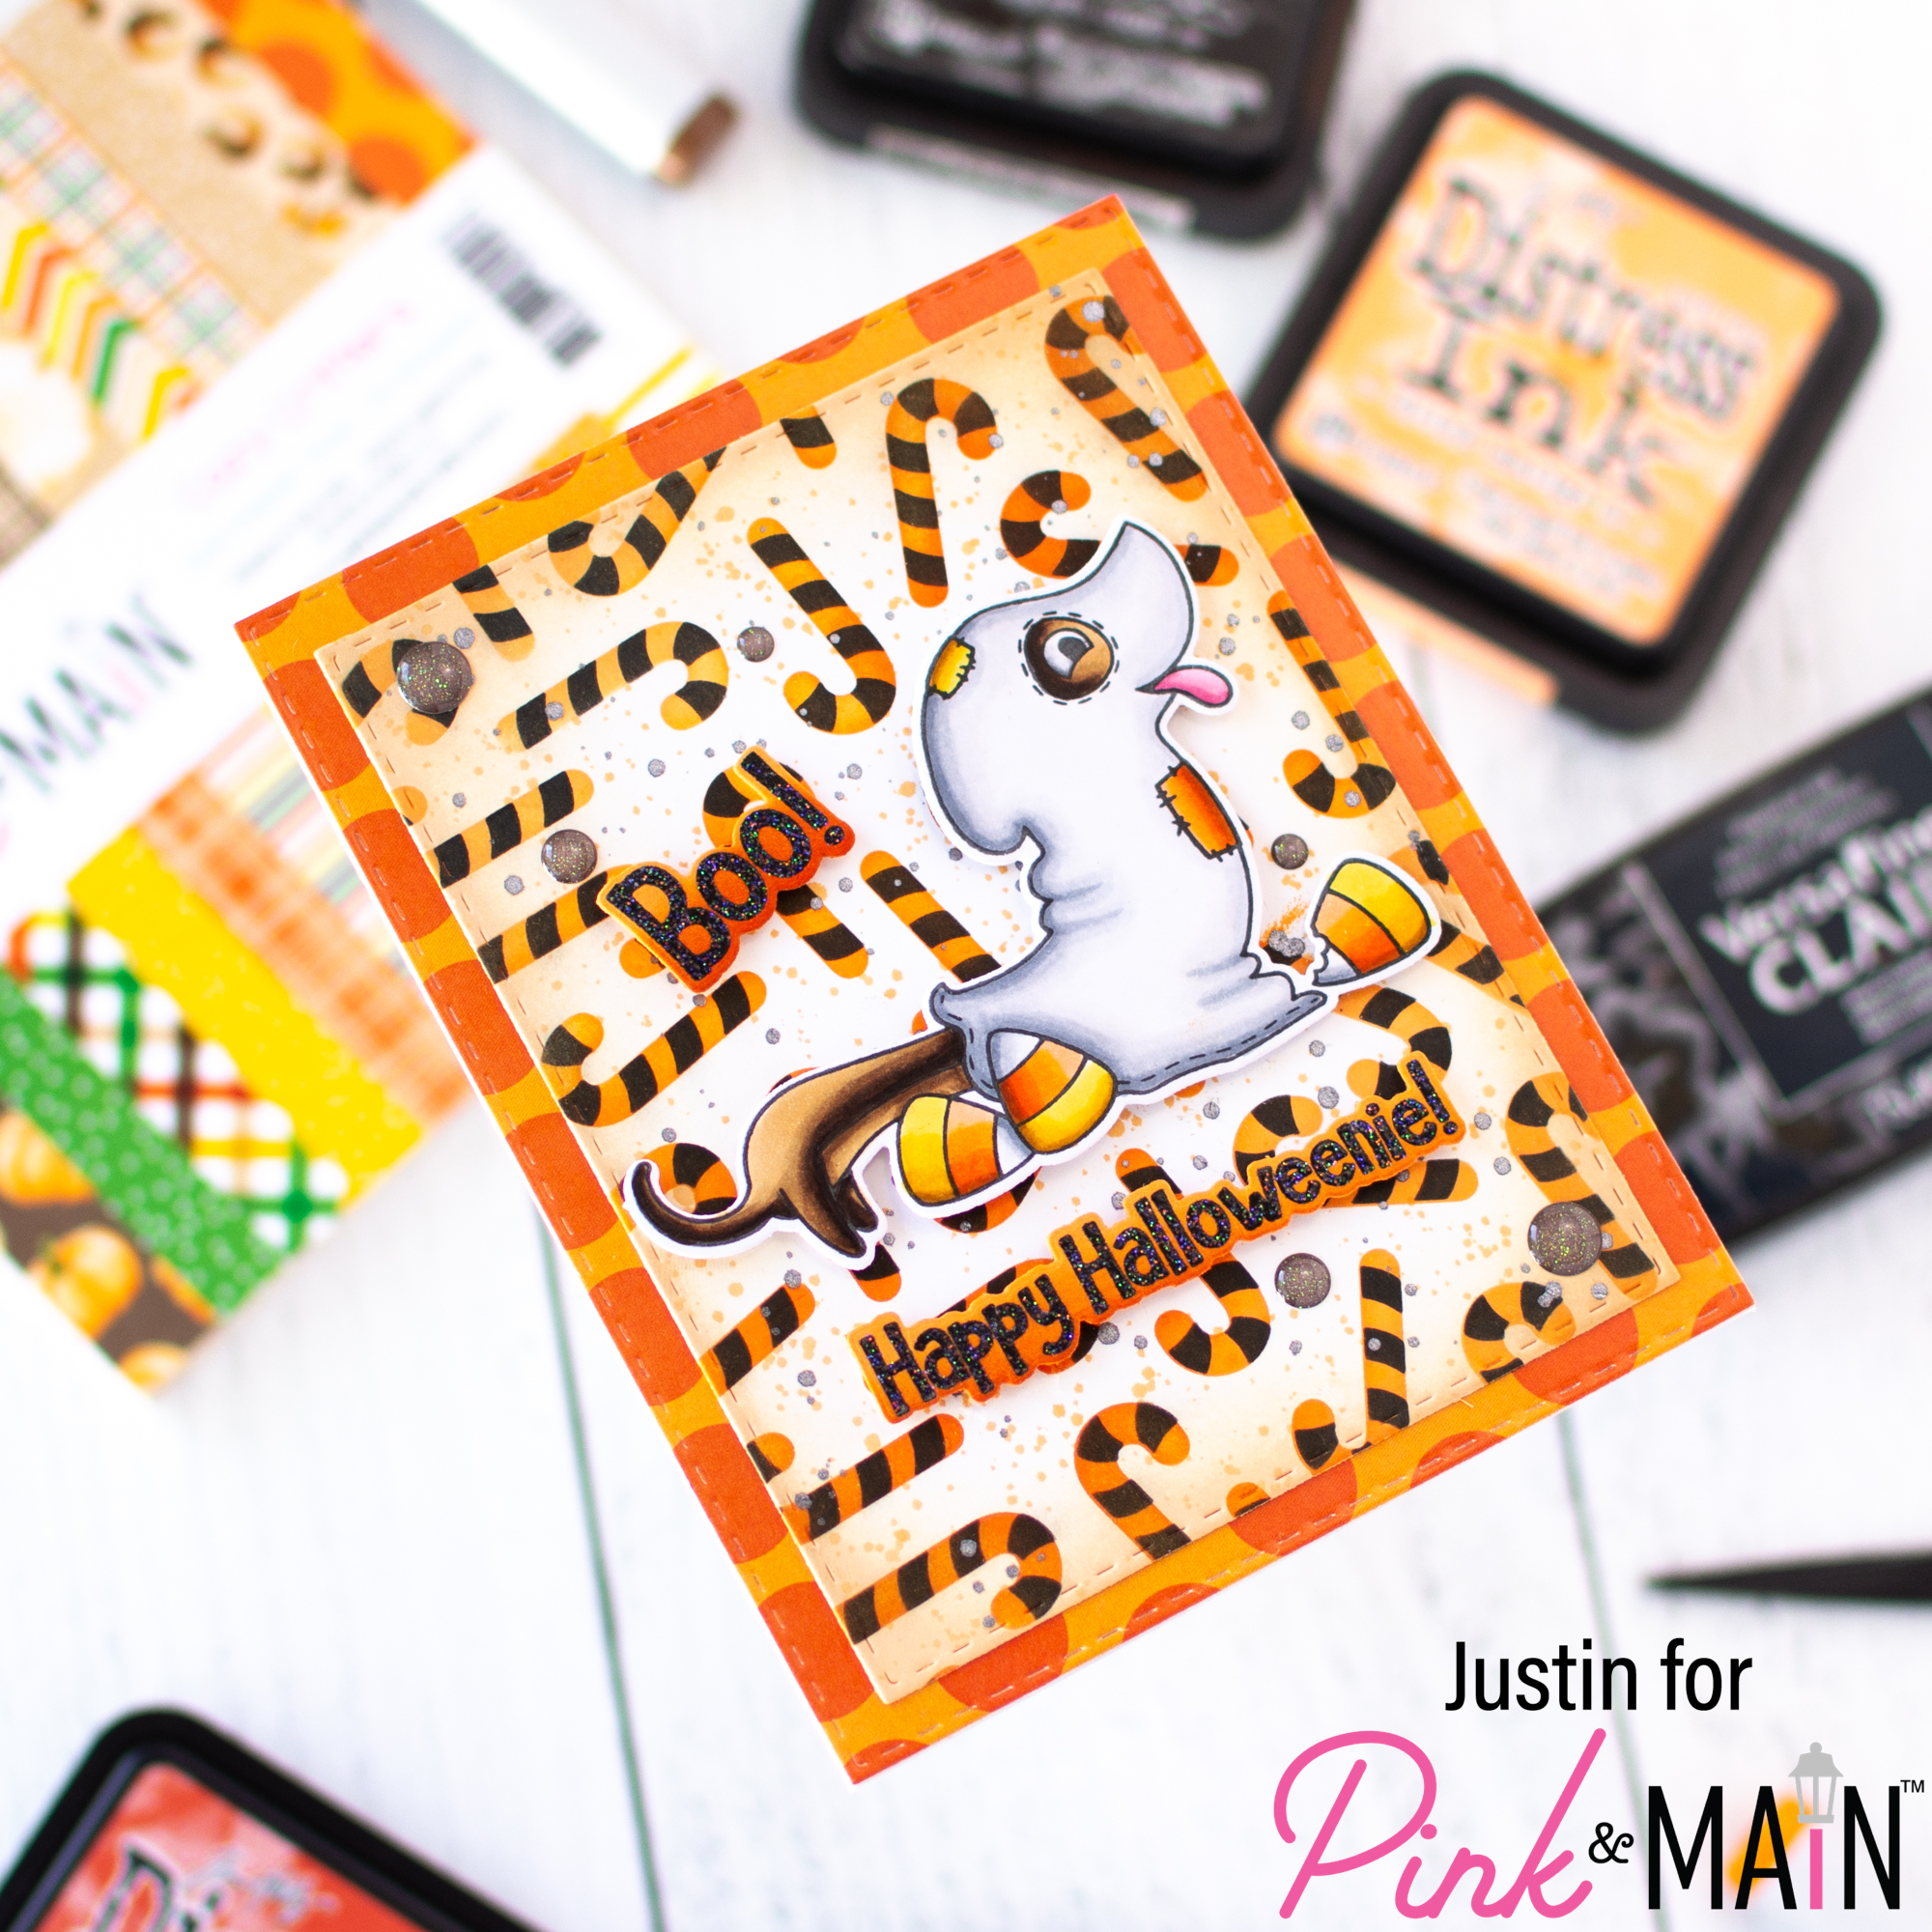
Hello friends! Today, I am sharing a project that I created using products from the September release, including the September Pup that is still free with your purchase of $50+ until this upcoming Friday, September 29th, 2023 (or until supplies last, whichever comes first)! I thought it would be fun to use the new Layered Candy Cane stencils with a Halloween Twist, too!
Below is a list of products that I used to create this card:
Pink & Main products Used:
September Pup Stamp Set
September Pup Coordinating Dies
Layered Candy Cane Stencil
Stitched Rectangles Set 1 Dies
Cozy Critter Paper Pad
Construction Cardstock
Icicle Embossing Powder
Fall Fun Glitter Enamel Dots
Foam Tape
EZ Squeeze Adhesive
Other Key Products Used:
Copic Markers
Distress Inks: Dried Marigold, Carved Pumpkin, Crackling Campfire & Black Soot
Nocturne Versafine Clair Ink
Prima Metallic Watercolor Accents
Now let’s get into all the tricks and treats that went into putting this card together!
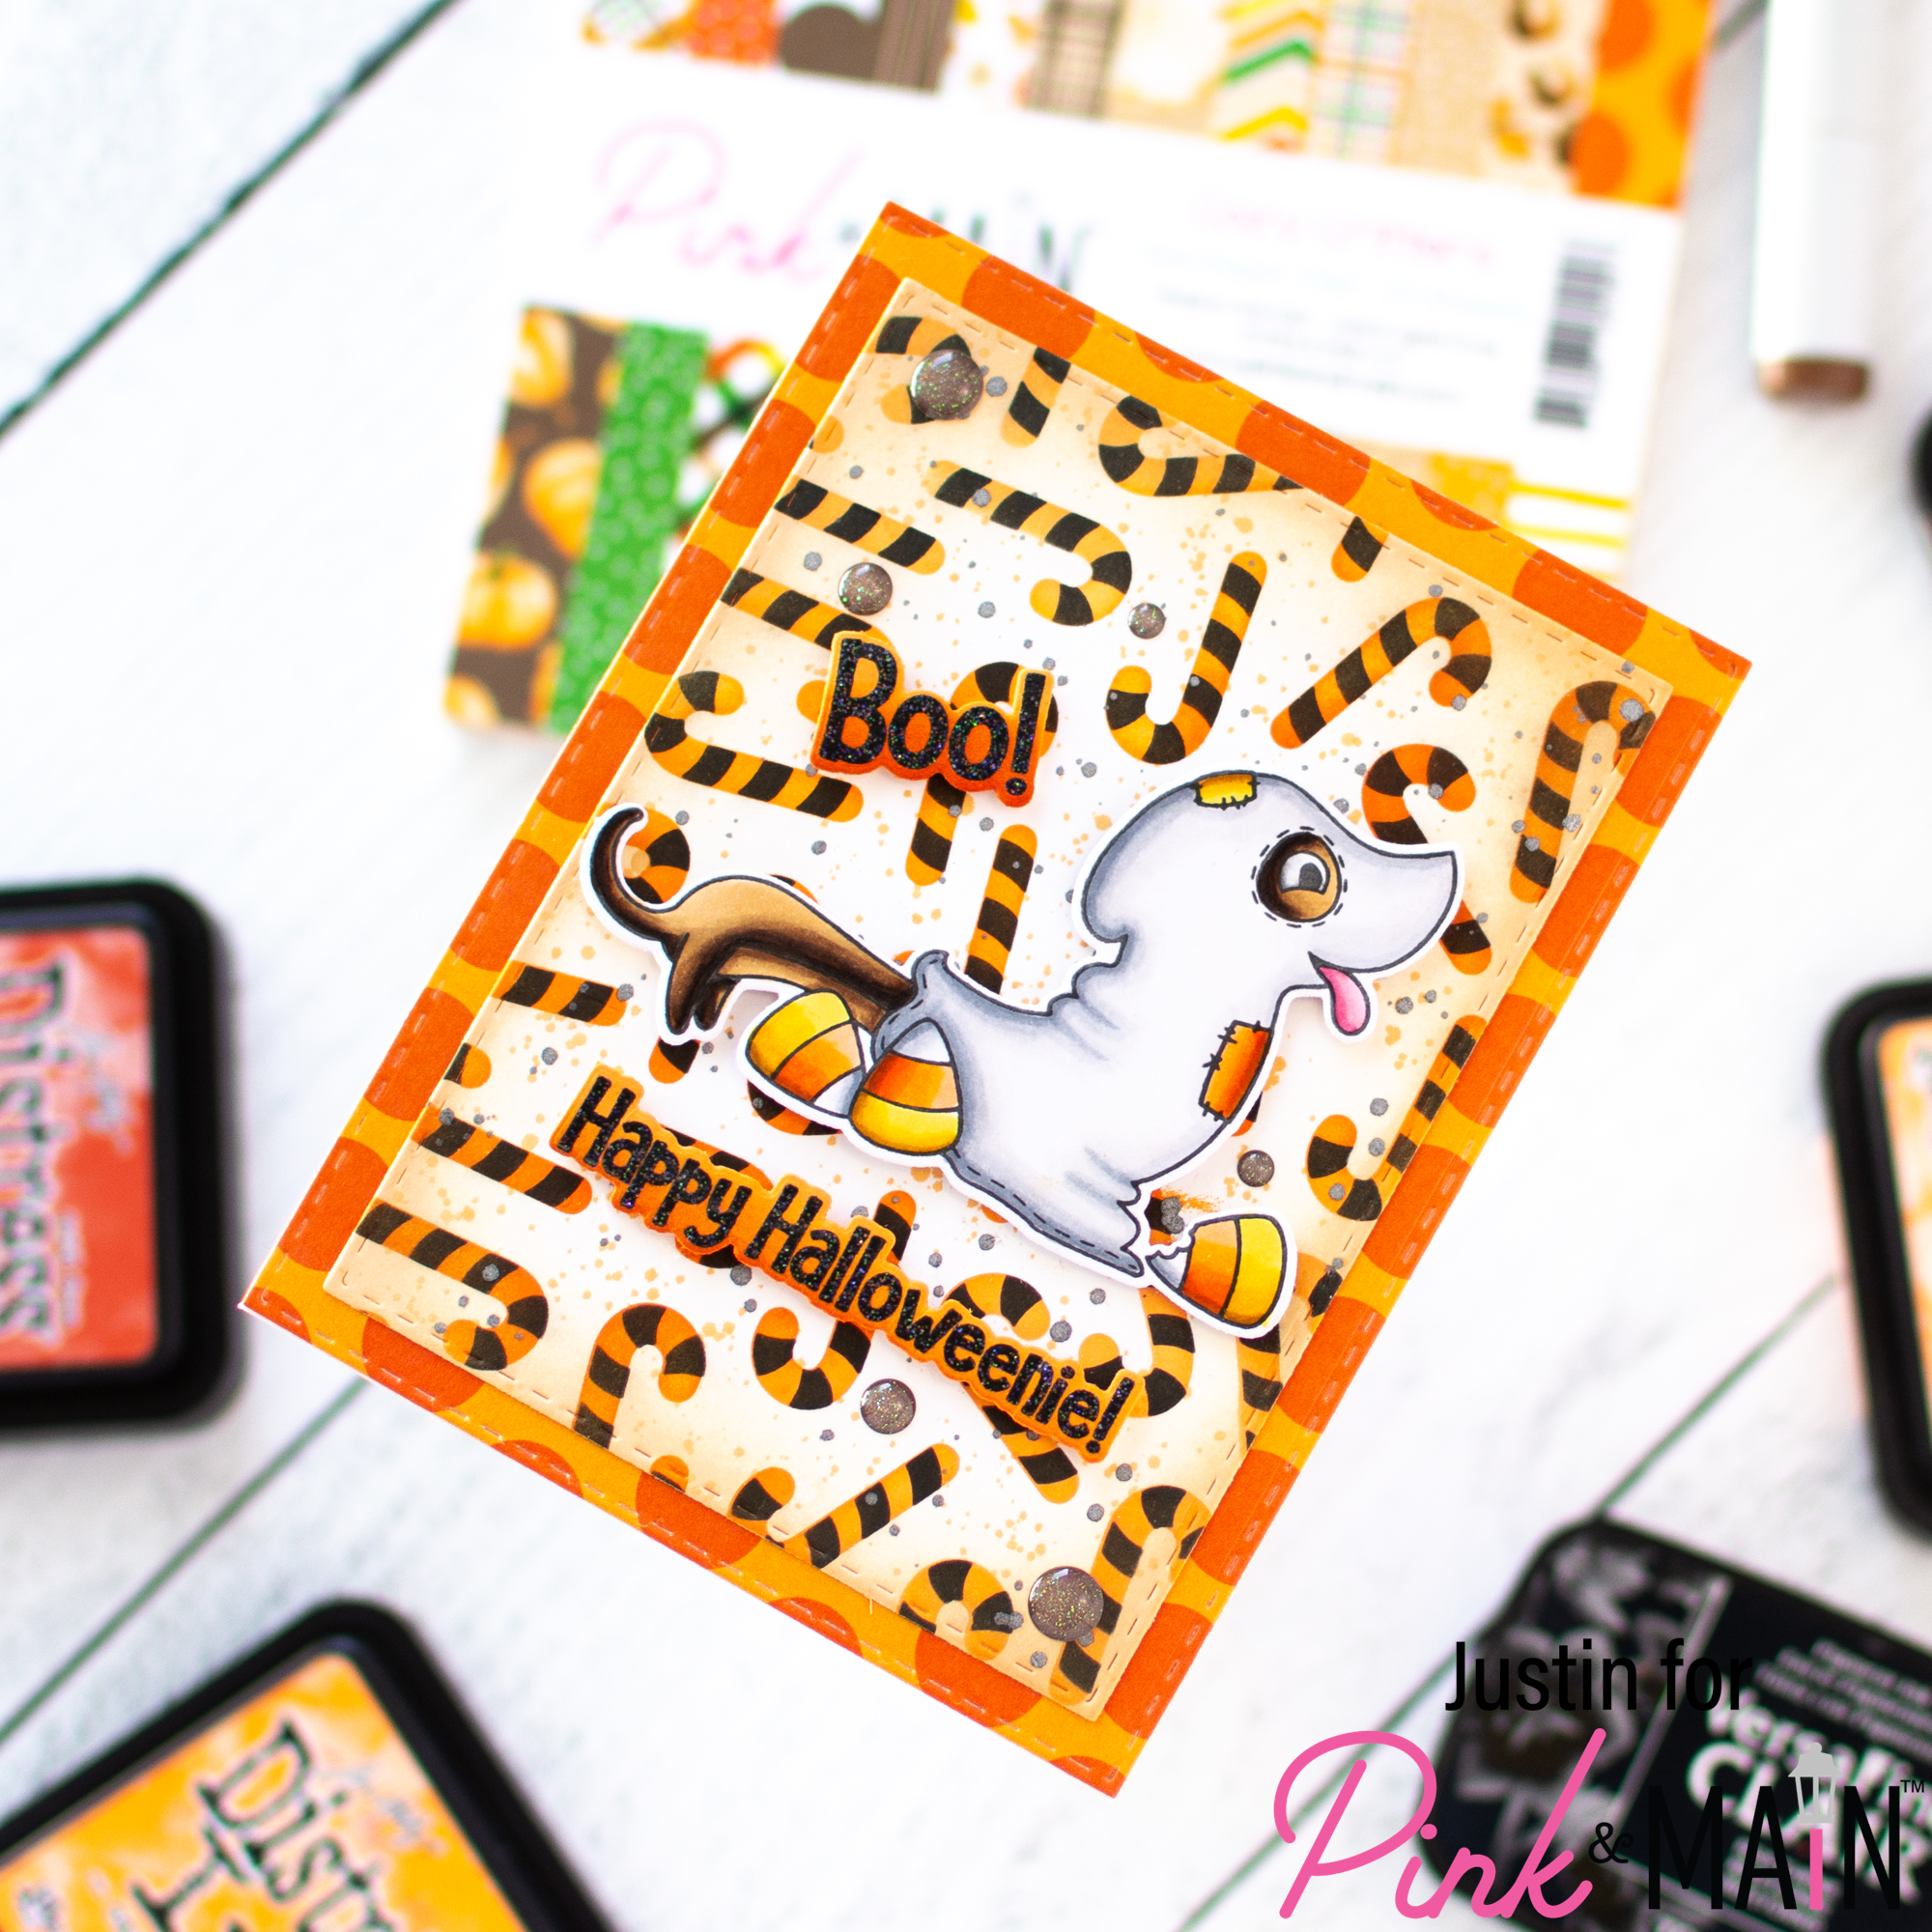
As always, I colored my September Pup image with Copic Markers first, and then used the coordinating dies to cut him out. I set him aside for later.
I took the large orange polka dot print from the Cozy Critters Paper Pad and used the largest die from the Large Stitched Rectangles Set 1 Dies to cut it out. I also set that aside for later.
Next, I took a piece of white blending cardstock and placed the full candy cane image stencil from the Layered Candy Cane Stencil set on top. I used a combination of Dried Marigold, Carved Pumpkin & Crackling Campfire Distress Inks to blend the base to the Candy Canes. I then placed the striped layer from the Layered Candy Cane Stencil set and blended Black Soot Distress Ink over to create black stripes. I die cut this layer with the 2nd largest die from the Large Stitched Rectangles Set 1 Dies, blended the edges with Dried Marigold Distress Ink, and splattered the panel with both Carved Pumpkin Distress Ink and Black Metallic Watercolor. Once dry, I used liquid adhesive to adhere this layer directly to my Orange Polka Dot Layer.
I stamped the sentiments “Boo” and “Happy Halloweenie” in Nocturne Versafine Clair Ink on Construction Cardstock, and then heat embossed the we ink with Icicle Powder. I used the coordinating dies to cut the sentiments out, and then distressed the edge of the dies with Crackling Campfire Distress Ink.
Using Foam Tape, I adhered my image and sentiments to my card. I then applied some embellishments from the Fall Fun Glitter Enamel Dots, and adhered my card to an A2-sized card base. I was completed!
Thank you so much for stopping by my blog today to check out my sneak peek of some new September Release Goodies! Don’t forget that you can still snag September Pup stamp for free with your purchase of $50+ until this upcoming Friday, September 29th, 2023!
Don’t forget that for more crafty inspiration, you can follow me on Instagram, subscribe to my channel on YouTube, and check out my personal blog as well!
Thanks again for stopping by!
Happy Crafting!
Justin
Leave a Reply