

Before we jump into today’s project, I wanted to let you know that I sometimes use affiliate links to share my favorite products. Don’t worry, these links won’t cost you a dime – they’re just little crafty helpers behind the scenes that help support me if you use them to make a purchase! Let’s dive into today’s creative journey together!
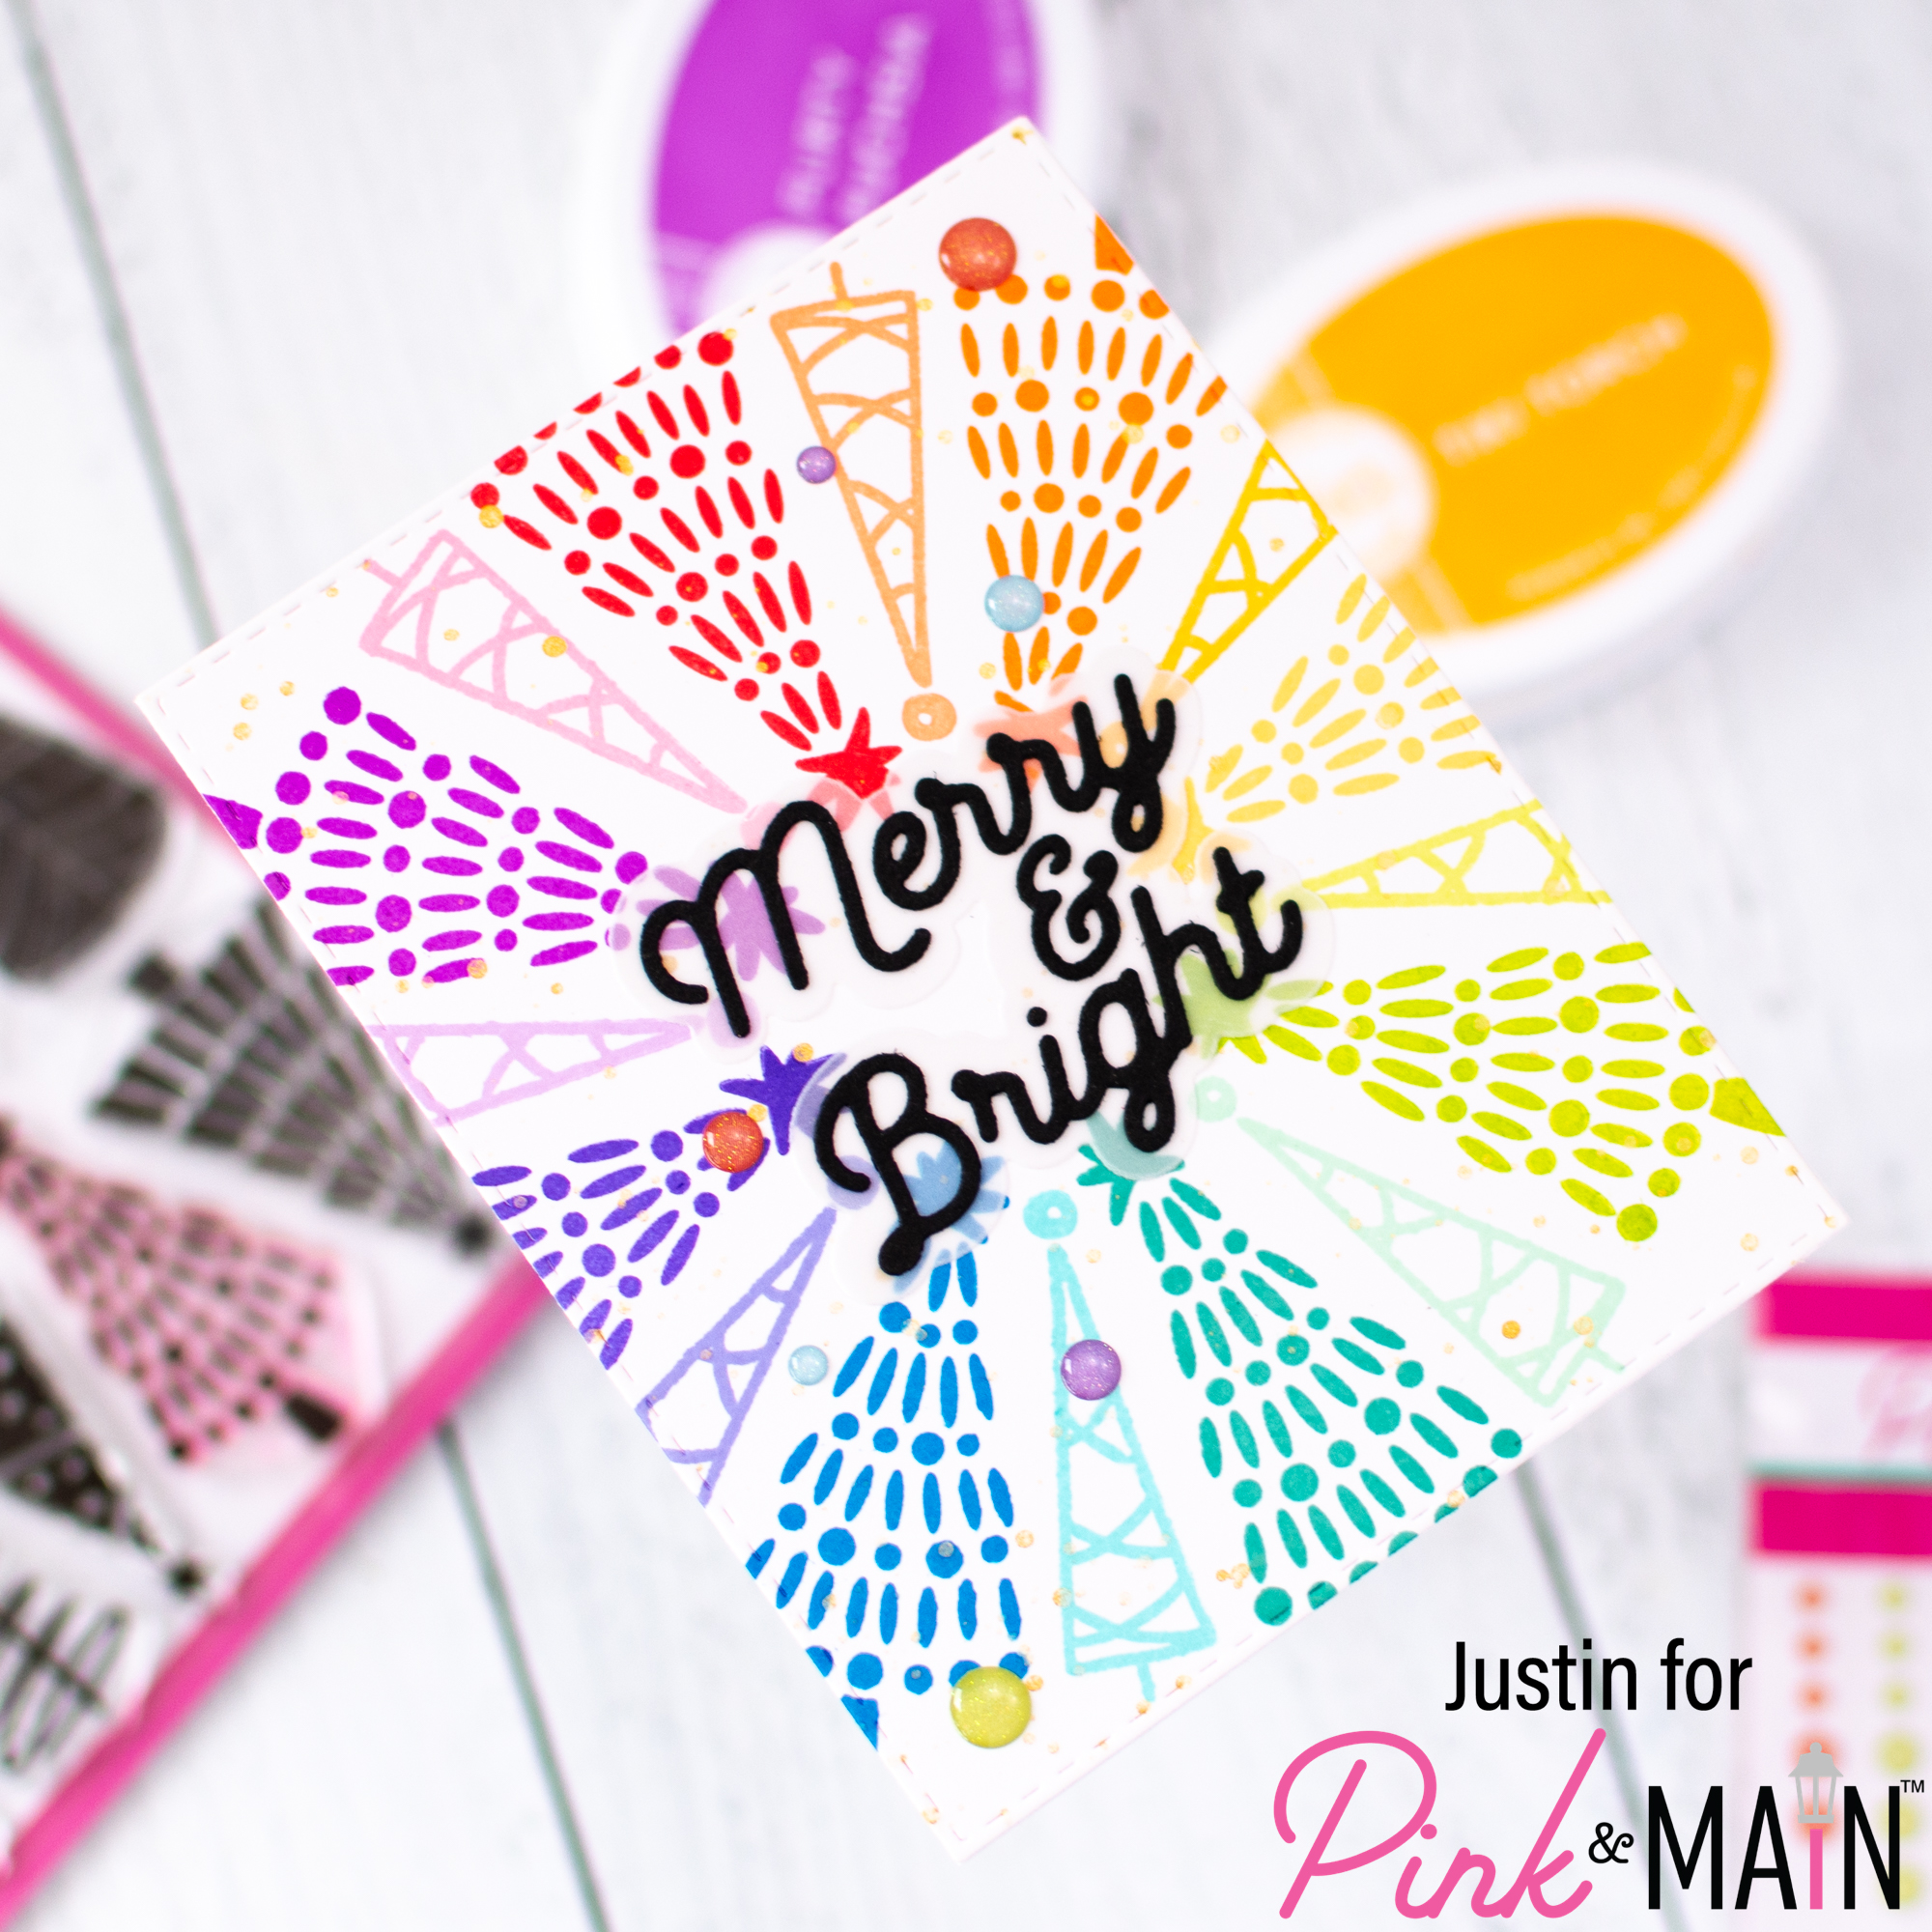
Hello, friends! Justin here, and today I am sharing a sneak peek of 2 brand new products heading your way as part of the September release! This card I created shows off the brand new O Christmas Tree Stamp Set, along with the Winter Greetings Die Set!
Below is a list of products that I used to create this card:
Pink & Main Products Used:
O Christmas Tree Stamp Set
Winter Greetings Die Set
Stitched Rectangle Dies Set 1
Fall Fun Glitter Enamel Dots
Asphalt Cardstock
Liquid Adhesive
Other Key Products Used:
Catherine Pooler Inks: It’s a Girl, Samba, Bellini, Orange Twist, Tiki Torch, Tiara, Melon Ice, Lime Rickey, Minted, Aquatini, Cummerbund, Something Borrowed, Serenade, Grape Crush, Sixteen Candles, & Flirty Fuchsia
Catherine Pooler White Cardstock
Stamp Wheel by Altenew
Prima Metallic Watercolor Accents
Let’s get into the details for how I put this card together!
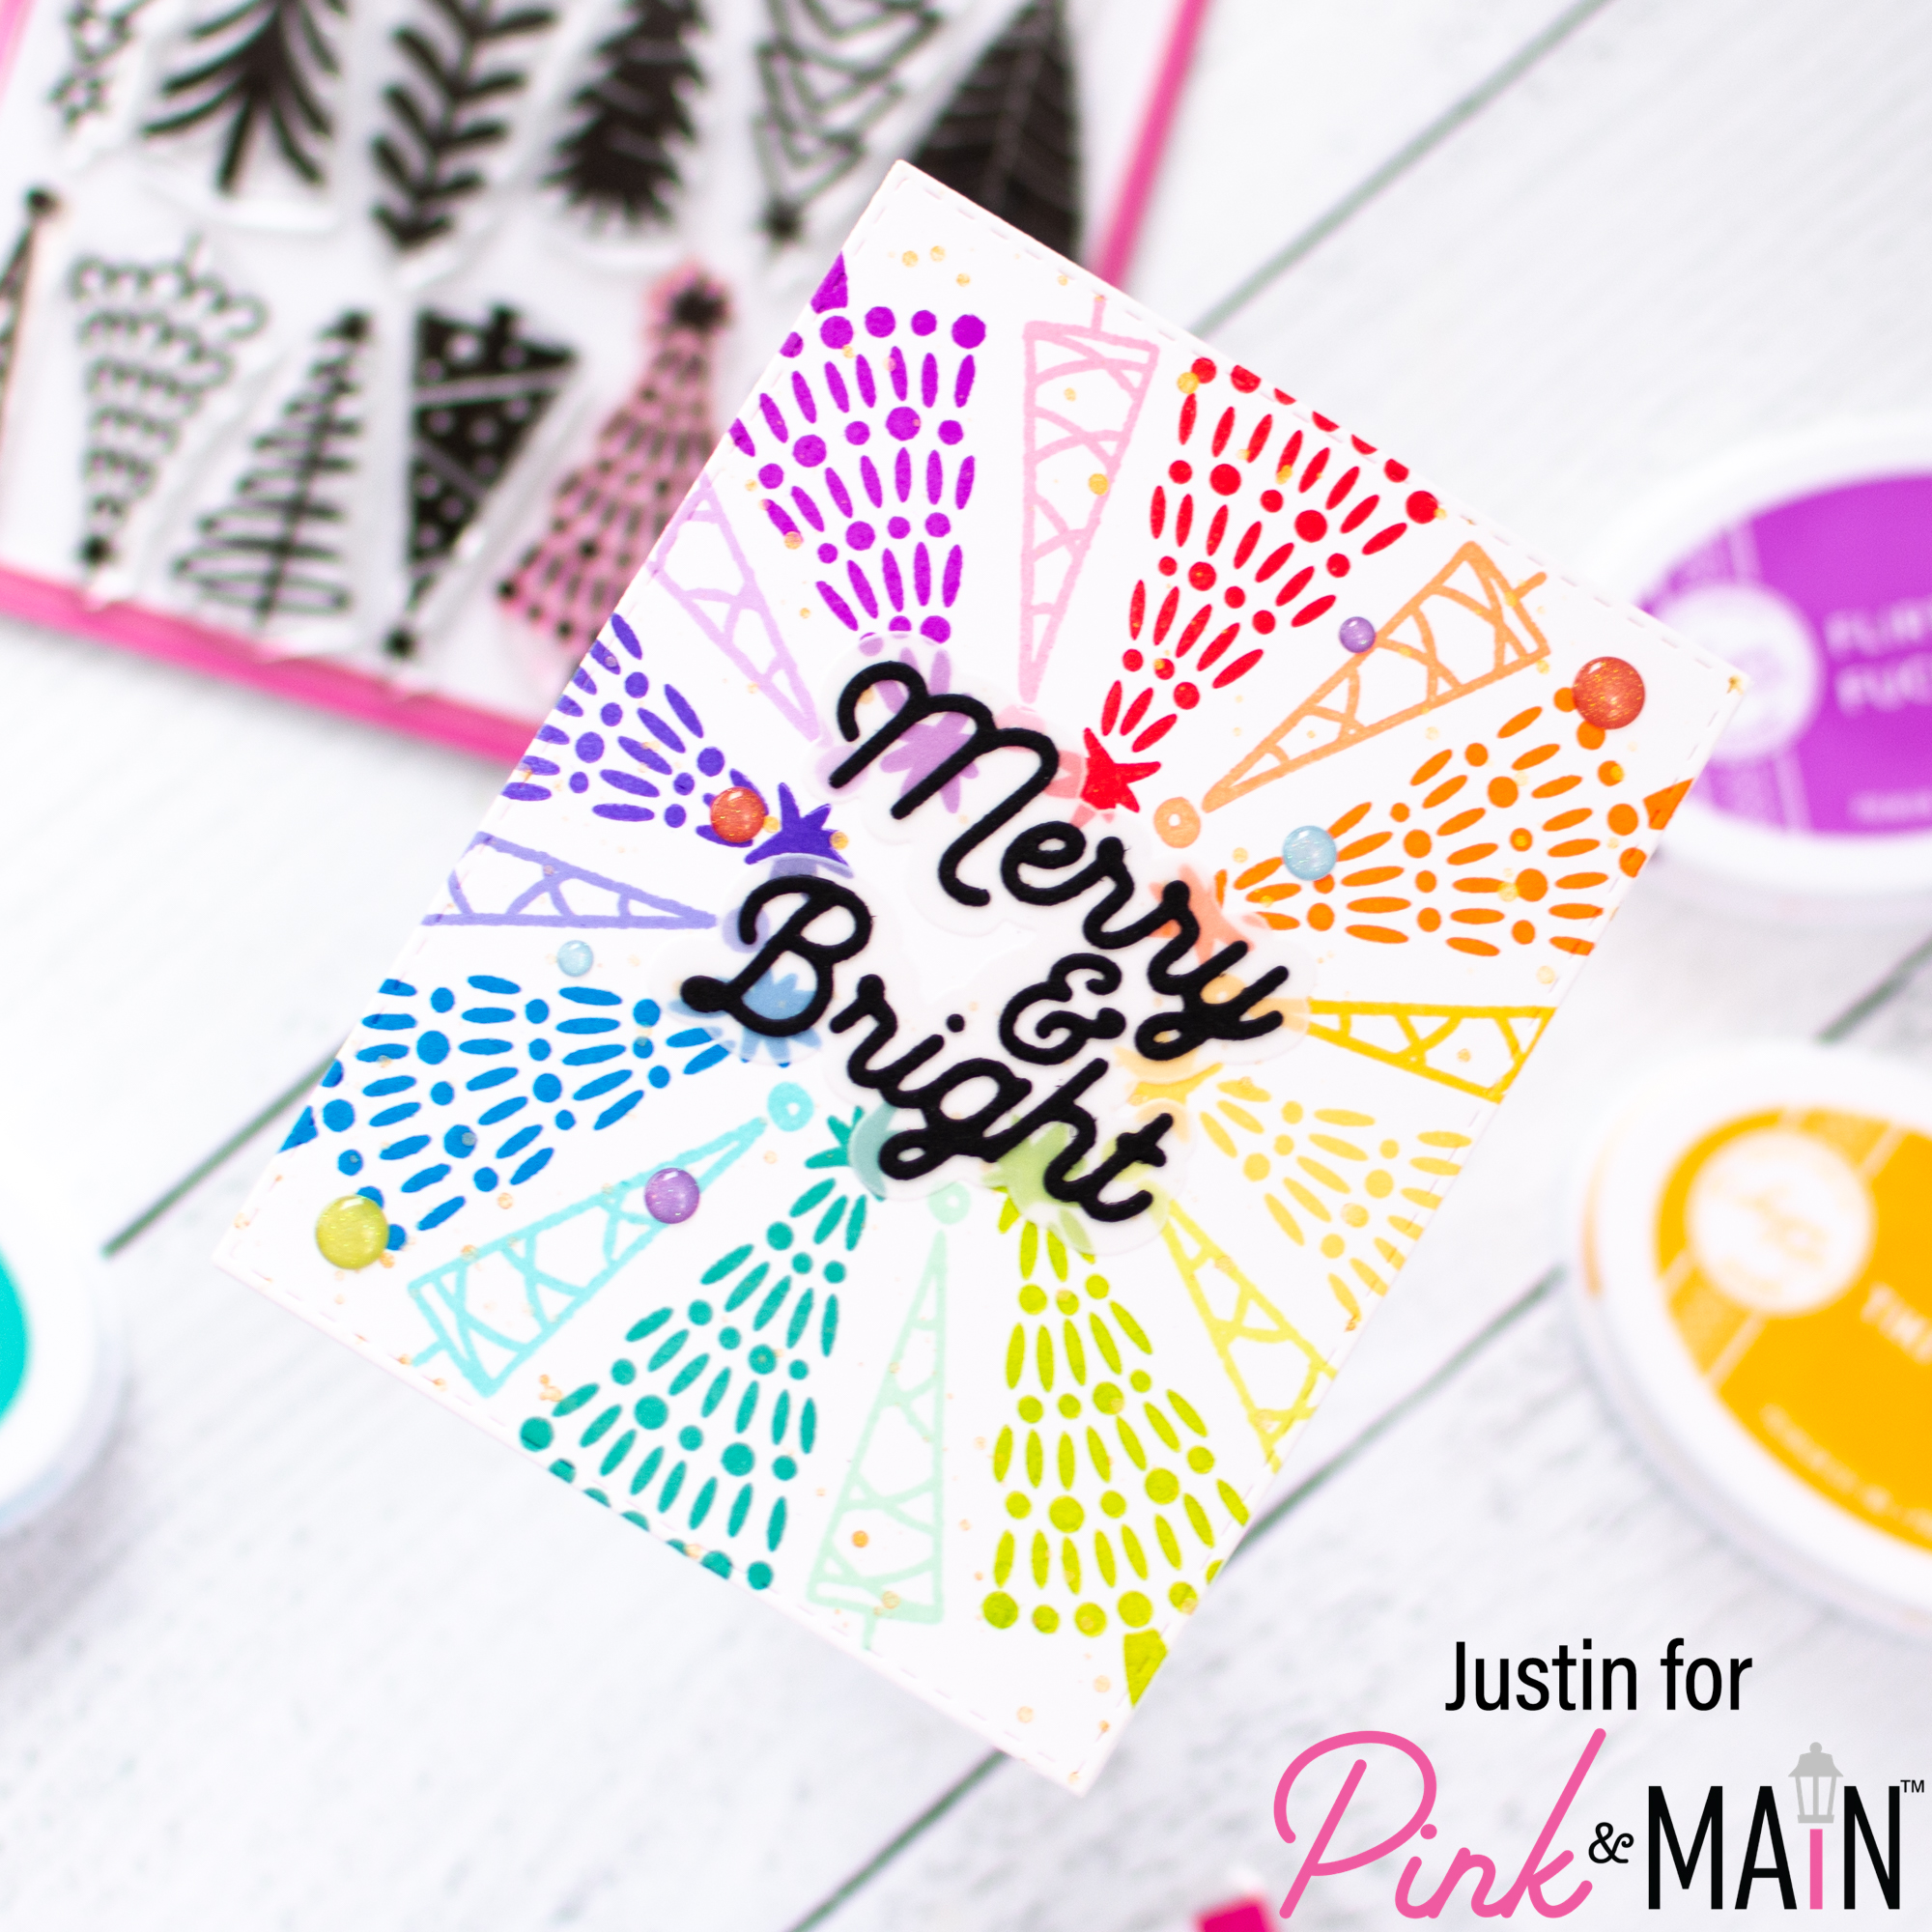
This card was a fun one to put together! First, I cut a 6″ x 6″ panel of white cardstock and placed it inside of my Stamp Wheel. Using the O Christmas Tree Stamp Set, I stamped out 8 of the larger Christmas Trees in rainbow color Catherine Pooler Inks. I then placed a smaller Christmas Tree between the larger trees and used my Stamp Wheel to stamp those out in lighter rainbow color Catherine Pooler Inks. Using the largest die from the Stitched Rectangles Set 1 Die Set, I die cut my panel out and splattered it with some gold metallic water color. I adhered this unit to an A2-sized card base.
Next, using the new Winter Greetings die set, I die cut out the sentiment “Merry & Bright” from Asphalt Cardstock, and the outline from vellum. Using liquid adhesive, I very carefully adhered the die cut letters to my vellum, and then my vellum unit to the center of my card. Finally, I placed some Glitter Enamel Dots on my card and it was completed!
Thank you so much for stopping by my blog today to check out my sneak peek of some new September Release Goodies!
Don’t forget that for more crafty inspiration, you can follow me on Instagram, subscribe to my channel on YouTube, and check out my personal blog as well!
Thanks again for stopping by!
Happy Crafting!
Justin
Be sure to follow me on Instagram at @justanotebyjustin and subscribe to my YouTube Channel for even more crafting inspiration!
Note: This blog does use affiliate links when possible. Please know that I only recommend products that I love and think you’ll love too!
Did you know that I have written a special blog post that I rank all of the current Distress Oxide colors?
Check it out if you haven’t yet! I have had a lot of great response from people who have used this list to start their Distress Oxide Journey!
Leave a Reply