

This post uses affiliate links at no additional cost to you! By clicking the links in this post, I earn a small commission should you make a purchase. Thank you in advance!
Happy Monday, friends! I am so excited to be sharing a sneak peek of one of the newest Stamp Sets from the Pink & Main August Release: Cocoa For You! This 6″ x 6″ stamp set comes with 4 adorable fall-themed mugs, and some sentiments that are equally as cute!
Below is a supply list of products used to create this card:
Pink & Main Products Used:
Cocoa For You Stamp Set
Cocoa For You Coordinating Dies
Micro Dots 6″ x 6″ Embossing Folder
Frosting Embossing Powder
Embossing Watermark Ink Pad
Magic Anti-Static Embossing Brush
River Walk Cardstock
Lakeside Cardstock
Pebble Cardstock
Other Key Products Used:
Copic Markers
Copic Safe Ink
Peacock Feathers Distress Oxide Ink
Vintage Photo Distress Ink
Metallic Water Color Accents
This card was super fun and easy to make! Let’s get to the details!
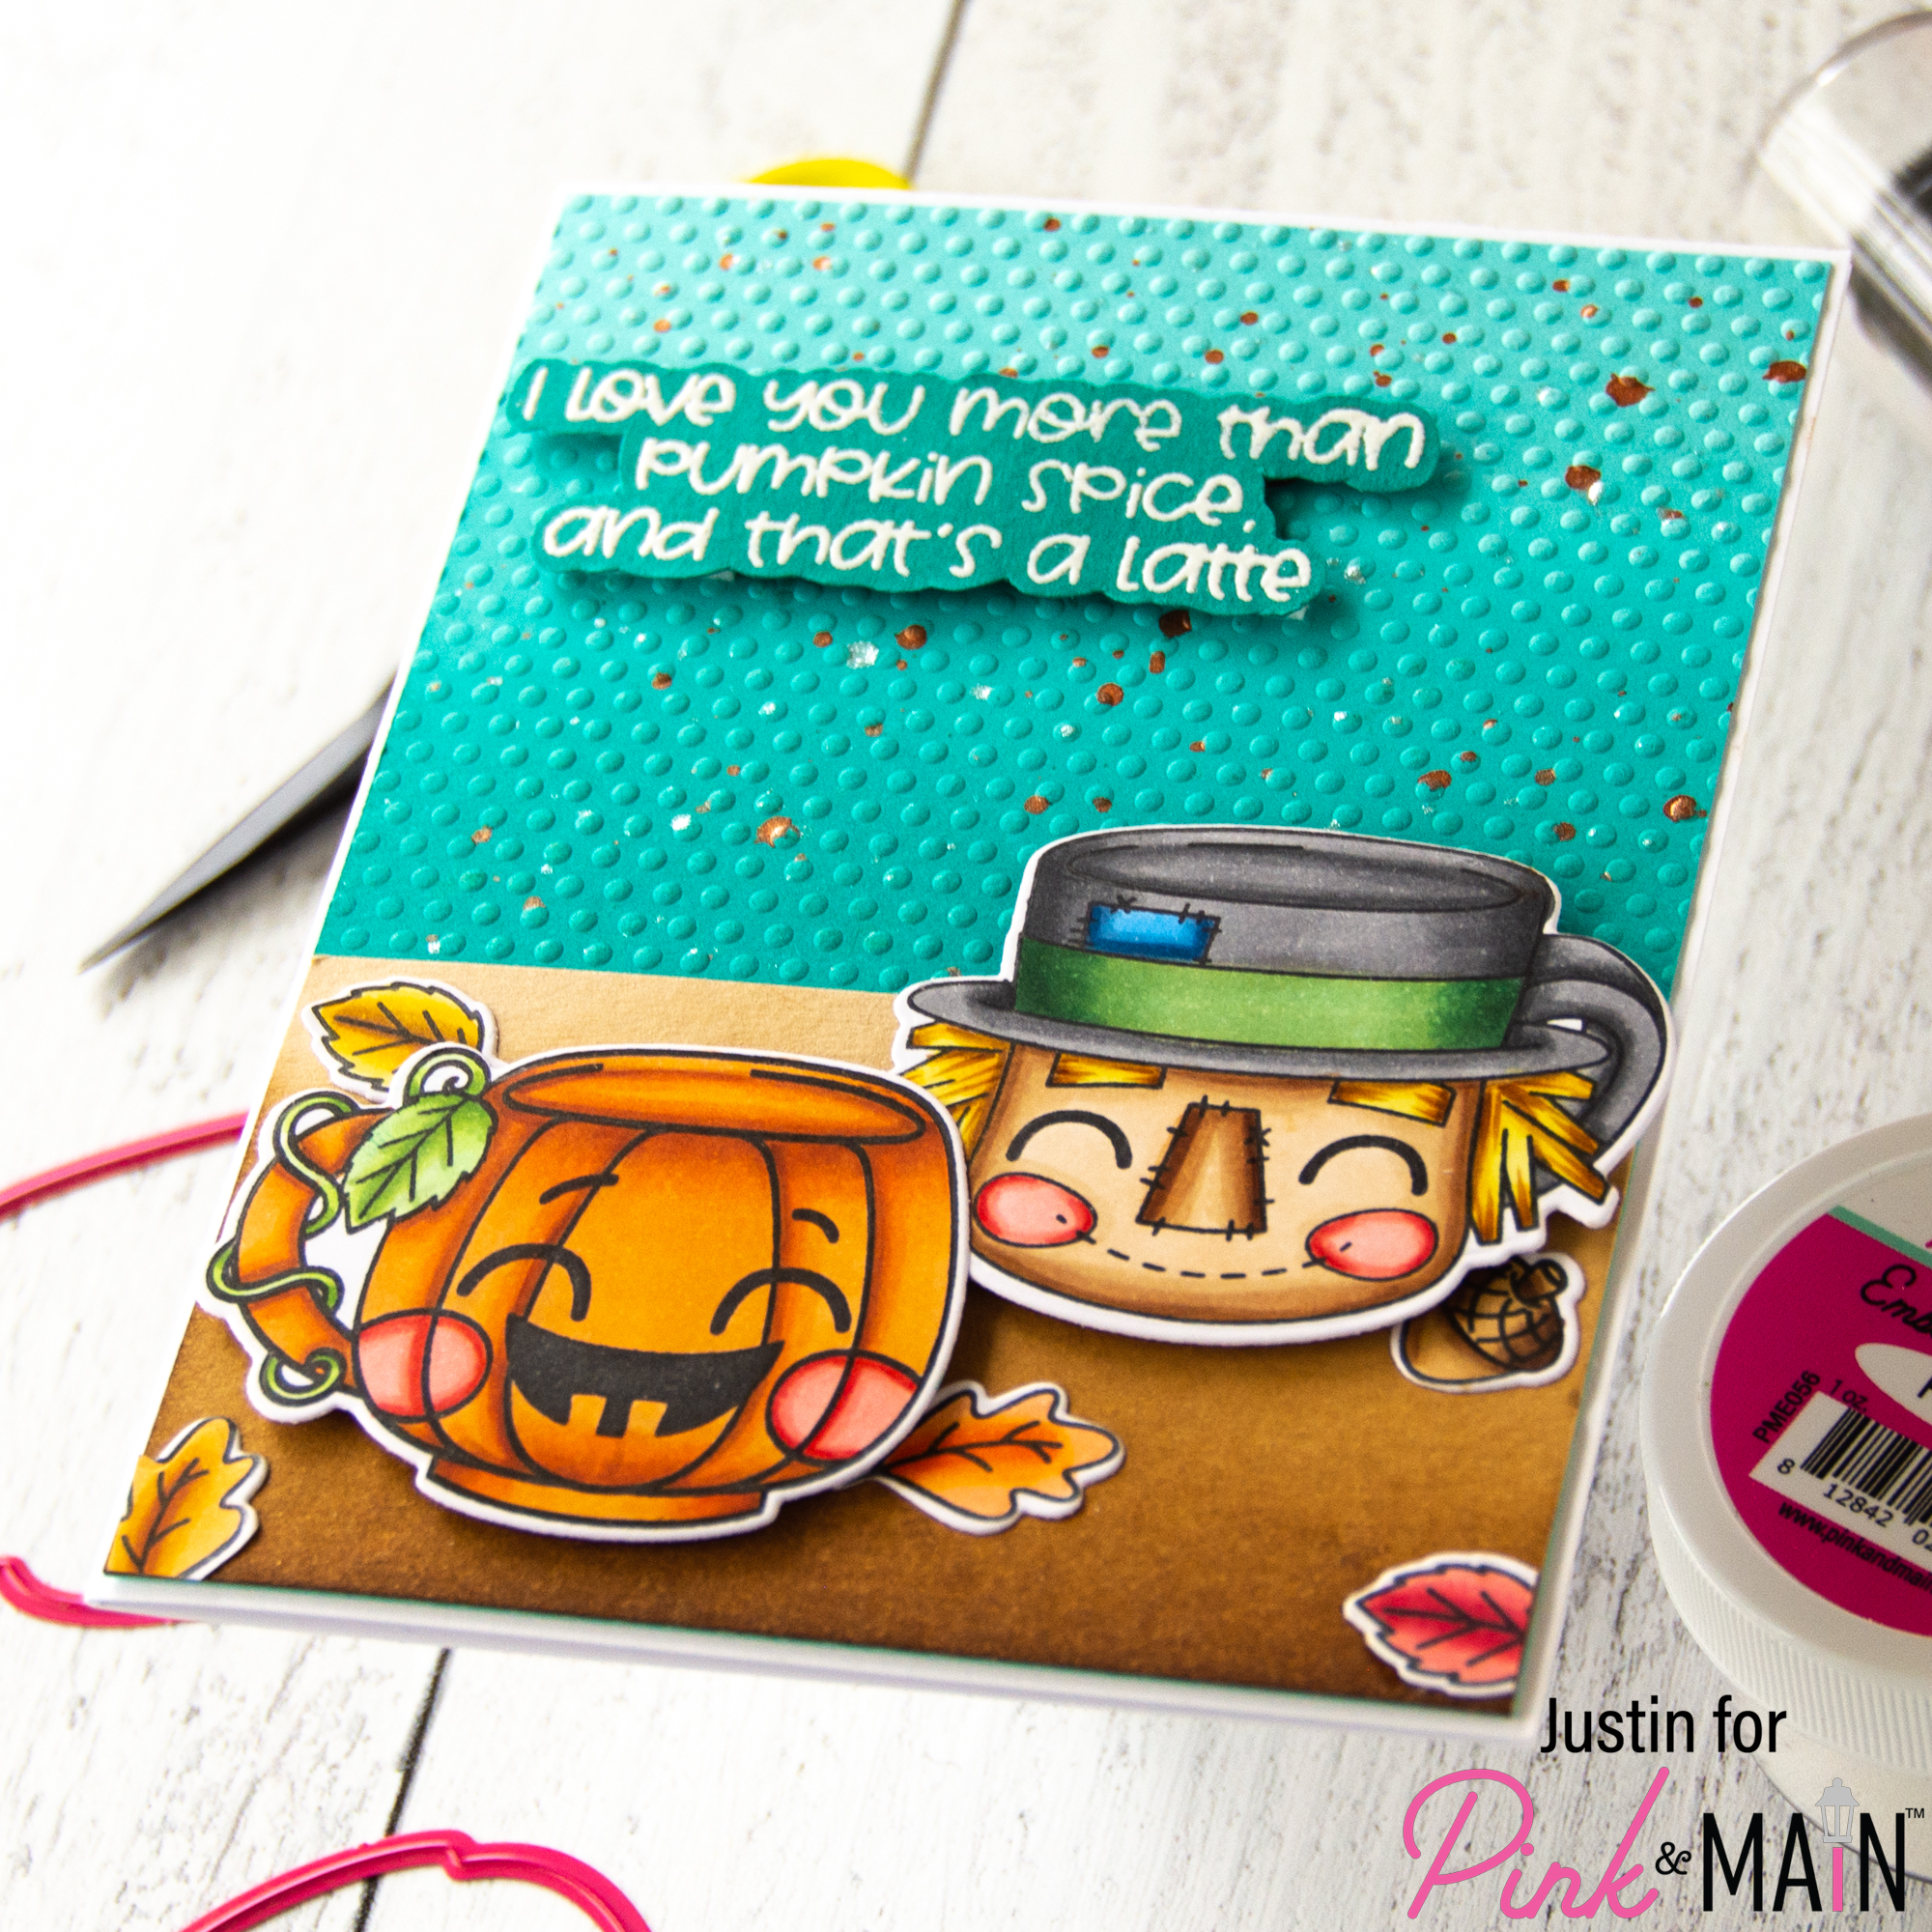
First, I stamped out the Pumpkin Mug, Scarecrow Mug, leaves and the acorn image from Cocoa For You. I colored them up with Copic Markers and cut them out with the Cocoa For You Coordinating Die Cuts. I set them aside for later.
I took an A2-sized piece of River Walk cardstock and blended it from the bottom up with Peacock Feathers Distress Oxide Ink. I misted the panel with water, placed it inside of the Micro Dots Embossing Folder, and processed it through my die cutting machine. I then trimmed the panel down to about 4.125″ x 5.375″ and splattered it with some gold metallic watercolor accents. I set this panel aside to dry.
I took a piece of 2.25″ x 4.25″ Pebble Cardstock and blended Vintage Photo Distress Ink from the bottom of the strip towards the top of the strip, to create an ombré effect. I adhered my Pebble Cardstock panel to the bottom of my embossed panel, and trimmed off the excess. I then heat embossed my sentiment with Frosting Embossing Powder onto Lakeside Cardstock. I fussy cut the sentiment out and set it aside
To finish my card, I used a combination of liquid glue and foam tape to adhere the elements to my card, and adhered the entire unit to an A2-sized card base!

I hope this project leaves you so excited for the new Cocoa For You stamp set, along with the rest of the August Release!
For more crafty inspiration, please follow me on Instagram and check out my personal blog as well!
Thank you again for stopping by, and happy crafting!
Justin
Be sure to follow me on Instagram at @justanotebyjustin for all my crafting projects!
Note: This blog does use affiliate links when possible. Please know that I only recommend products that I love and think you’ll love too!
Did you know that I have written a special blog post that I rank all of the current Distress Oxide colors?
Check it out if you haven’t yet! I have had a lot of great response from people who have used this list to start their Distress Oxide Journey!
Leave a Reply