

This post uses affiliate links at no additional cost to you! By clicking the links in this post, I earn a small commission should you make a purchase. Thank you in advance!
Hello friends! Today I am sharing a foiled card I created using Pink & Main July Stamp of the Month, Sweeter than Honey! I think the Pink & Main Stamp of the Month Subscription is such a fun way to add adorable stamps to your collection, and at a discount as well! On top of that, subscribers automatically get 15% off future orders while being a subscriber as well!
Below is a list of products I used to create this birthday card:
Pink & Main Products Used:
Sweeter Than Honey Stamp Set
Sweeter Than Honey Coordinating Die Set
Black & White Paper Pack
Many Hearts Embossing Folder
Arch Tag Dies
Lakeside Cardstock
The Park Cardstock
Pandamonium Enamel Dots
Magic Anti-Static Brush
Clear Embossing Powder
Other Key Products Used:
Blending Cardstock
Copic Markers
Distress Oxide Inks: Squeezed Lemonade & Salvaged Patina
Teal Foil
Foam Tape
Here is a brief walkthrough of how I made my card!

First and foremost, I turned on my laminator and let it heat up for a good 30 minutes or so.
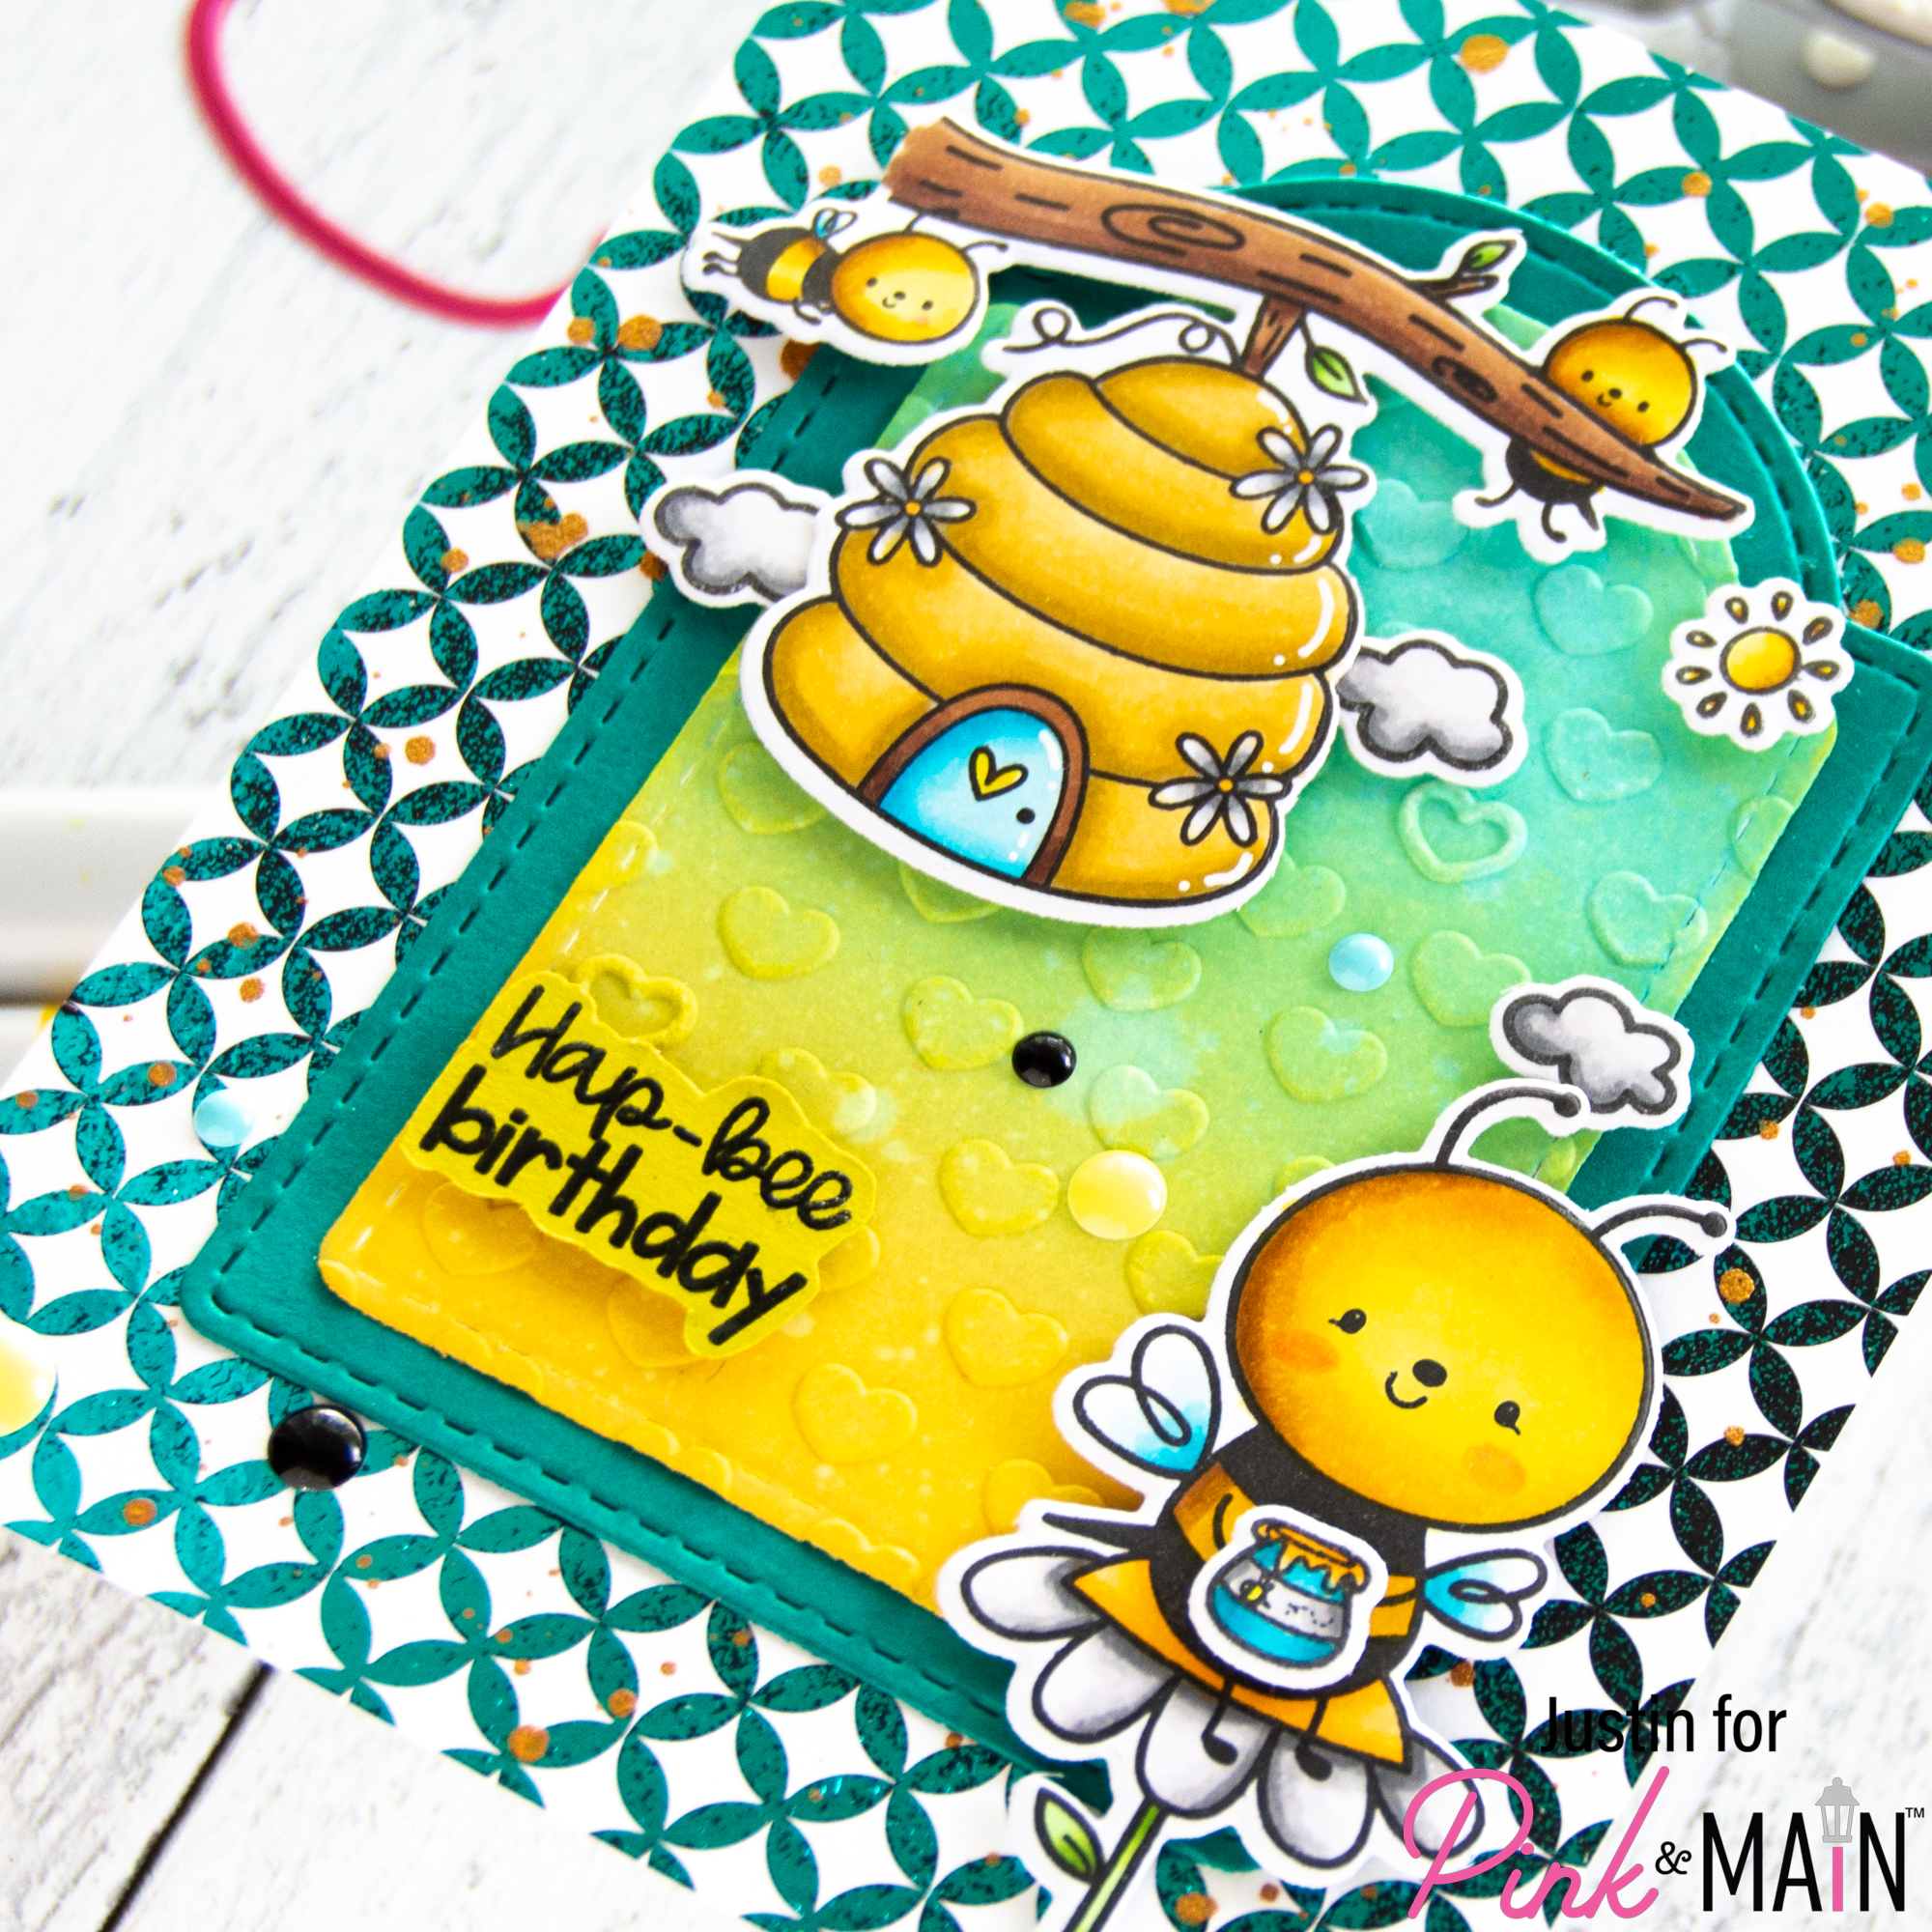
While waiting for my laminator to warm up, I colored up all my images from the Sweeter Than Honey with Copic Markers and cutting them out with the coordinating dies. I set these aside for later.
I grabbed one of the prints from the Black & White Paper Pack and trimmed it down to A2-sized. I then took a piece of Teal Foil, wiped the back of the foil and the front of the Black & White panel with a Microfiber Towel, placed it into a parchment paper sandwich, and processed it through my laminator. I removed the foil to see how it transferred. I then splattered this panel with gold metallic watercolor and set it aside to dry.
I die cut (1) Arch Tag from Lakeside Cardstock, and then the next smaller size from blending cardstock. On the smaller tag, I blended an ombré using Squeezed Lemonade and Salvaged Patina Distress Oxide Inks. I spritzed this panel with water, placed it into Many Hearts Embossing Folder, and processed it through my die cutting machine to get that embossed effect. Using liquid adhesive, I adhered the smaller tag on top of the Lakeside Tag.
For the sentiment, I brushed some The Park cardstock with my Magic Anti-Static Brush, stamped the sentiment “Hap-bee Birthday” in black pigment ink, and heat embossed it in Clear Embossing Powder. I then fussy cut the sentiment out.
To assemble my card, I used liquid adhesive to adhere the background tags, and foam tape for all of the images and sentiment to give them a little bit of lift. I then applied a few Pandamonium Enamel Dots for finishing embellishments!
Thank you so much for stopping by my blog today! I am hoping this birthday card leaves you buzzing with excitement to subscribe to the Pink & Main Stamp of the Month Club and get your crafty on!
Happy Crafting!
Justin
Be sure to follow me on Instagram at @justanotebyjustin for all my crafting projects!
Note: This blog does use affiliate links when possible. Please know that I only recommend products that I love and think you’ll love too!
Did you know that I have written a special blog post that I rank all of the current Distress Oxide colors?
Check it out if you haven’t yet! I have had a lot of great response from people who have used this list to start their Distress Oxide Journey!
Leave a Reply