
Hello everyone! Can you believe that summer is just nearly here!? For us crafters, that means it’s time for more wedding, patriotic, and, most pertinent to this post, graduation cards need to be added to our stash! I decided to take a nautical spin on your typical graduation card, so let me get into the details!
Note: this blog post is also being featured on the Therm O Web blog today. Be sure to head on over and show them some love by clicking here!
First, let me provide you with a list of products used to create this card:
This blog uses affiliate links at no additional cost to you! By clicking on one of my links and making a purchase, I earn a small commission. I thank you in advance for your support!
Therm O Web Products Used:
Brutus Monroe Foil Transfer Sheets- Blue Waves
Toner Sheet
Flock Transfer Sheets- Midnight Blue
Silver Glitz Glitter Gel by Gina K. Designs.
iCraft 3D White Foam Tape- 1/16″
UltraBond Permanent Adhesive
Stencil Pal
Pixie Tape
Other Products Used:
Smooth Sailing Stamp Set by Lawn Fawn
Snowy Sky Stencil by Lawn Fawn
Congrats Word Die by Stamp Anniething
Waves Builder Die by Stamp Anniething
Copic Markers
Copic Coloring Paper
Blackout Ink by Ink on 3
Distress Oxide Inks: Squeezed Lemonade, Carved Pumpkin, Picked Raspberry & Wilted Violet
Blending Cardstock
Snowfall Embossing Powder by Kindred Stamps
Embossing Ink Pad by Kindred Stamps
Colored Cardstock
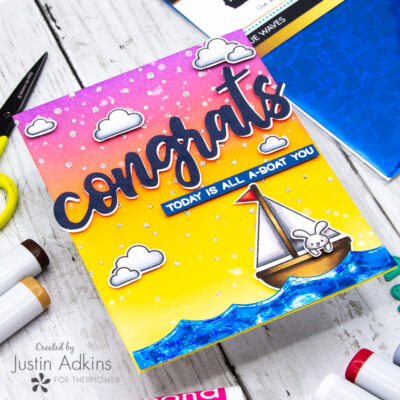
Alright, let’s get into how I put this card together!
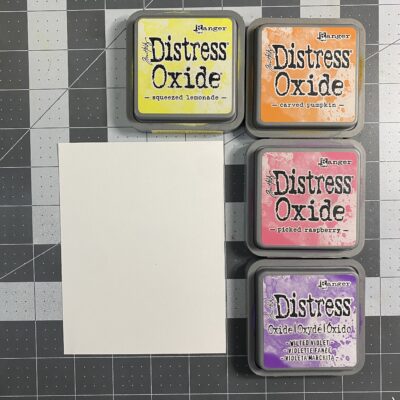
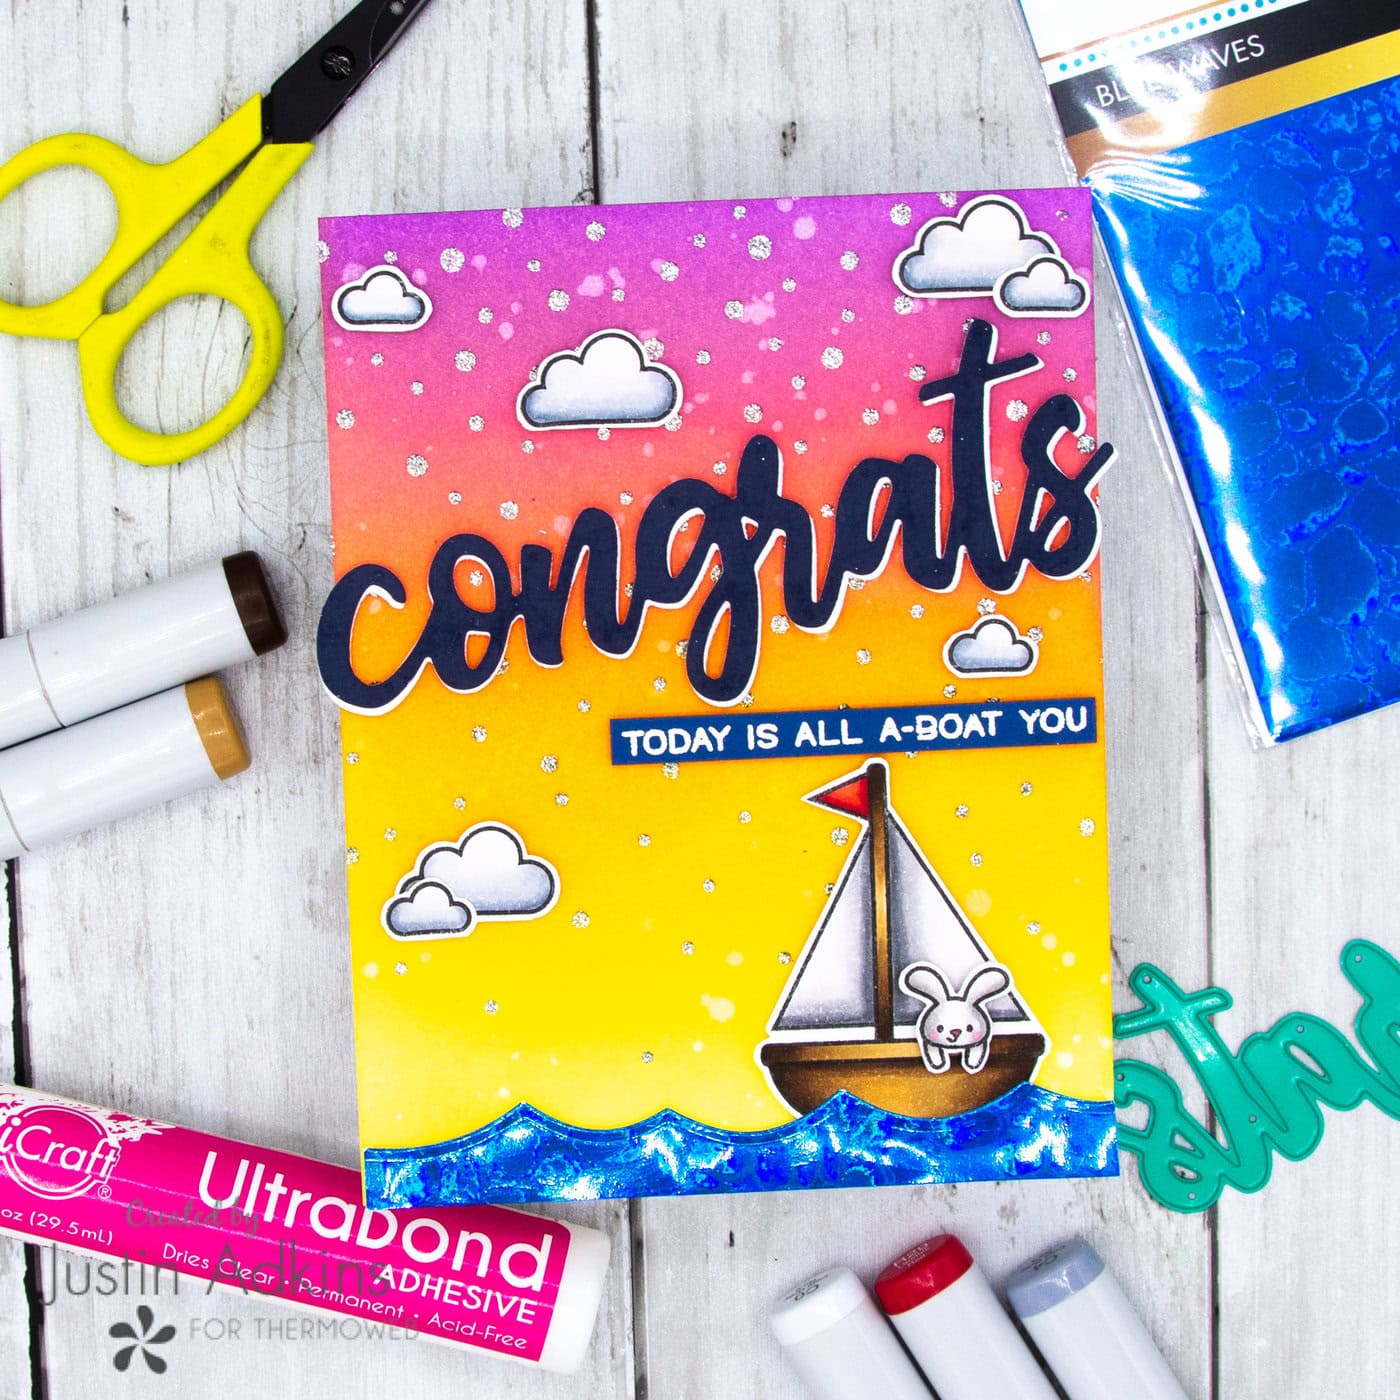
I colored up my images with Copic Markers, fussy cut them out, and set them aside for later. Taking an A2-sized piece of blending cardstock, I blended up a sunset ombré using Squeezed Lemonade, Carved Pumpkin, Picked Raspberry & Wilted Violet Distress Oxide Inks.
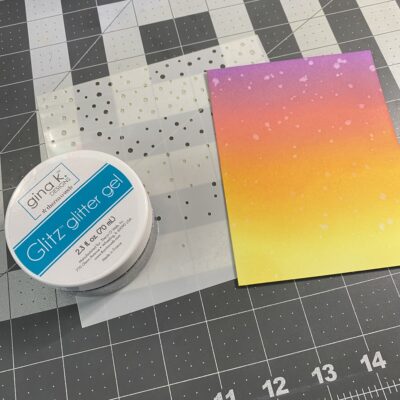
I splattered my panel with some water for bleach spots. Next, I took the Snowy Sky stencil by Lawn Fawn, placed it on top of my panel, secured it with Pixie Tape, and then applied a solid layer of Silver Glitz Glitter Gel using my Stencil Pal. I know this stencil is labeled as a snow, but I figured these small dots would make for perfect stars too. I removed my stencil, set my panel aside to dry entirely, and cleaned off my stencil and tools immediately.
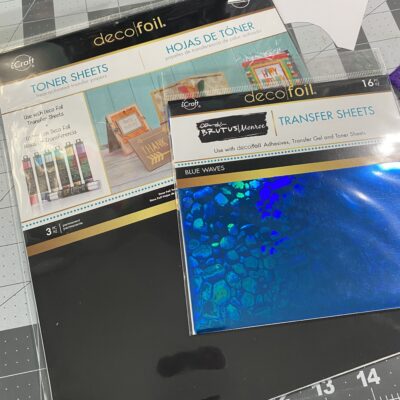
Next, I transferred some Blue Waves Foil by Brutus Monroe to a Toner Sheet by processing it through my laminator.
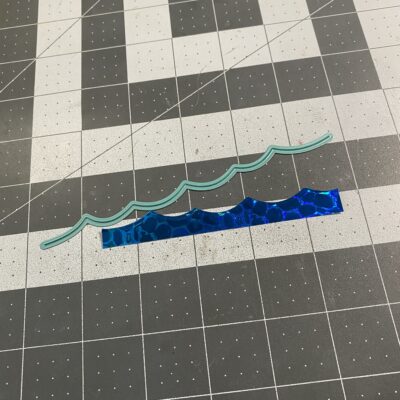
Once the foil was transferred, I trimmed down a 4.25″ long strip and die cut it using a Waves Die.
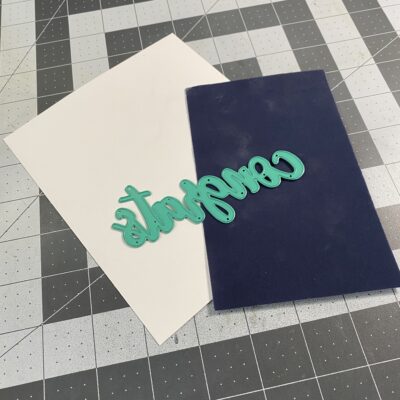
Using a Congrats Die, I die cut the word from a piece of Midnight Blue Flock and white cardstock. I used UltraBond adhesive to adhere the Midnight Blue die cut on top of the white cardstock die cut, offsetting it a tad so I got some of the white peeking through.
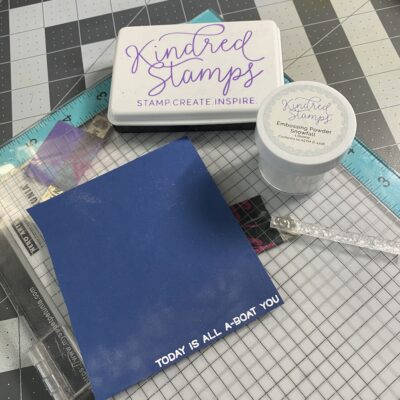
Using Snowfall Embossing Powder, I heat embossed more of my sentiment and trimmed it into a narrow strip.
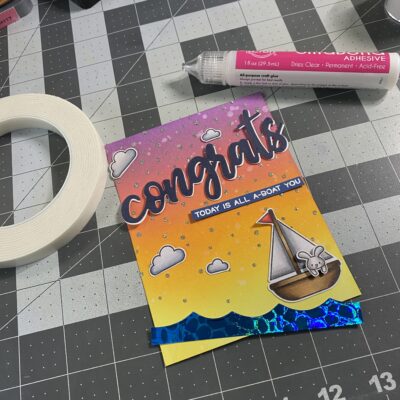
Finally, using a combination of UltraBond Adhesive and iCraft 3D Foam Tape (1/16″ in white), I adhered all of my elements to my dried Silver Glitz Gel sunset panel. I adhered my card to a card base and was completed!
Below are a few more images of the finalized card!

Thank you for stopping by the blog today! I hope this card leaves you inspired to create a foiled and flocked creation for your next graduation project!
Happy Crafting!
Justin
Be sure to follow me on Instagram at @justanotebyjustin for all my crafting projects!
Note: This blog does use affiliate links when possible. Please know that I only recommend products that I love and think you’ll love too!
Did you know that I have written a special blog post that I rank all of the current Distress Oxide colors?
Check it out if you haven’t yet! I have had a lot of great response from people who have used this list to start their Distress Oxide Journey!
Leave a Reply