

Before we jump into today’s project, I wanted to let you know that I sometimes use affiliate links to share my favorite products. Don’t worry, these links won’t cost you a dime – they’re just little crafty helpers behind the scenes that help support me if you use them to make a purchase! Let’s dive into today’s creative journey together!
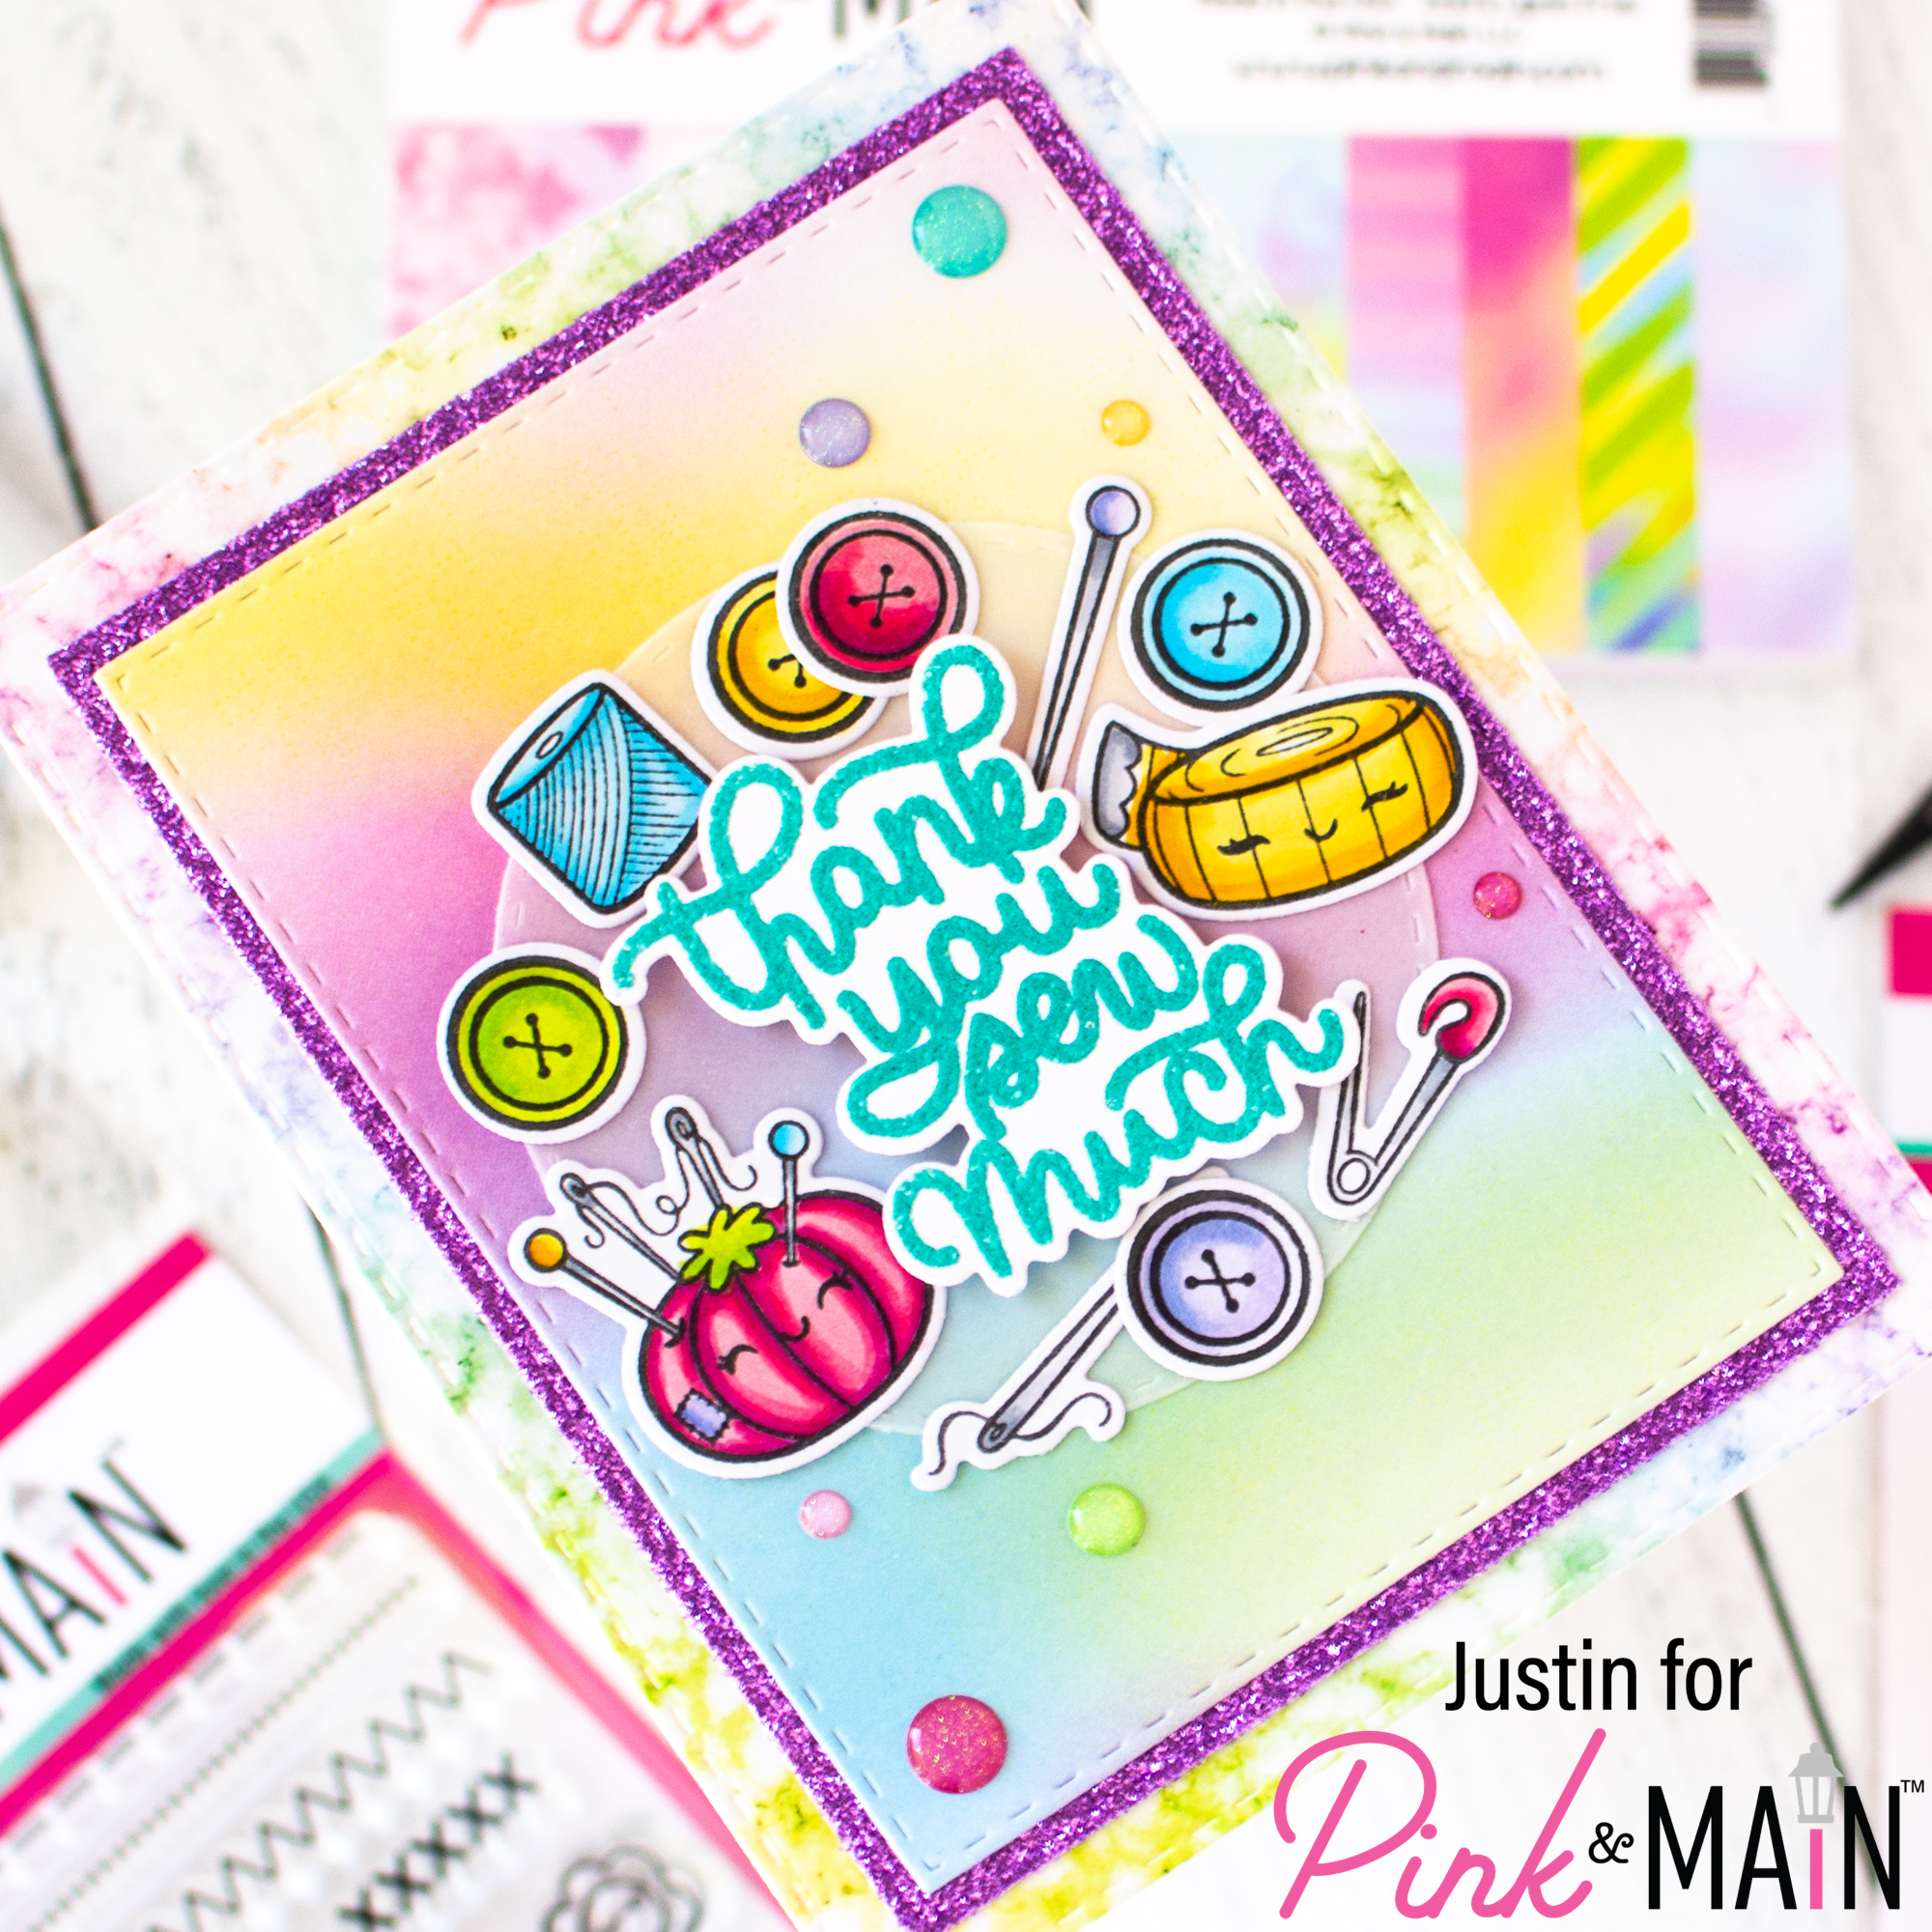
Hello, friends! Today, I am SEW excited to be sharing a closer look at the October Release with this card I created using some new stamp sets and paper pad!
Below is a list of products that I used to create this card:
Pink & Main Products Used:
Sew Sweet of You
Sew Sweet of You Dies
Sew Loved
Sew Loved Dies
Fun Pastels Paper Pad
Crafty Friends Glitter Enamel Dots
Summer Glitter Paper Pack
Stitched Rectangle Dies Set 1
Stitched Rectangle Dies Set 2
Aquatini Embossing Powder
Embossing Watermark Ink Pad
EZ Squeeze Adhesive
Foam Tape
Other Key Products Used:
Copic Markers
Vellum
Now let’s get into details for how I put this card together!
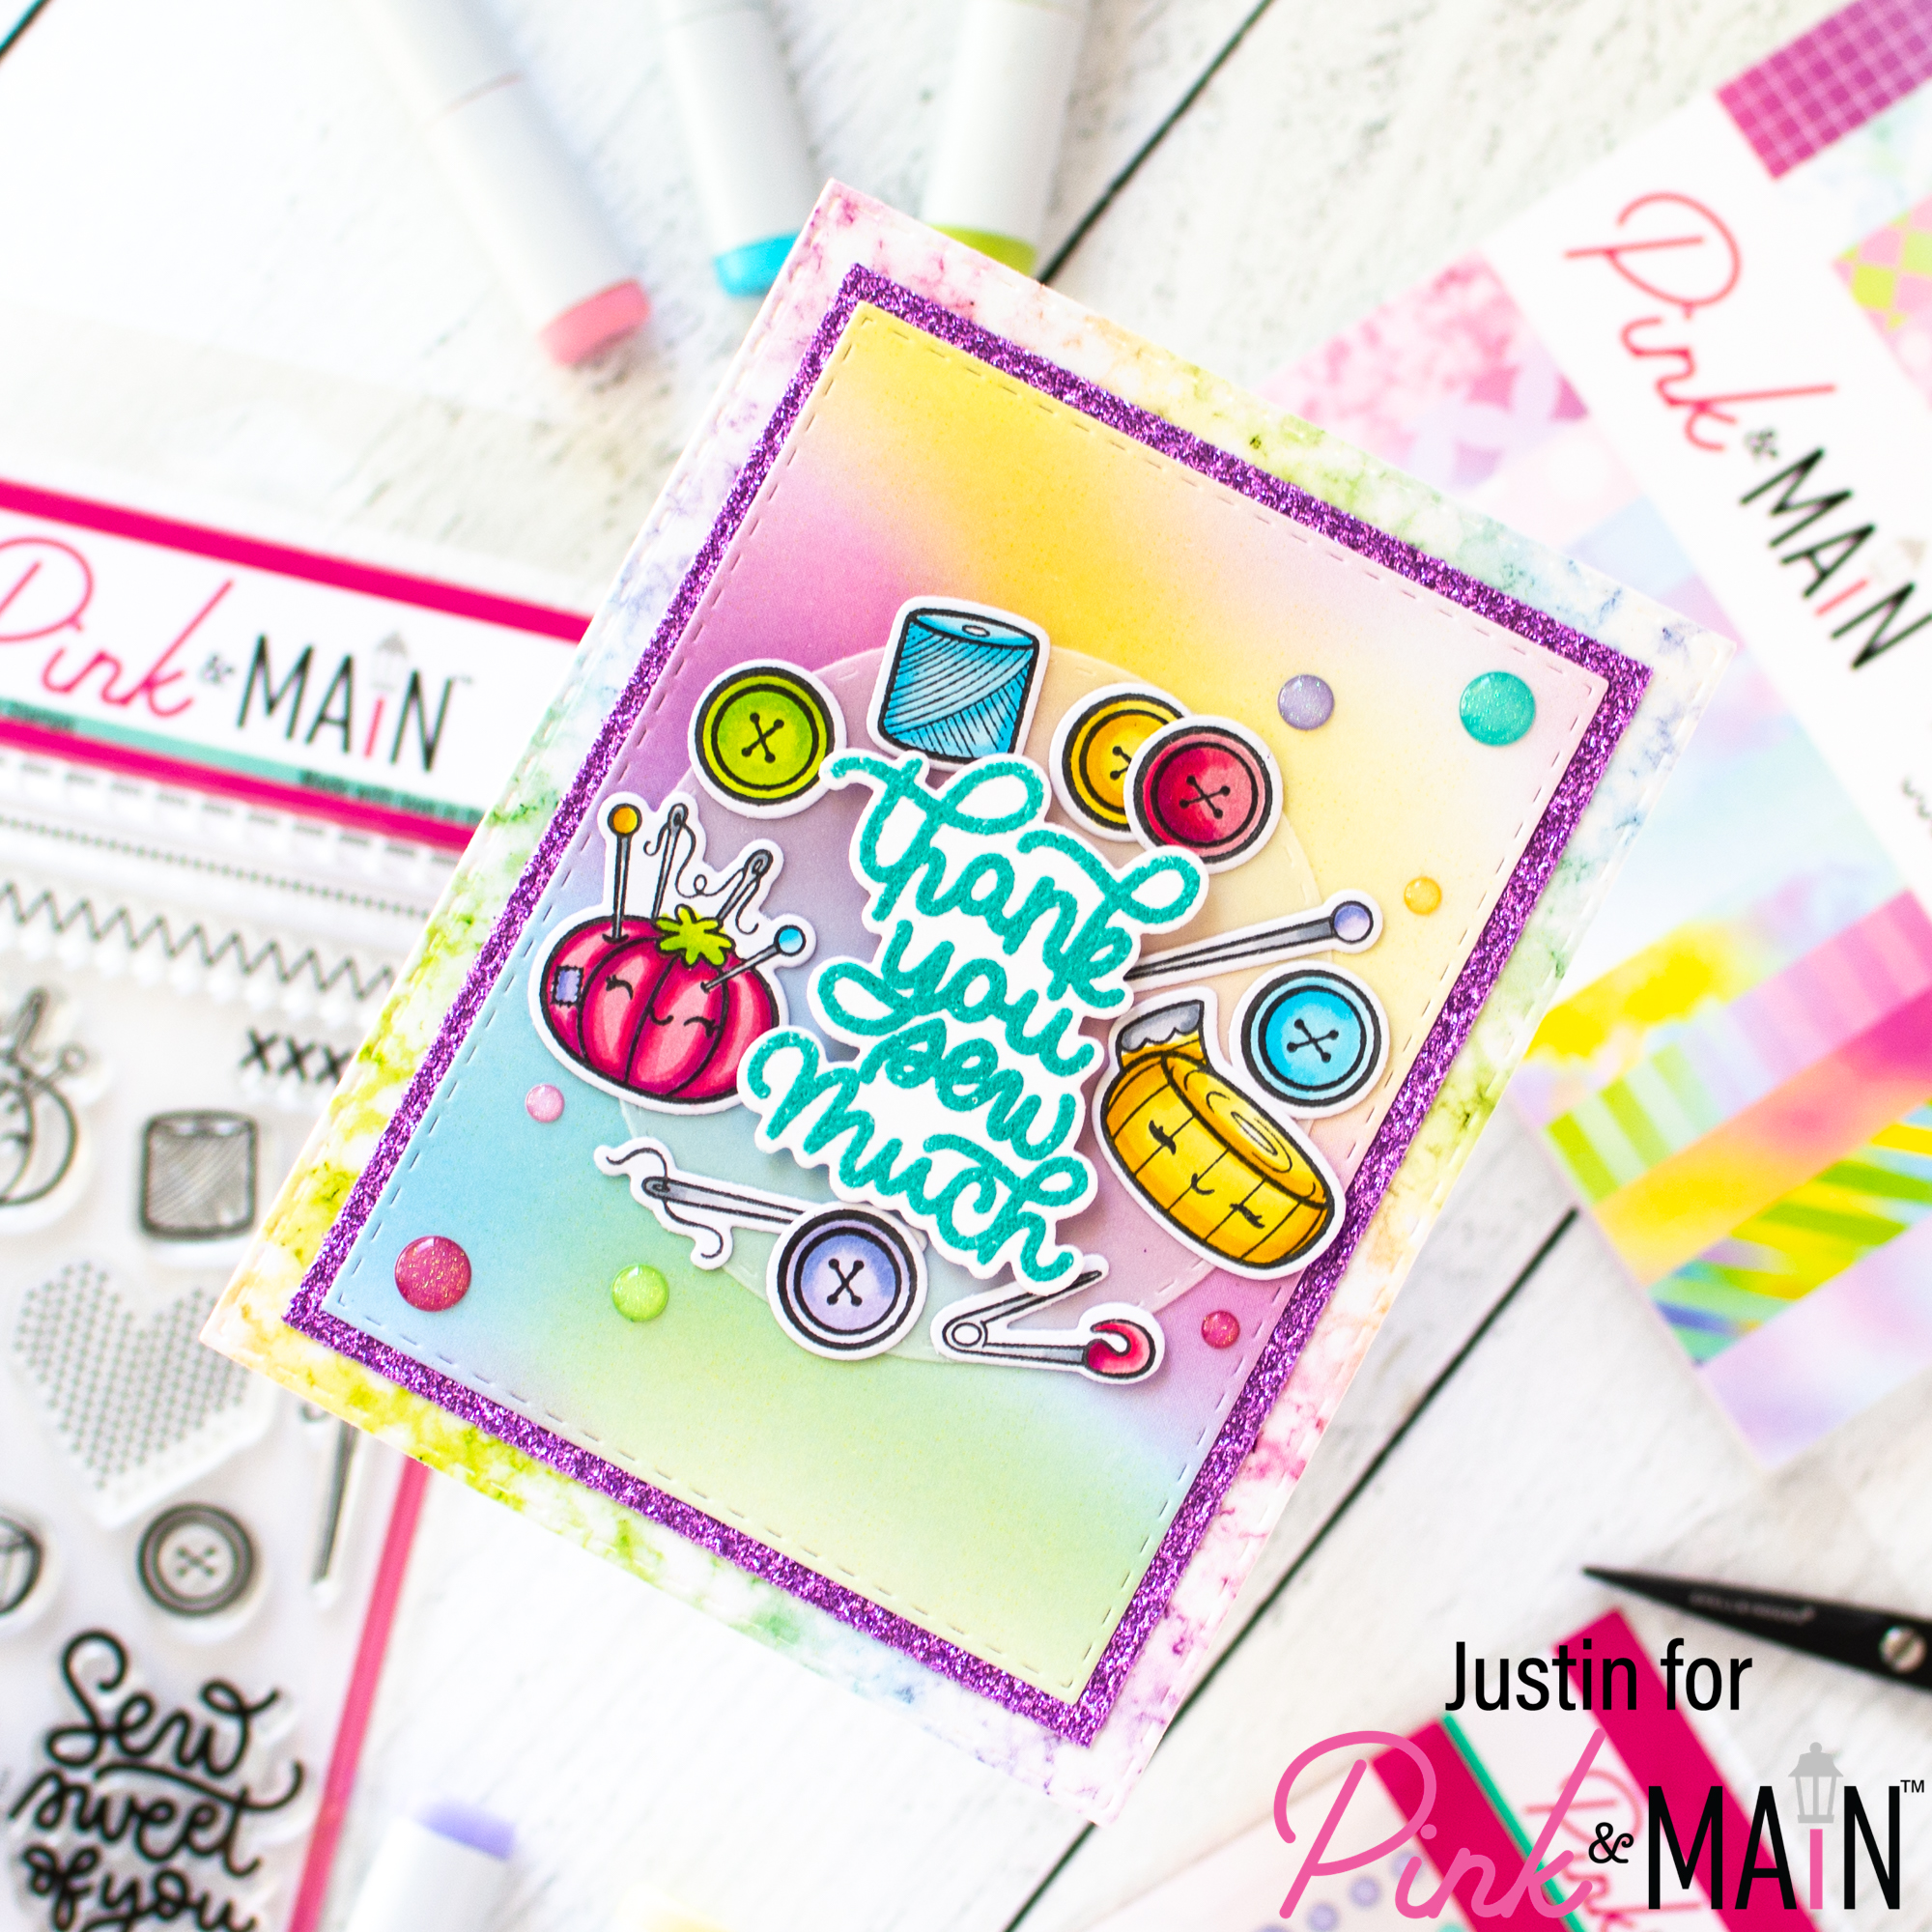
I colored up a handful of images from the Sew Sweet of You stamp set with my Copic Markers, and used the coordinating dies to cut them out. I also heat embossed the sentiment “Thank you sew much” from the Sew Loved stamp set with Aquatini Embossing Powder, and used the coordinating die to cut the sentiment out as well. I set my images and sentiments aside for later.
Using the largest die from the Stitched Rectangles Dies Set 1, I die cut out a rainbow speckled pattern from the Fun Pastels Paper Pad. Using the 2nd largest die from the Stitched Rectangles Dies Set 1, I die cut the purple glitter paper from the Summer Glitter Paper Pack. Finally, I used the 2nd largest die from the Stitched Rectangles Dies Set 2 to die cut out a pastel design from the Fun Pastels Paper Pad. I adhered my smallest rectangle to the glitter rectangle, and then adhered my framed glitter panel onto the largest die cut.
I went ahead and die cut a stitched circle from vellum and used a combination of foam tape and liquid adhesive to adhere all my images and my sentiment to the vellum circle. I carefully applied adhesive to the back of the unit, only putting it in places masked by the images on the top of the panel, and adhered it to the center of my card. I applied some Crafty Friends Glitter Enamel Dots to my panel and adhered the panel to an A2-sized card base. My card was completed!
Thank you so very much for stopping by the blog today! I hope this card brings some crafty pastel inspiration your way, and inspires your next project using the Pink & Main October Release!
Don’t forget that for more crafty inspiration, you can follow me on Instagram, subscribe to my channel on YouTube, and check out my personal blog as well!
Thanks again for stopping by!
Happy Crafting!
Justin
Leave a Reply