

Before we jump into today’s project, I wanted to let you know that I sometimes use affiliate links to share my favorite products. Don’t worry, these links won’t cost you a dime – they’re just little crafty helpers behind the scenes that help support me if you use them to make a purchase! Let’s dive into today’s creative journey together!
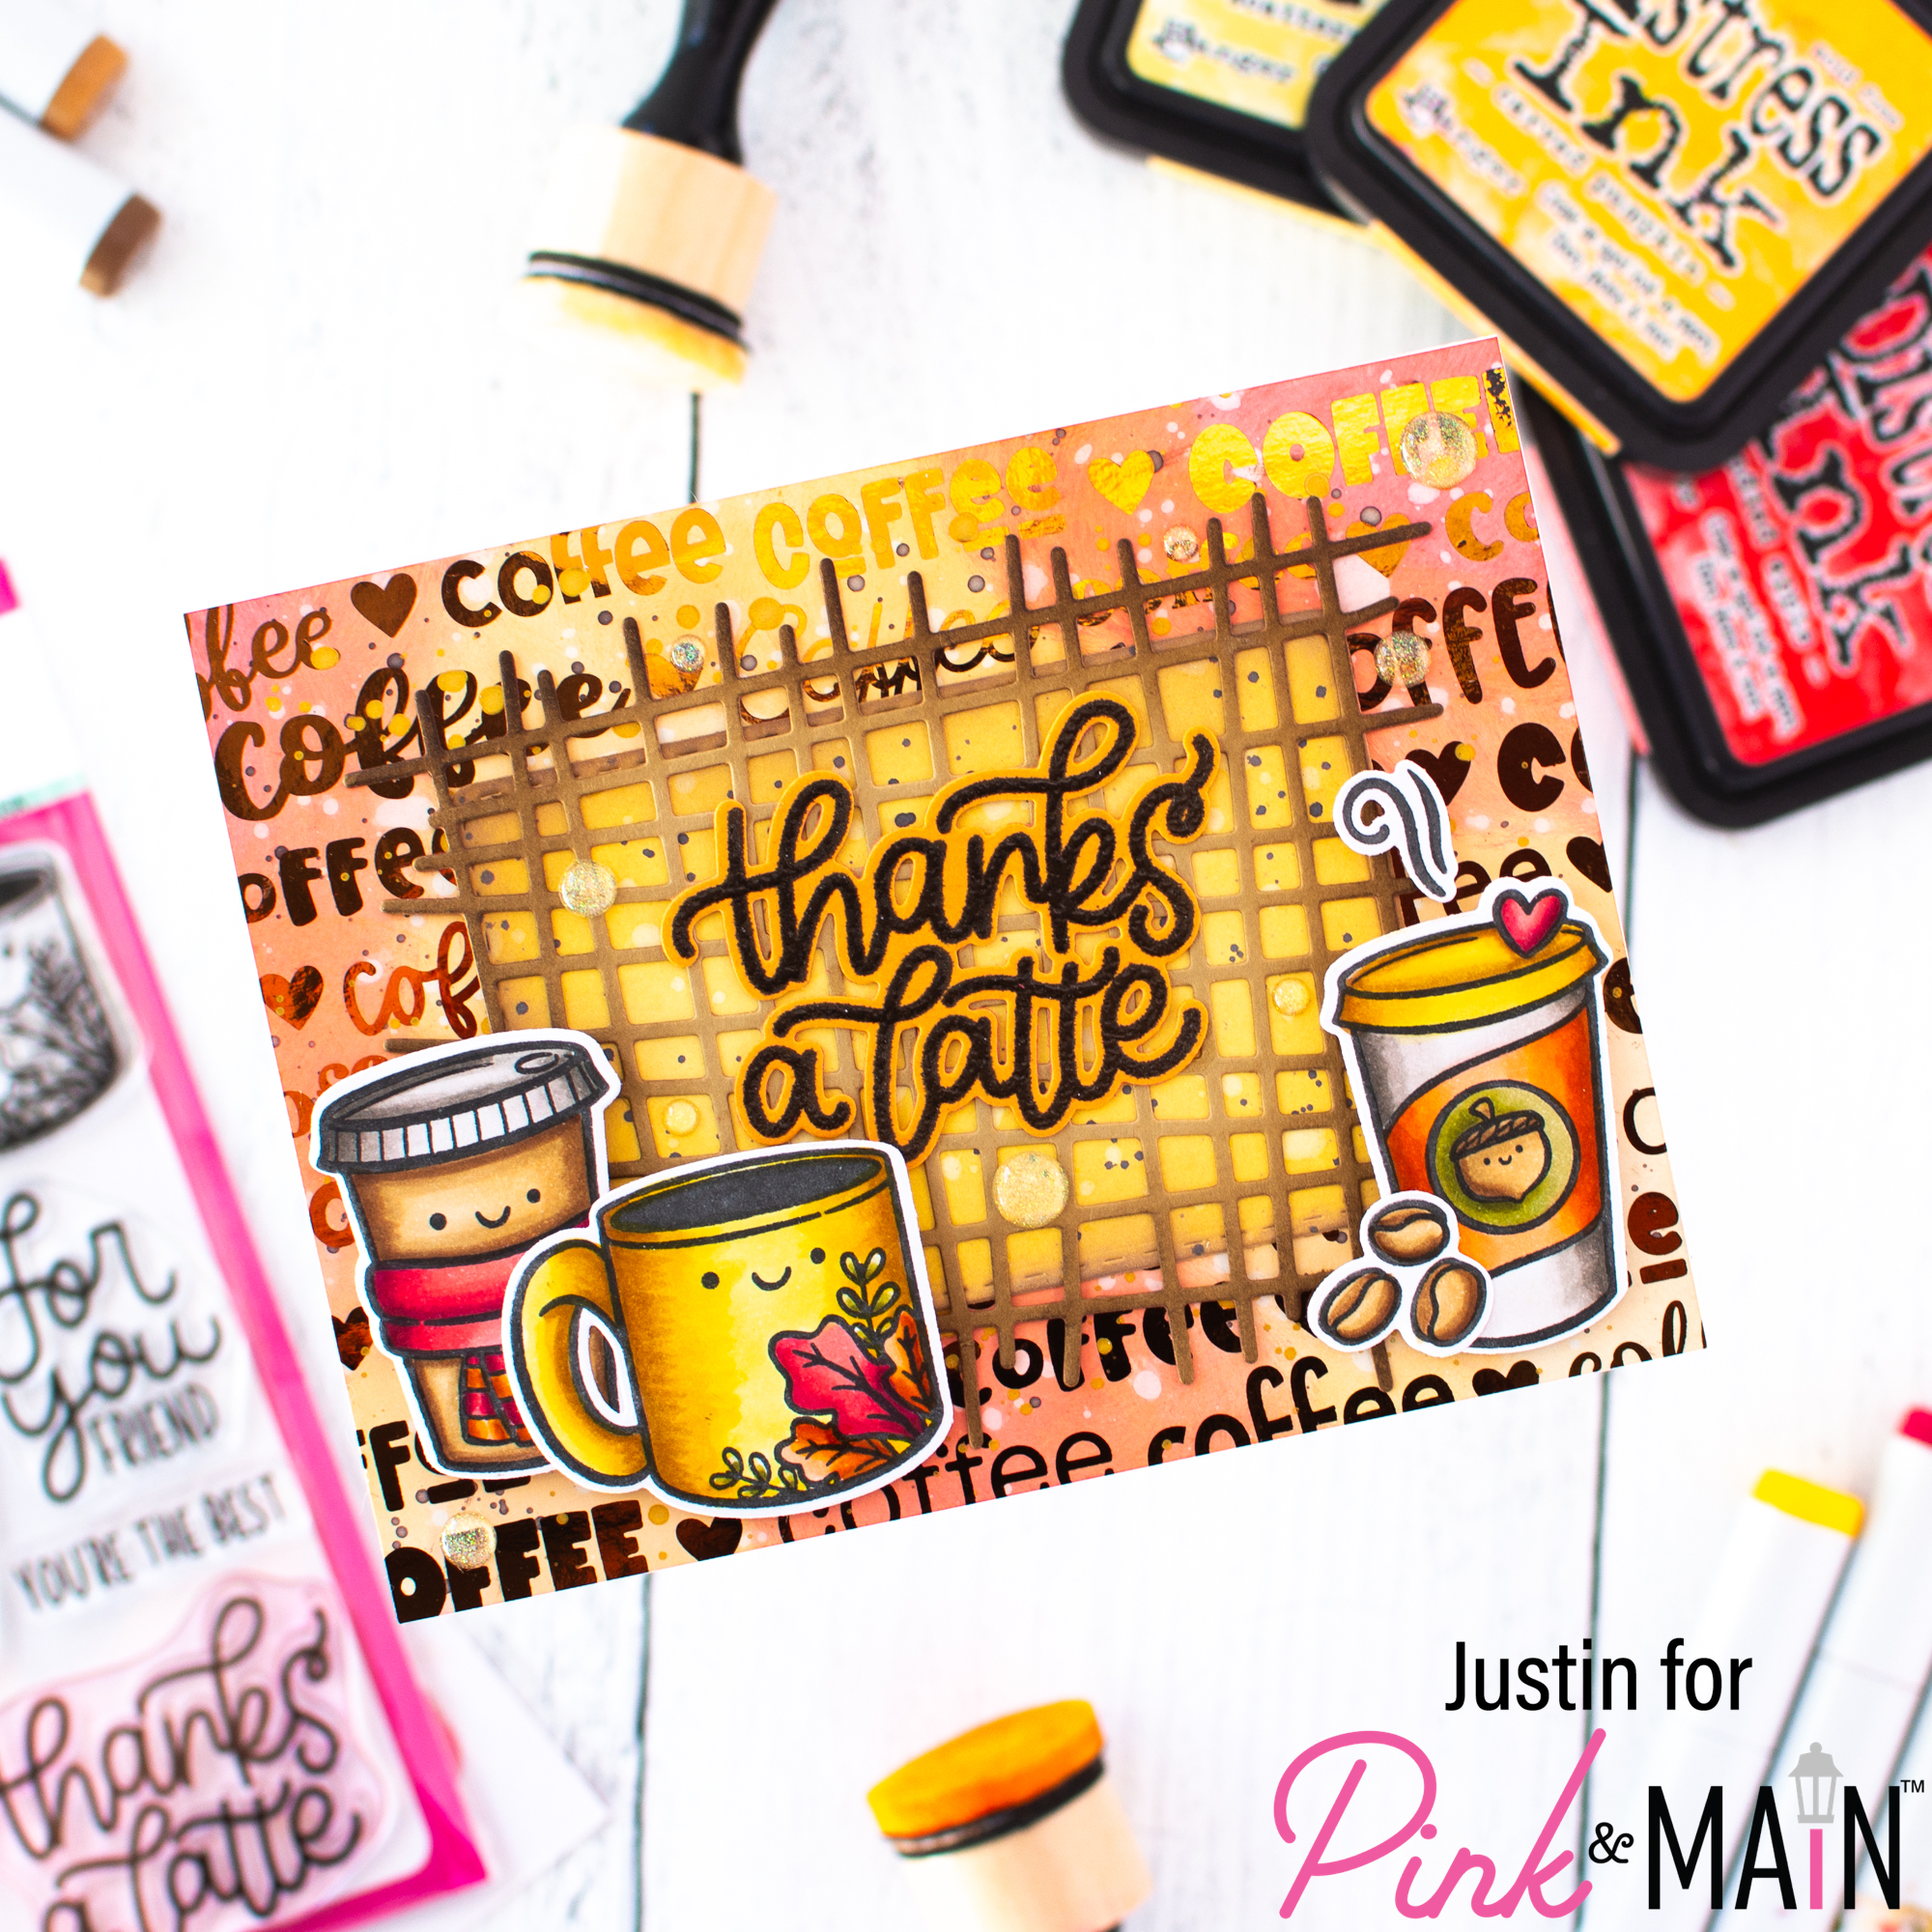
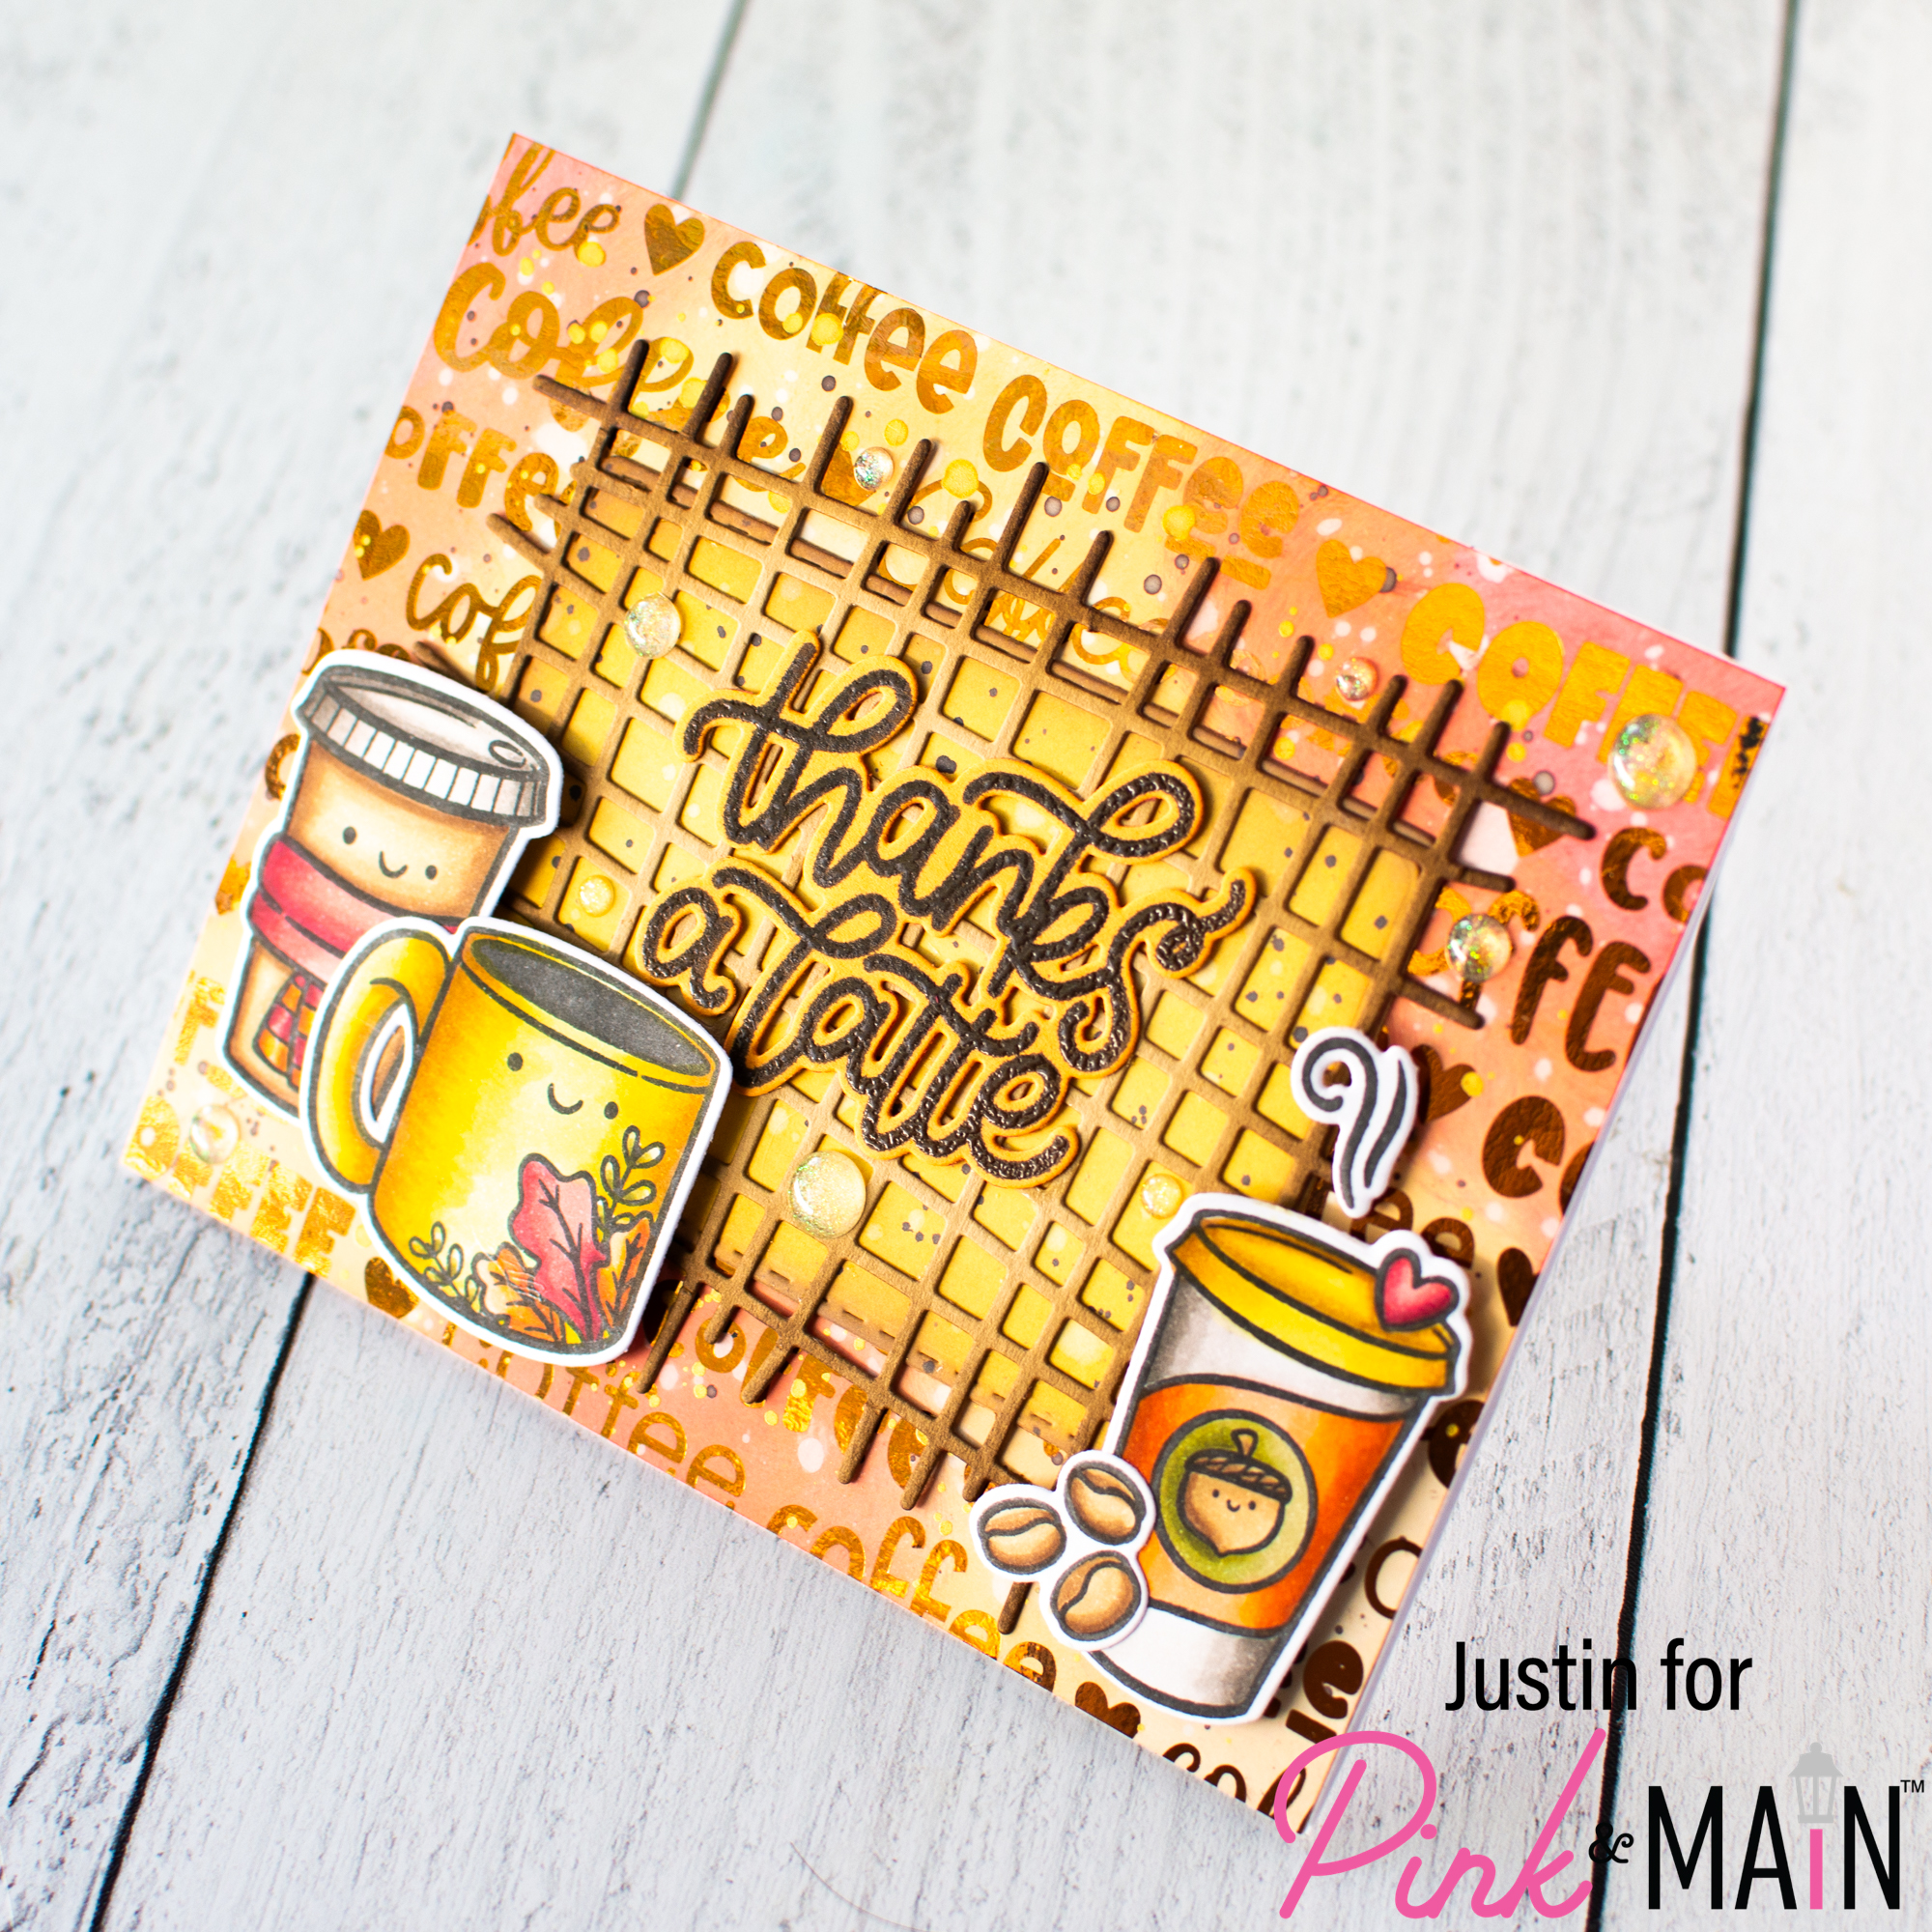
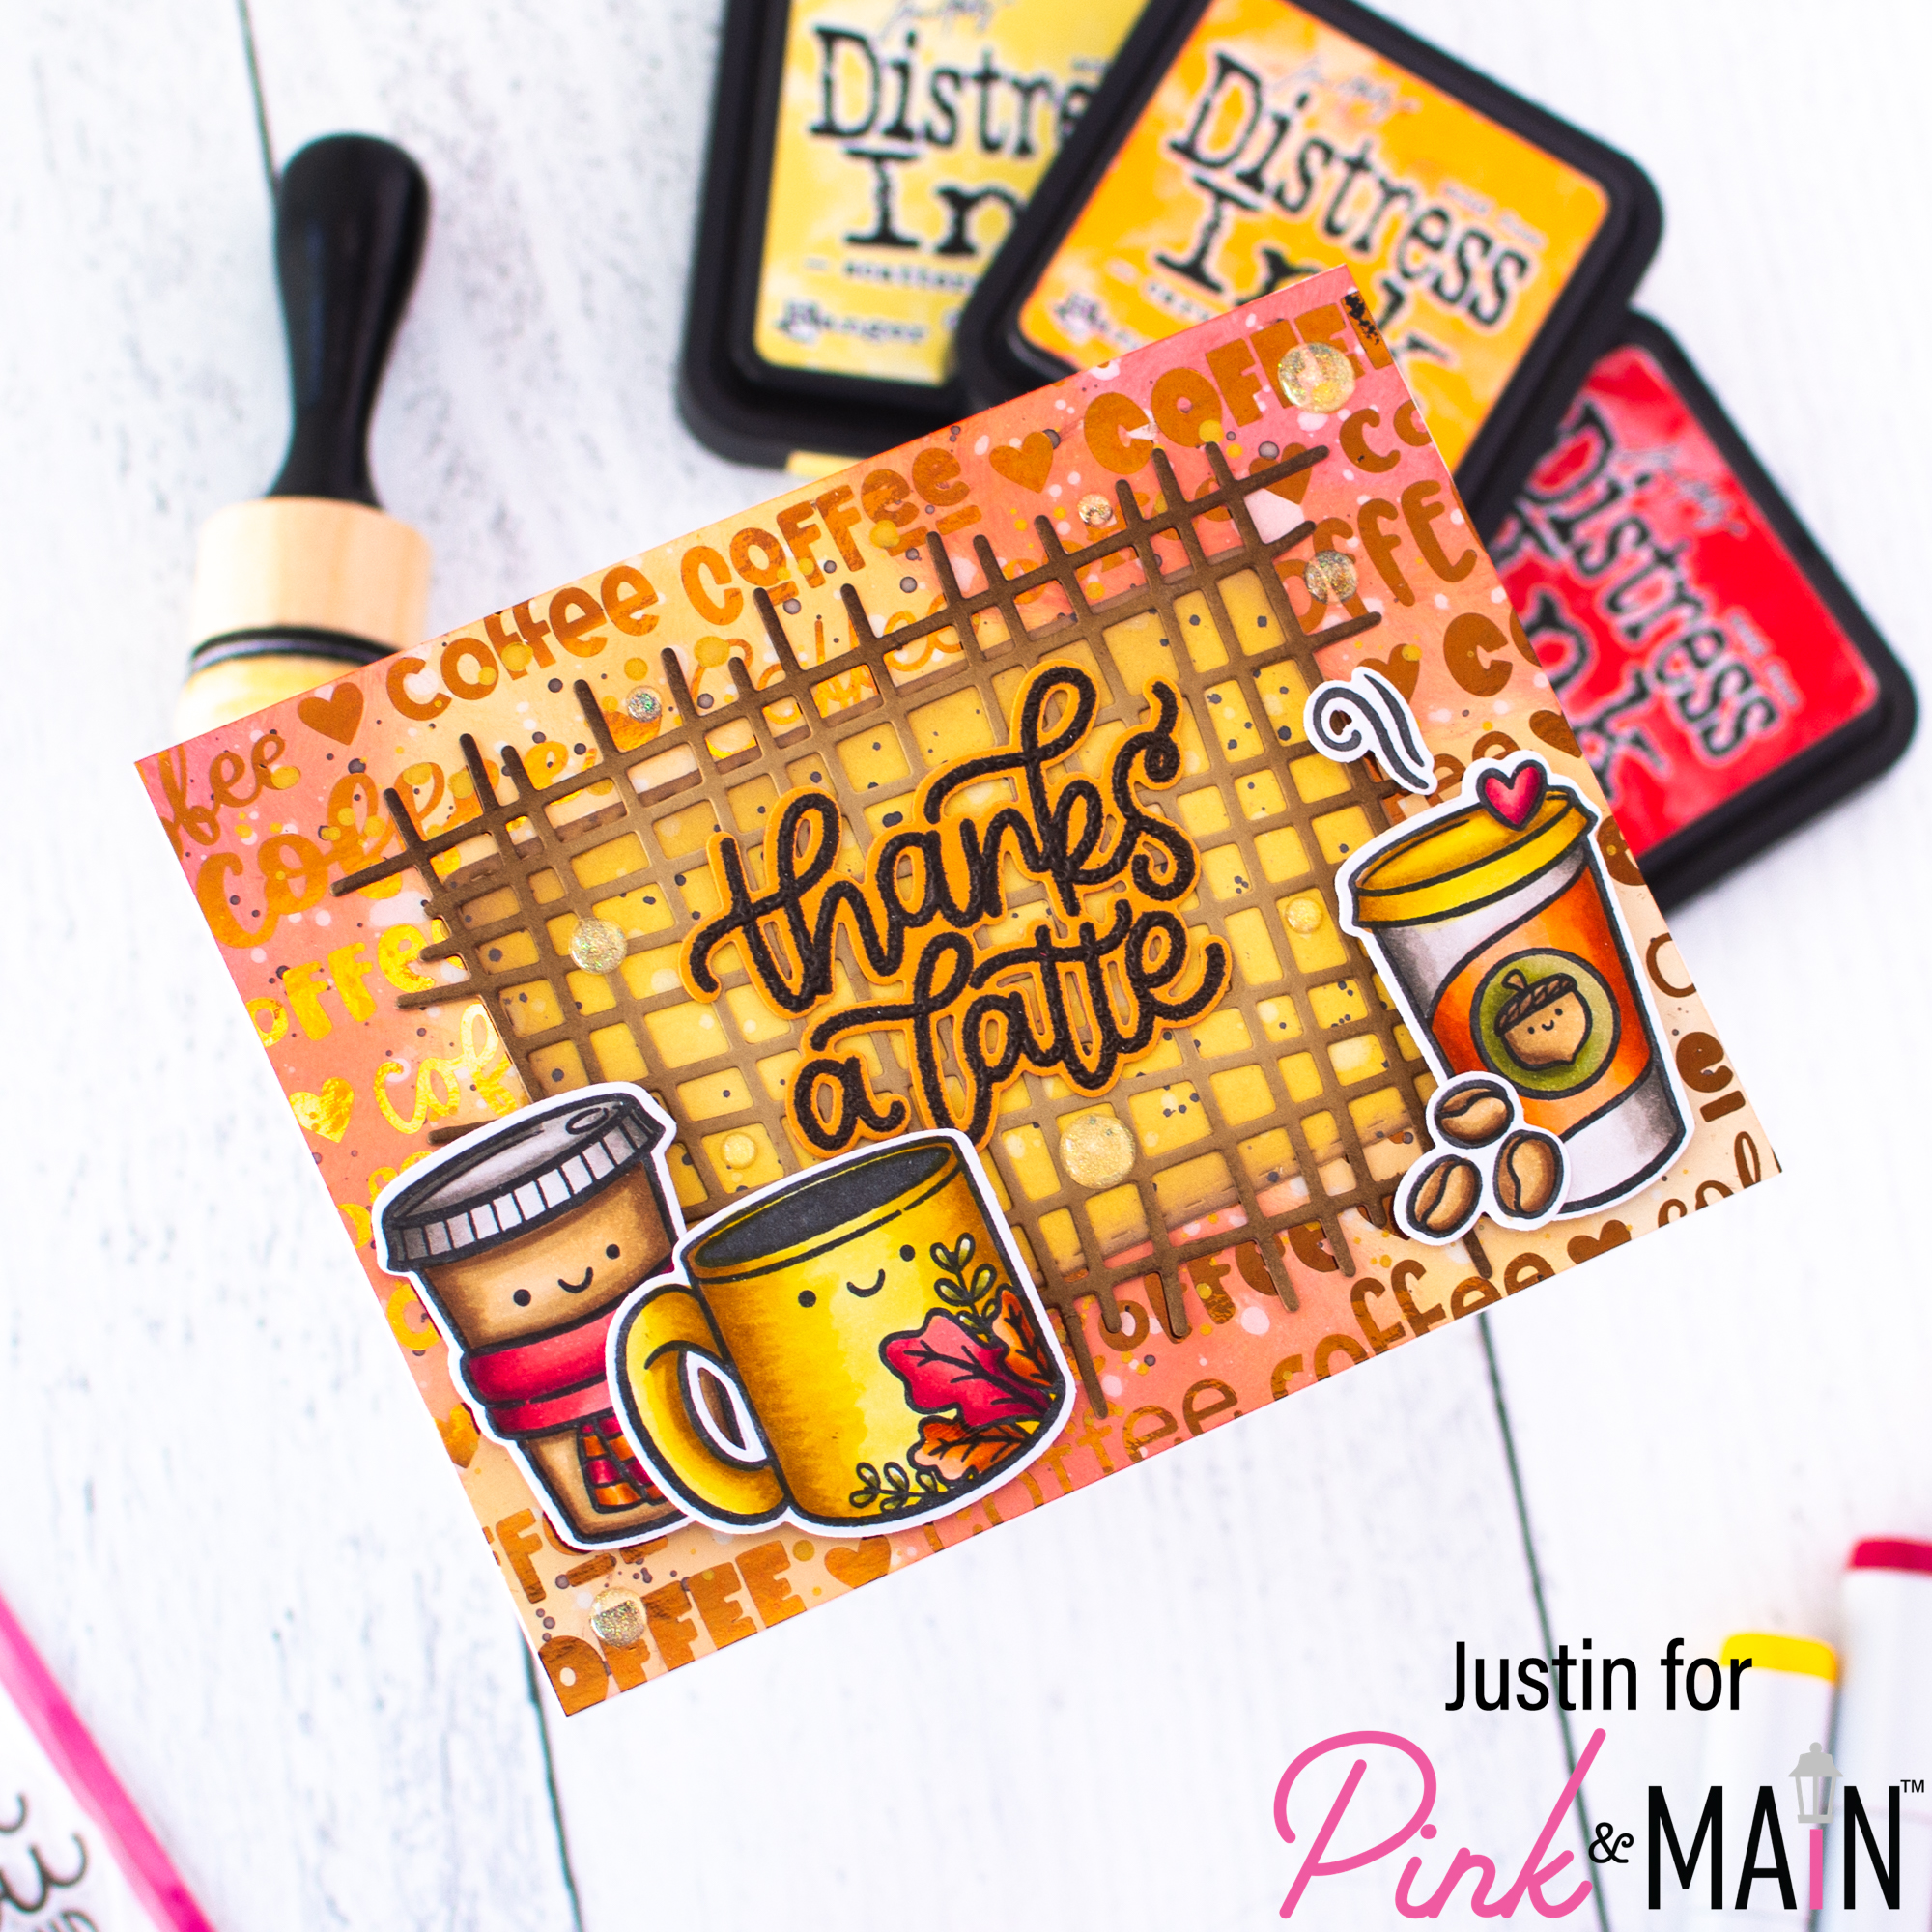
Hello friends! Today, I am sharing a foiled “thank you” card that I created using the new Thanks a Latte Stamp Set with the Coffee Lovers Foilable Kit to create this foiled A2 card!
Below is a list of products that I used to create this card:
Pink & Main Products:
Thanks a Latte
Thanks a Latte Dies
Coffee Lover Foilable Kit
Bronze CheerFoil
Crosshatch Die
Stitched Rounded Rectangle Dies
Clear Embossing Powder
Embossing Watermark Ink Pad
Clear Glitter Enamel Dots
Pebble Cardstock
Construction Cardstock
Foam Tape
Liquid Adhesive
Mini Minc Machine
Other Key Products Used:
Copic Markers
Distress Inks: Candied Apple, Carved Pumpkin, Scattered Straw, Vintage Photo & Ground Espresso
Distress Oxide Inks: Scattered Straw & Wild Honey
Prima Metallic Watercolor Accents
Now let’s get into some details for how I put this card together!
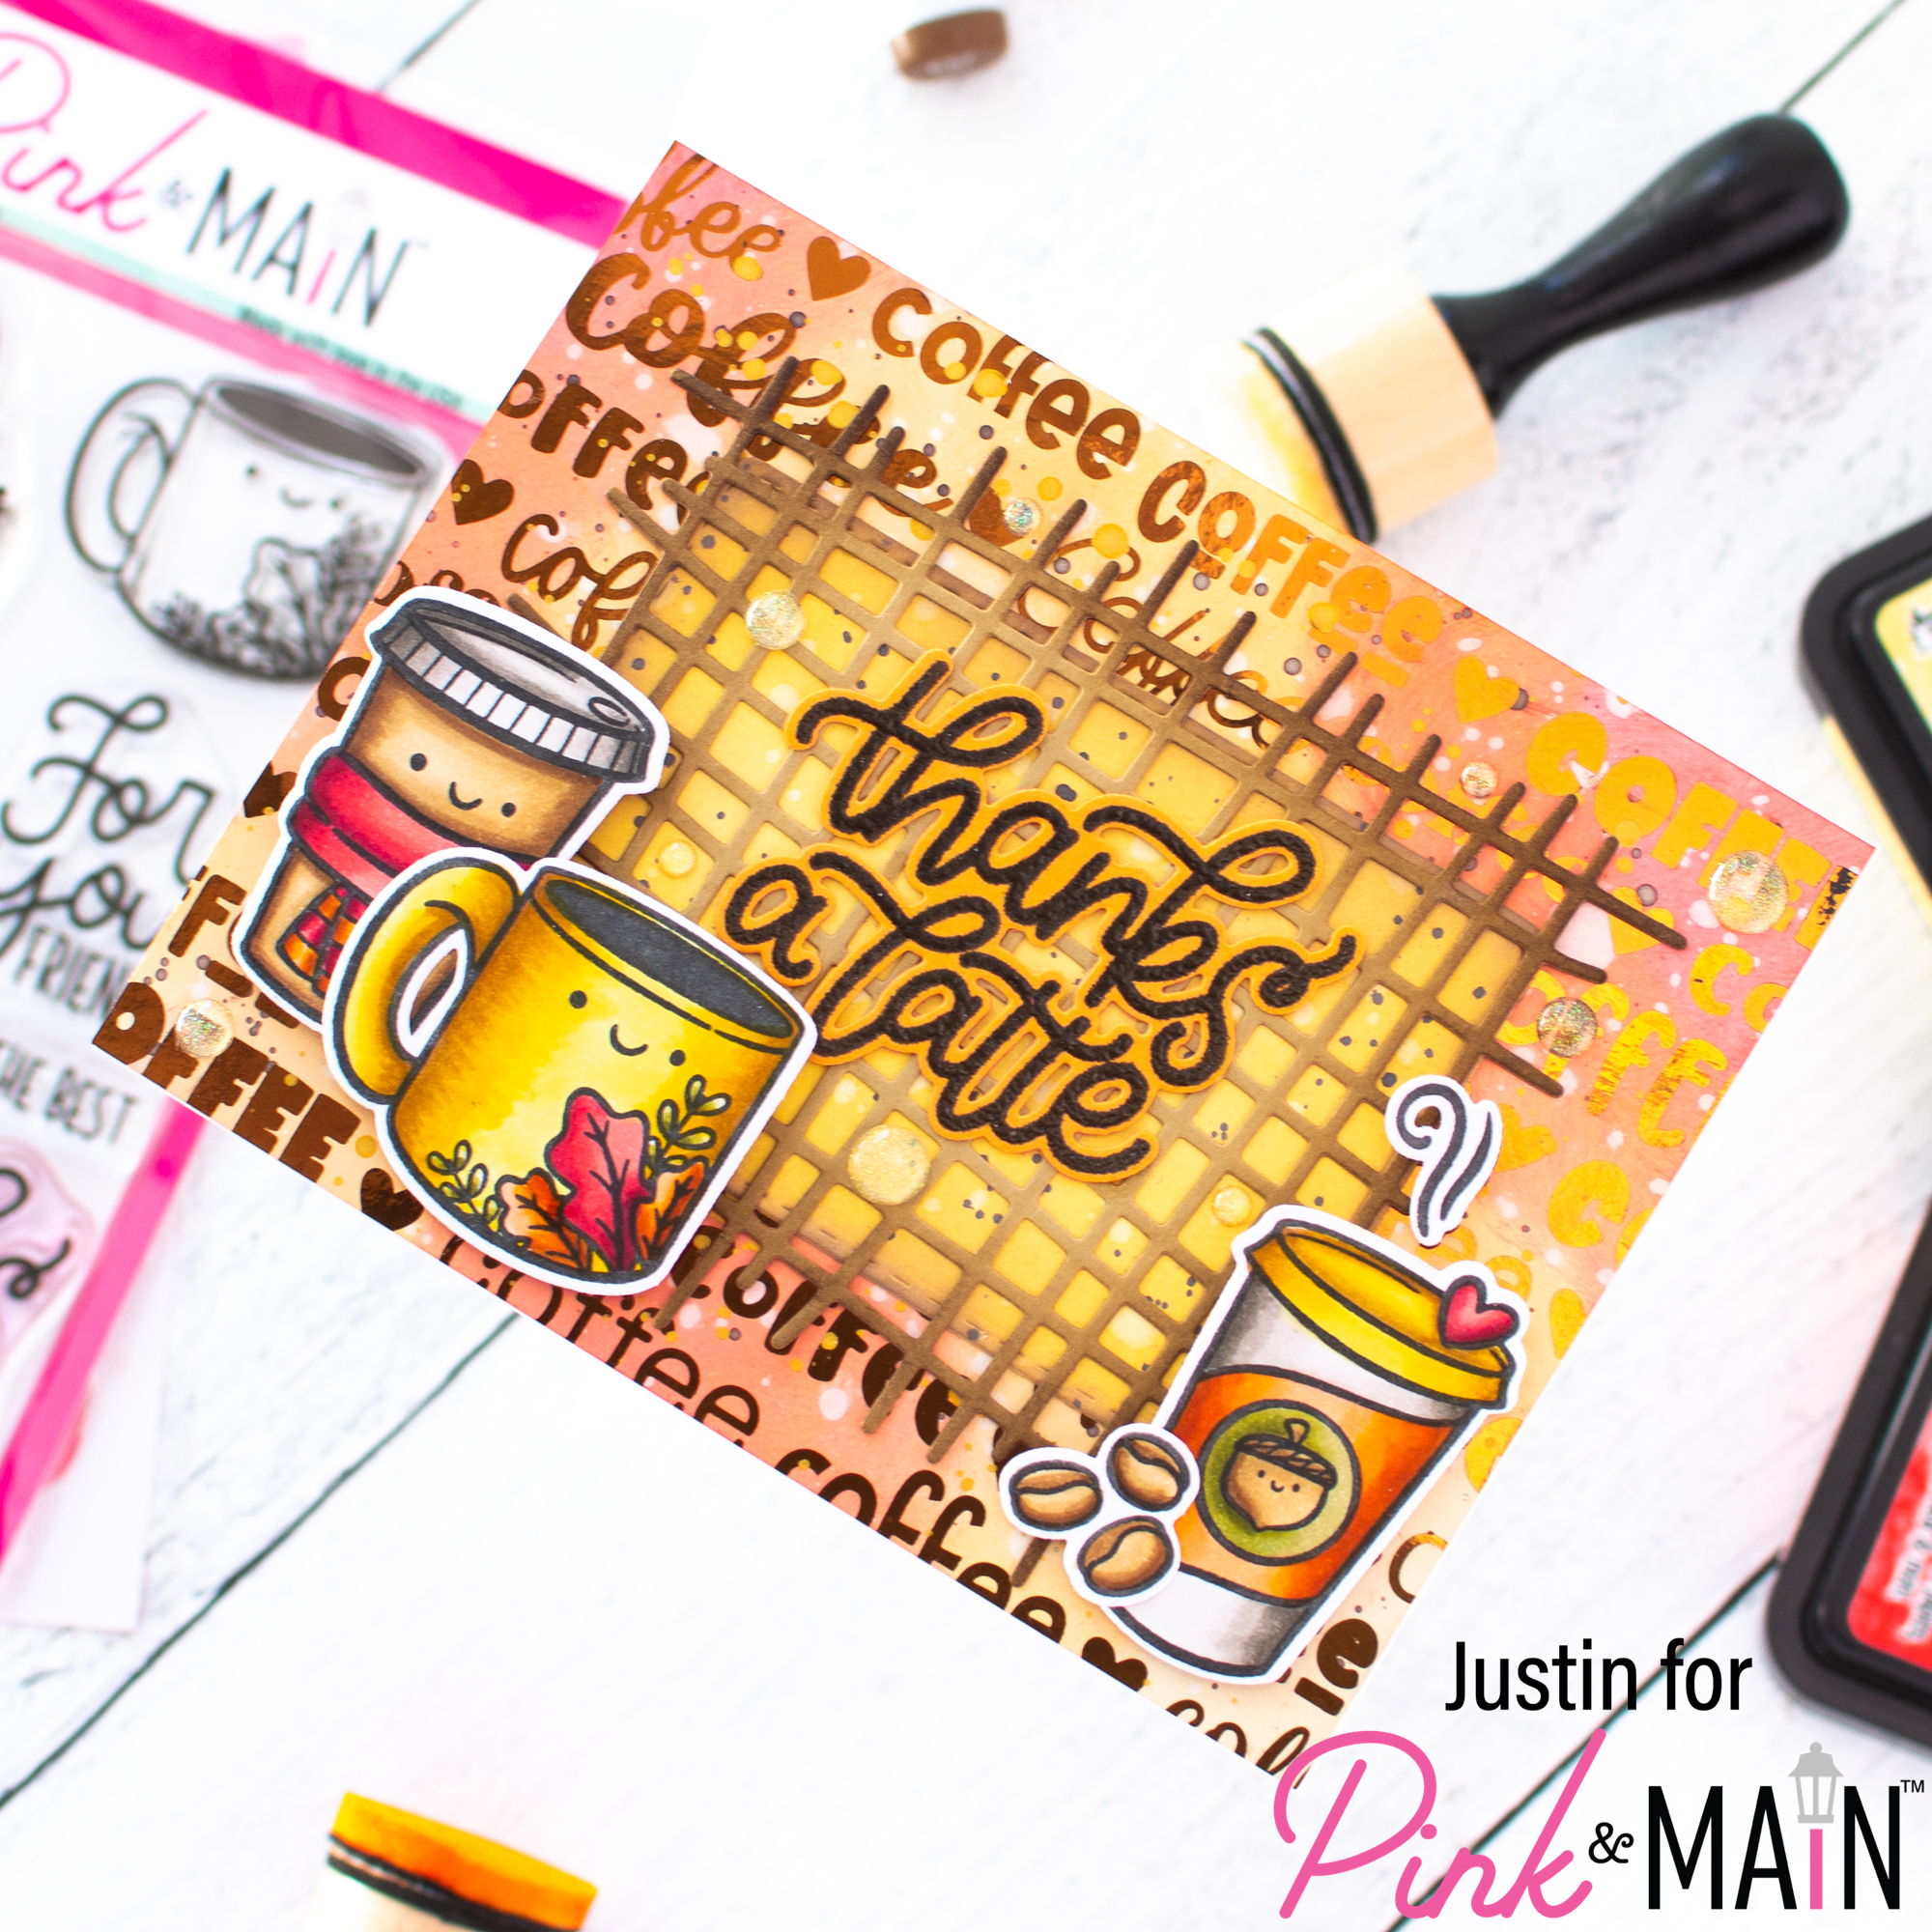
For this card, I colored up a handful of images from Thanks a Latte with autumn-color Copic Markers and used the coordinating dies to cut the images out. I also stamped out my sentiment “thanks a latte” on Construction Cardstock in brown ink, and then stamped over it in Watermark Embossing Ink. I heat embossed the sentiment with Clear Embossing Powder and used the coordinating dies to cut it out.
To create my background, I ink blended over a trimmed down panel from the Coffee Lover Foilable Kit with Candied Apple, Carved Pumpkin and Scattered Straw Distress Inks. I spritzed the panel with water. I then processed it through my Mini Minc with Bronze CheerFoil. Once my panel was foiled, I splattered the panel with both Vintage Photo Distress Ink and Gold Metallic Watercolor.
I then ink-blended a panel die cut with the Stitched Rounded Rectangles with Scattered Straw and Wild Honey Distress Oxide Ink, distressed the edges with Vintage Photo Distress Ink. I splattered the panel with water and also with Ground Espresso Distress Ink. I die cut a Crosshatch die from Pebble Cardstock and distressed the edges with Ground Espresso Distress Ink. I adhered the Crosshatch die cut directly on top of the Stitched Rounded Rectangle Die Cut, and then adhered my unit to my foiled card panel.
Using Foam Tape and Liquid Adhesive, I adhered my images and sentiment to my card. I placed a few Clear Glitter Enamel Dots to my card and adhered it to an A2-sized card base. My card was complete!
Thank you so much for stopping by today! I this coffee card leaves you with some crafty inspiration for your next Thank You card!
Don’t forget that for more crafty inspiration, you can follow me on Instagram, subscribe to my channel on YouTube, and check out my personal blog as well!
Thanks again for stopping by!
Happy Crafting!
Justin
Did you know that I have written a special blog post that I rank all of the current Distress Oxide colors?
Check it out if you haven’t yet! I have had a lot of great response from people who have used this list to start their Distress Oxide Journey!
Leave a Reply