

This post uses affiliate links at no additional cost to you! By clicking the links in this post, I earn a small commission should you make a purchase. Thank you in advance!
Hello everyone! Today I am so excited to be sharing a project that I created using the new Sending Happy Mail Stamp Set! This super cute 4″ x 6″ stamp set has 3 critters, and some really bold sentiments that are just perfect to send to a friend!
I used a selection of Pink & Main products to put this card together so let’s get into the details!
Pink & Main Products Used:
Sending Happy Mail Stamp Set
Sending Happy Mail Coordinating Dies
Premium Dye Inks: Night Sky, Dress Shop & Construction
Cardstock: Night Sky, Dress Shop & Construction
Frosting Embossing Powder
Icicle Embossing Powder
Embossing Watermark Ink Pad
Magic Anti-Static Brush
Mini Ergonomic Blending Brush
Other Key Products Used:
Copic Markers
Metallic Watercolor Accents
Let’s get into the details for how I put this card together!

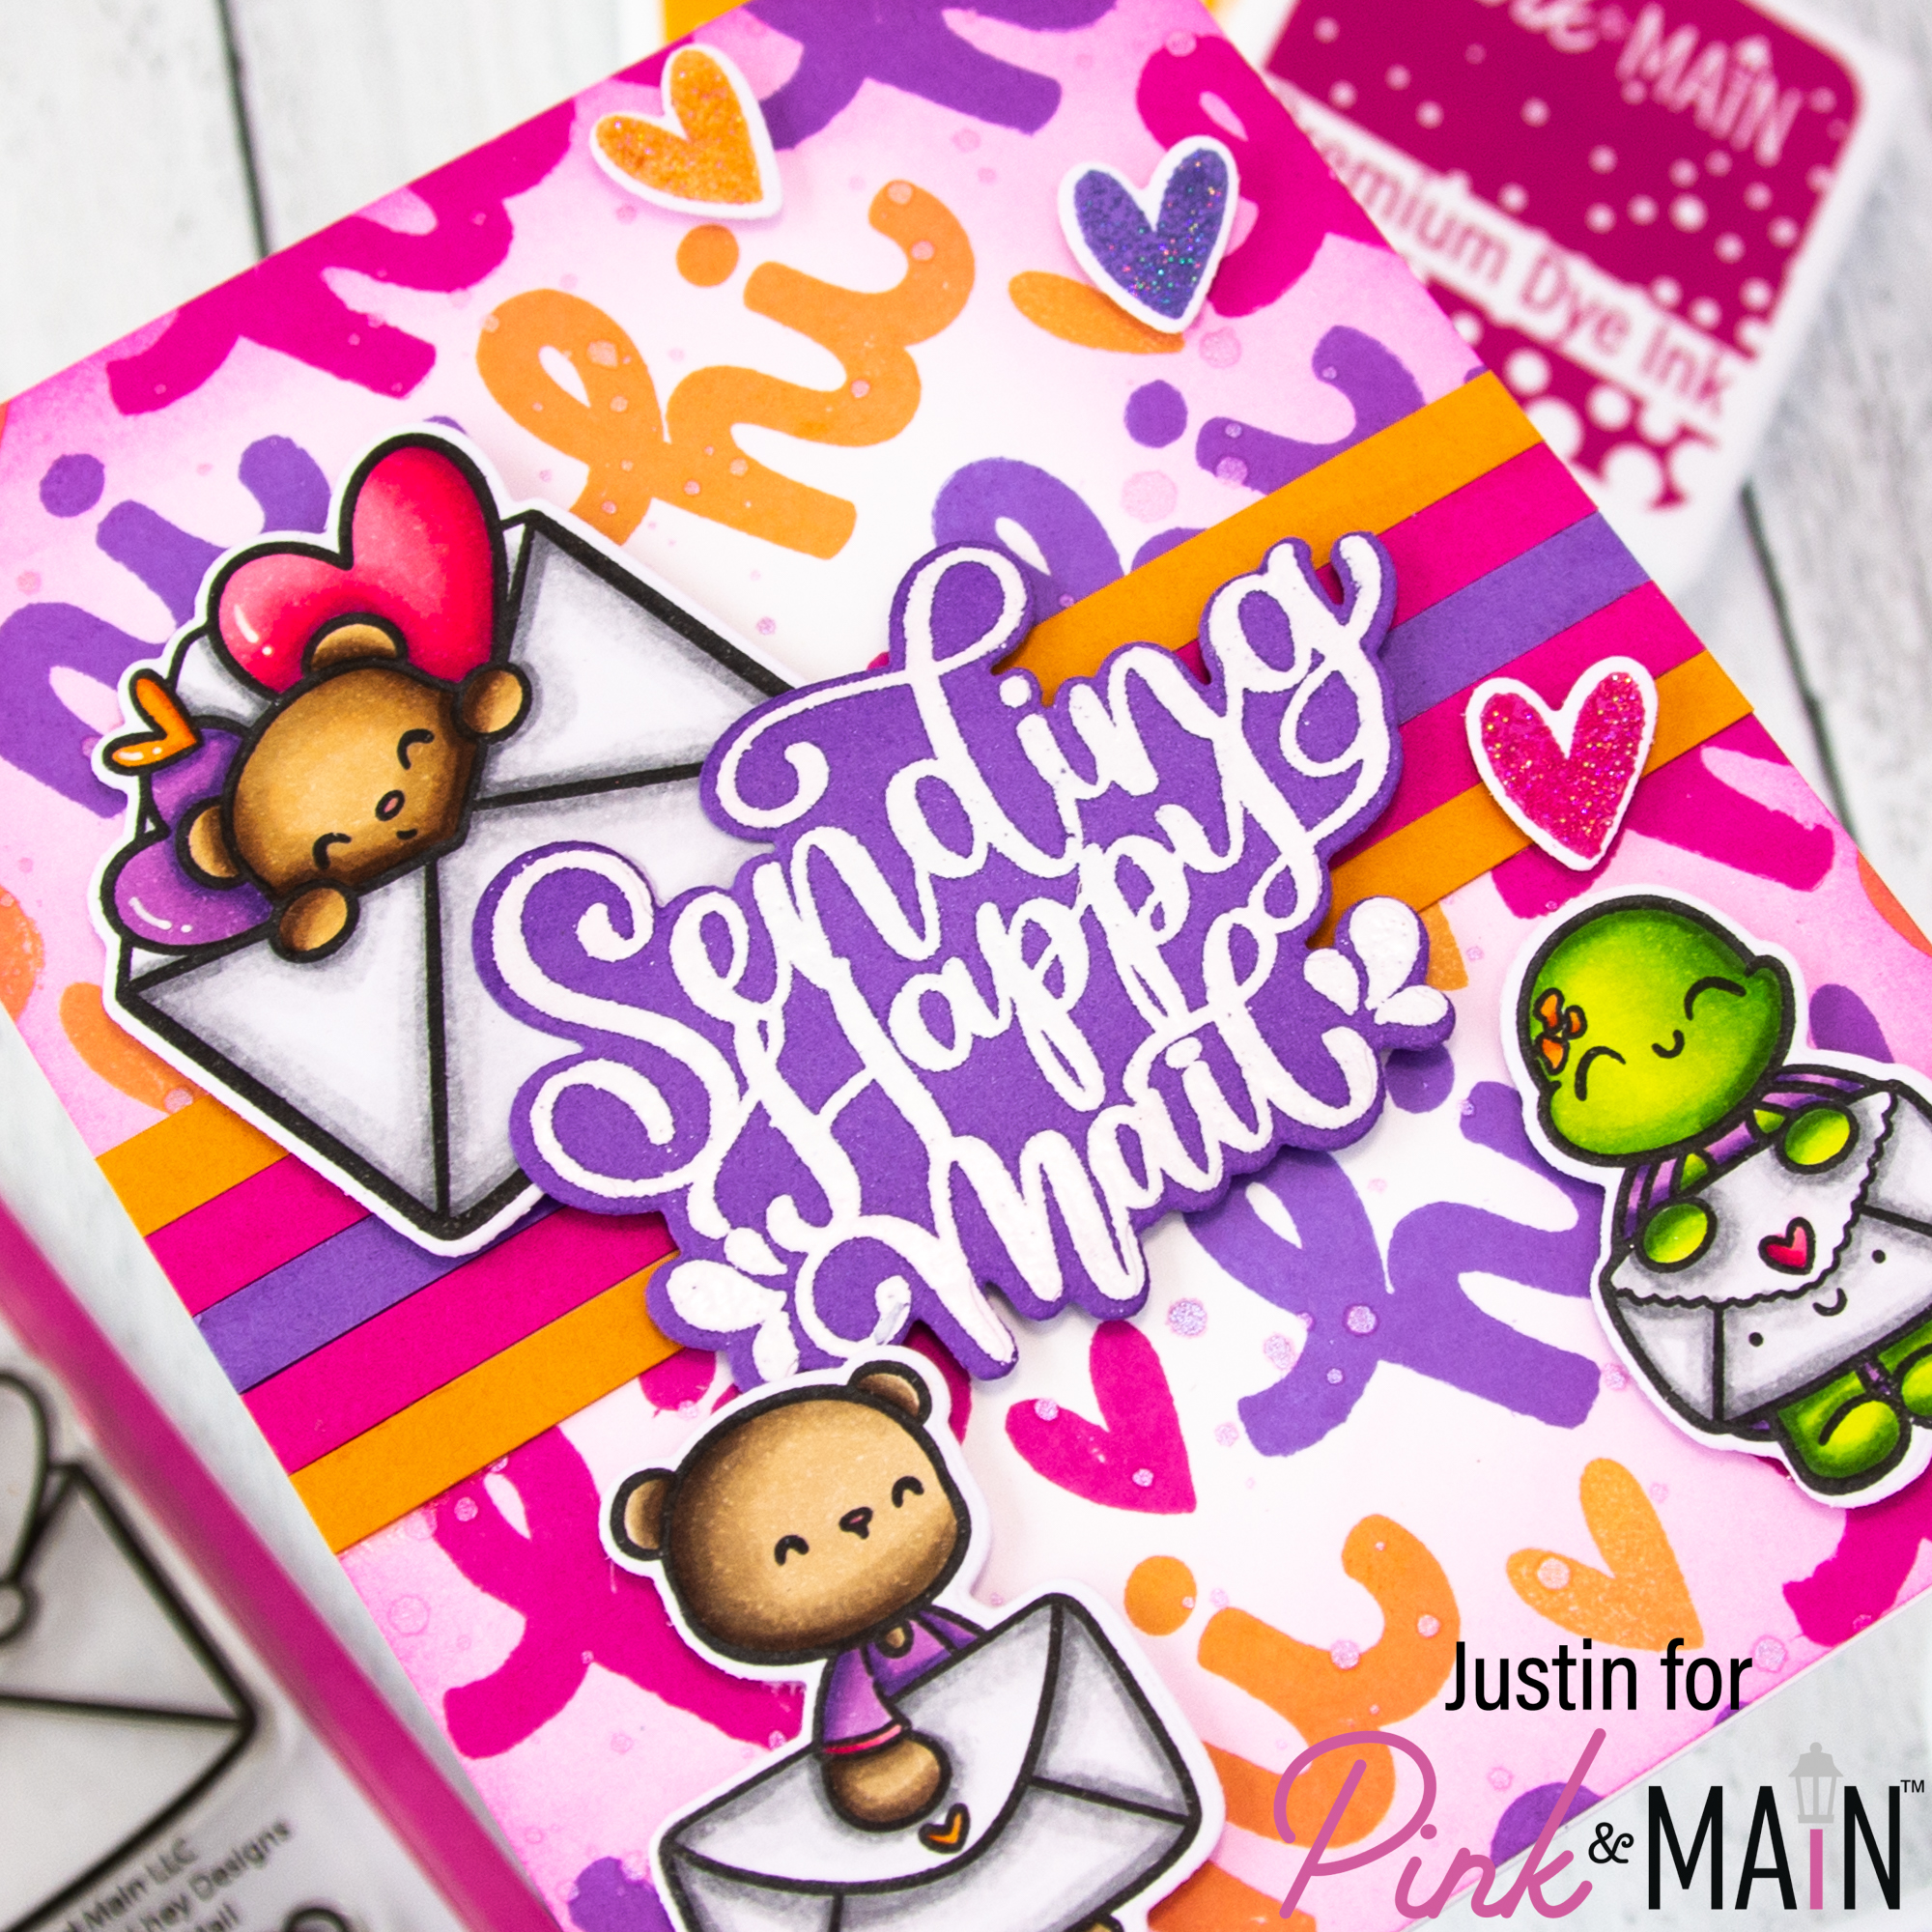
As always, I started my project off my coloring all of my images from the Sending Happy Mail set with Copic Markers. I used the coordinating dies to cut them out and set them aside. I also stamped 3 of the solid heart images, 1 of each of the 3 Premium Dye Ink colors I am using for this card (Night Sky, Dress Shop & Construction). I heat embossed these hearts with Icicle Embossing Powder and used the coordinating dies to cut them out.
I cut an A2-sized piece of heavy white cardstock and began stamping the “hi” sentiment in a diagonal repetitive pattern, using the same 3 Premium Dye Ink colors. I also used the solid heart image to stamp the heart in some of the gaps as well. Once I was done stamping, I took a Mini Ergonomic Blending Brush, I blended the edges of the panel with Dress Shop Premium Dye Ink. I splattered the panel with Purple Metallic Watercolor and let it dry.
I had some 1/4″ strips of Night Sky, Construction, and Dress Shop Cardstock cut from a previous set of cards that I made (you can check out that post here), and adhered them as a stripe pattern in the center of my card.
Using Night Sky Cardstock, I heat embossed the sentiment “Sending Happy Mail” in Frosting Embossing Powder and cut it out with the coordinating dies. I distressed the edges of the cut out sentiment with Night Sky Premium Dye Ink.
Using a mixture of foam tape and liquid adhesive, I adhered my images and sentiment to the card. I also used liquid adhesive to adhere my panel to an A2-sized card base. My card was completed!
Thank you so much for stopping by my blog! I hope you are just adoring the January Release as much as I am! I can’t wait to see what you make with these new products!
For more crafty inspiration, please follow me on Instagram and check out my personal blog as well!
Thank you again for stopping by! Happy Crafting!
Justin
Be sure to follow me on Instagram at @justanotebyjustin and subscribe to my YouTube Channel for all my crafting projects!
Note: This blog does use affiliate links when possible. Please know that I only recommend products that I love and think you’ll love too!
Leave a Reply