This post uses affiliate links at no additional cost to you! By clicking the links in this post, I earn a small commission should you make a purchase. Thank you in advance!
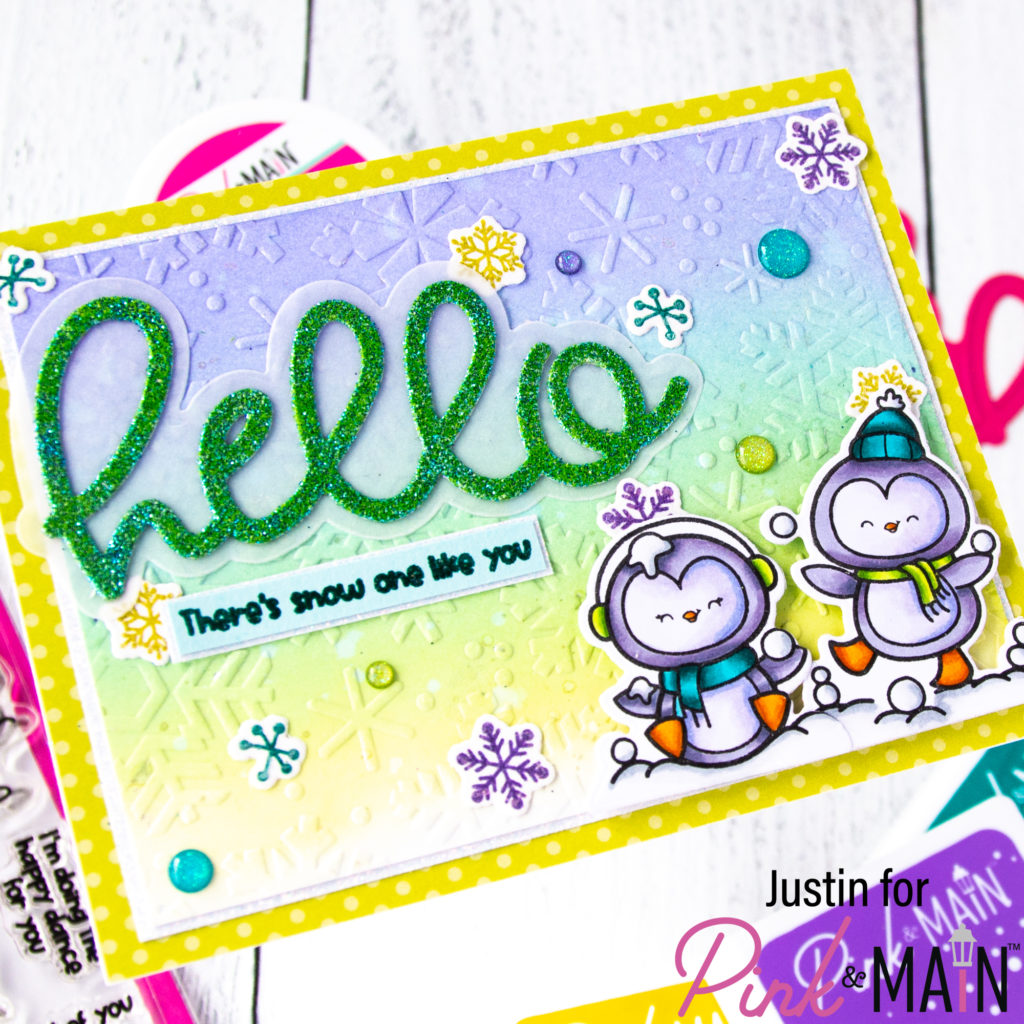
Hello friends! Justin here, and today I am sharing a card filled with cool-tones using the Snow One Like You stamp set! I just think these little penguins are the cutest, and I love coloring up these penguins in non-traditional colors!
I’ve got some tips and tricks below as to how I put this card together, so here we go!
Pink & Main Products Used:
Snow One Like You Stamp Set
Snow One Like You Coordinating Dies
Big Hello Dies
Snow Day Embossing Folder
Premium Dye Inks: The Park, Lakeside & Night Sky
Watermark Embossing Ink Pad
Chameleon Embossing Powder
Icicle Embossing Powder
Metallics Glitter Paper Pack
Year Round Dots & Stripes Paper Pack
Snow Day Glitter Enamel Dots
Other Key Products Used:
Copic Markers
Distress Oxide Inks: Twisted Citron, Salvaged Patina & Shaded Lilac
Sparkle Silk
Vellum
Liquid Adhesive
Foam Tape
I always like to start my cards by picking my color palette. A lot of times, when I incorporate patterned paper, I like to play off of the colors in that specific pattern. Or, I’ll just pick a color palette that speaks to me. I typically then color-up my images so I know what specific colors and sizes I will be working with. For this card, I picked (2) penguins from the Snow One Like You stamp set, and then cut them out with coordinating dies.
My background was pretty easy to pull together. I blended up my background using an ombré of Distress Oxide Inks. I splattered some water for some bleach marks too. I wanted an embossed background, so I misted the panel in water and placed it inside of the Snow Day Embossing Folder. Once embossed, I splattered some Sparkle Silk (basically special glitter liquid) over my card for a fun background element.
I wanted a big glittery sentiment, so I die cut the “hello” word from the Big Hello Dies, dredged it into the Embossing Watermark Ink Pad, and then heat embossed the die cut in Chameleon Powder. I actually repeated this process, because I wanted to make sure I got a thick and solid coverage of Embossing Powder.
In the spirit of heat embossing, I also stamped out some of the snowflakes from the Snow One Like You stamp set in The Park, Lakeside, and Night Sky Ink. Because this ink was taking a little white to dry, I heat embossed the snowflakes with Icicle Embossing Powder. This is a GREAT tip if you are finding your ink taking too long to dry on whatever paper you are using! I also stamped a sentiment in Lakeside Ink onto light blue cardstock, and also heat embossed that in Icicle Embossing Powder
I matted my main snowflake background with white glitter paper from the Metallics Glitter Paper Pack, and then adhered this panel to the Lime Green Dotted Patterned Paper from the Year Round Dots & Strips Paper Pack, trimmed to A2 sizing.
Now I was able to adhere all of my elements together. I adhered my images with foam tape, but adhered everything else with liquid adhesive. I finished off the card with some Snow Day Glitter Embossing Dots, and adhering the entire unit to an A2-sized card base!
Thank you so very much for stopping by and checking out my card! I hope this card inspires you to snag these super cute penguins and use them for more winter creations!
Justin
Be sure to follow me on Instagram at @justanotebyjustin and subscribe to my YouTube Channel for all my crafting projects!
Note: This blog does use affiliate links when possible. Please know that I only recommend products that I love and think you’ll love too!

