

This post uses affiliate links at no additional cost to you! By clicking the links in this post, I earn a small commission should you make a purchase. Thank you in advance!
Hello friends! Justin here, and I’m baking up some sweet holiday card-making today! The Pink & Main September Release is upon us, and I am so excited to be sharing a sneak peek of the delicious new set, Gingerbread Kisses! This set has some adorable cookies, a gingerbread house, and some really fun sentiments that will bring a smile to your loved one’s face!
Of course I have a brief walk through of how I put this card together to share with you!
Pink & Main Products Used:
Gingerbread Kisses Stamp Set
Gingerbread Kisses Coordinating Dies
Cranberries Embossing Powder
Floral Pumpkin Enamel Dots
Thin Alpha Die Set
Buffalo Plaid Embossing Folder
Homespun Christmas Paper Pack
Embossing Watermark Ink Pad
Magic Anti-Static Brush
Frosting Embossing Powder
Pebble Cardstock
Stop Sign Cardstock
Other Key Products Used:
Copic Markers
Copic Coloring Paper
Copic-safe Ink
Distress Oxide Inks: Salvaged Patina & Vintage Photo
Metallic Watercolor Accents
Alright, let’s get to the sugary details!
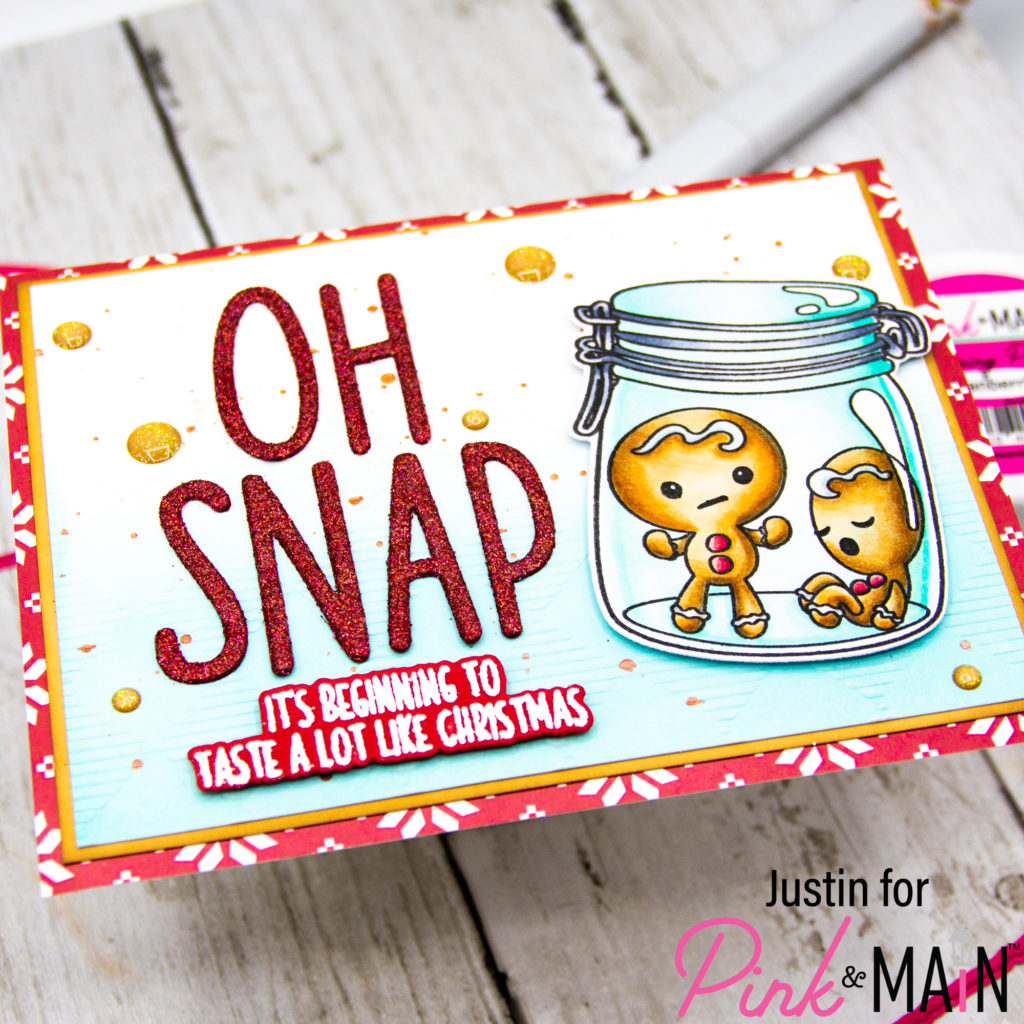
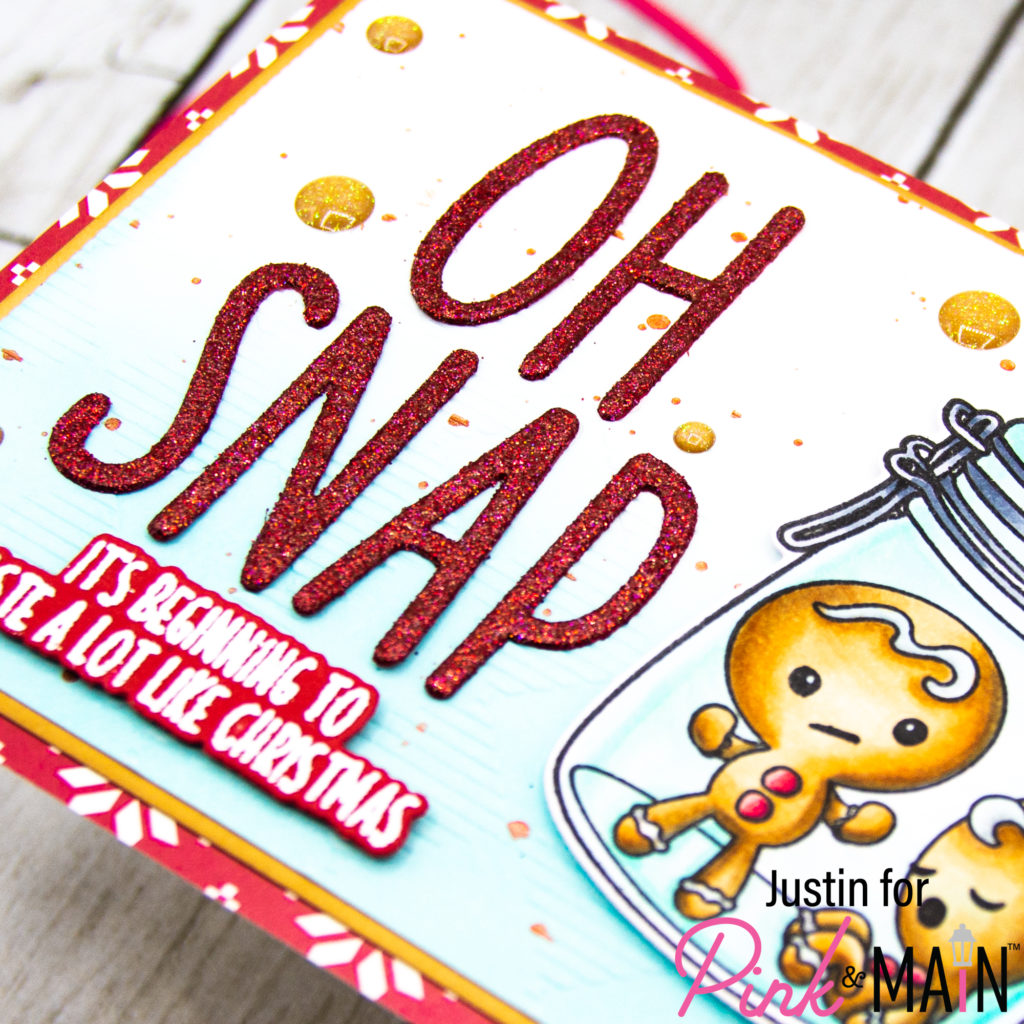
I started off my project by coloring up these adorable cookies in the jar from the Gingerbread Kisses stamp set with my Copic Markers. I used the coordinating dies to cut them out, and set them, aside for later.
Next, I wanted to get my embossing done. I went ahead and die cut the letters to spell “OH SNAP” twice from Stop Sign Cardstock using the Thin Alpha Die Set. I then adhered the letters on top of each other to get a stacked look. I pressed each letter into the Embossing Watermark Ink Pad and then poured the new Cranberries Embossing Powder onto each letter to heat emboss. Once embossed, I set aside. I then stamped out my the sentiment “It’s beginning to taste a lot like Christmas” in the Embossing Watermark Ink Pad onto Stop Sign Cardstock, brushed with the Magic Anti-Static Brush, and heat embossed that in Frosting Embossing Powder. I used the Gingerbread Kisses coordinating dies to cut out the sentiment.
I then took a 3.875″ x 5.125″ piece of white cardstock and blended from the bottom up with Salvaged Patina Distress Oxide Ink. I misted the panel, placed it into the Buffalo Plaid Embossing Folder, and processed it through my die-cutting machine. I then splattered some rusty red metallic watercolor onto the panel and let it dry. I adhered my die cut words with liquid tape, and then adhered the other sentiment and my image with foam tape. I also placed a few Floral Pumpkin Enamel dots around this panel as well.
Because I wanted a framed effect, I cut a 4″ x 5.25″ piece of Pebble Cardstock and distressed the edges with Vintage Photo Distress Ink. I adhered my embossed layer on top of my distressed Pebble Cardstock layer. I then adhered that layer onto an A2-sized pattern paper from the Homespun Christmas Paper Pack, and finally adhered the whole unit onto an A2-sized card base!
I was all complete!
Thank you so much for stopping by my blog today! I hope this sneak peek of the new Gingerbread Kisses stamp set leaves you hungry for some Christmas Cookie Crafting with the new Pink & Main September Release!
Happy Crafting!
Justin
Be sure to follow me on Instagram at @justanotebyjustin and subscribe to my YouTube Channel for all my crafting projects!
Note: This blog does use affiliate links when possible. Please know that I only recommend products that I love and think you’ll love too!
Leave a Reply