

This post uses affiliate links at no additional cost to you! By clicking the links in this post, I earn a small commission should you make a purchase. Thank you in advance!
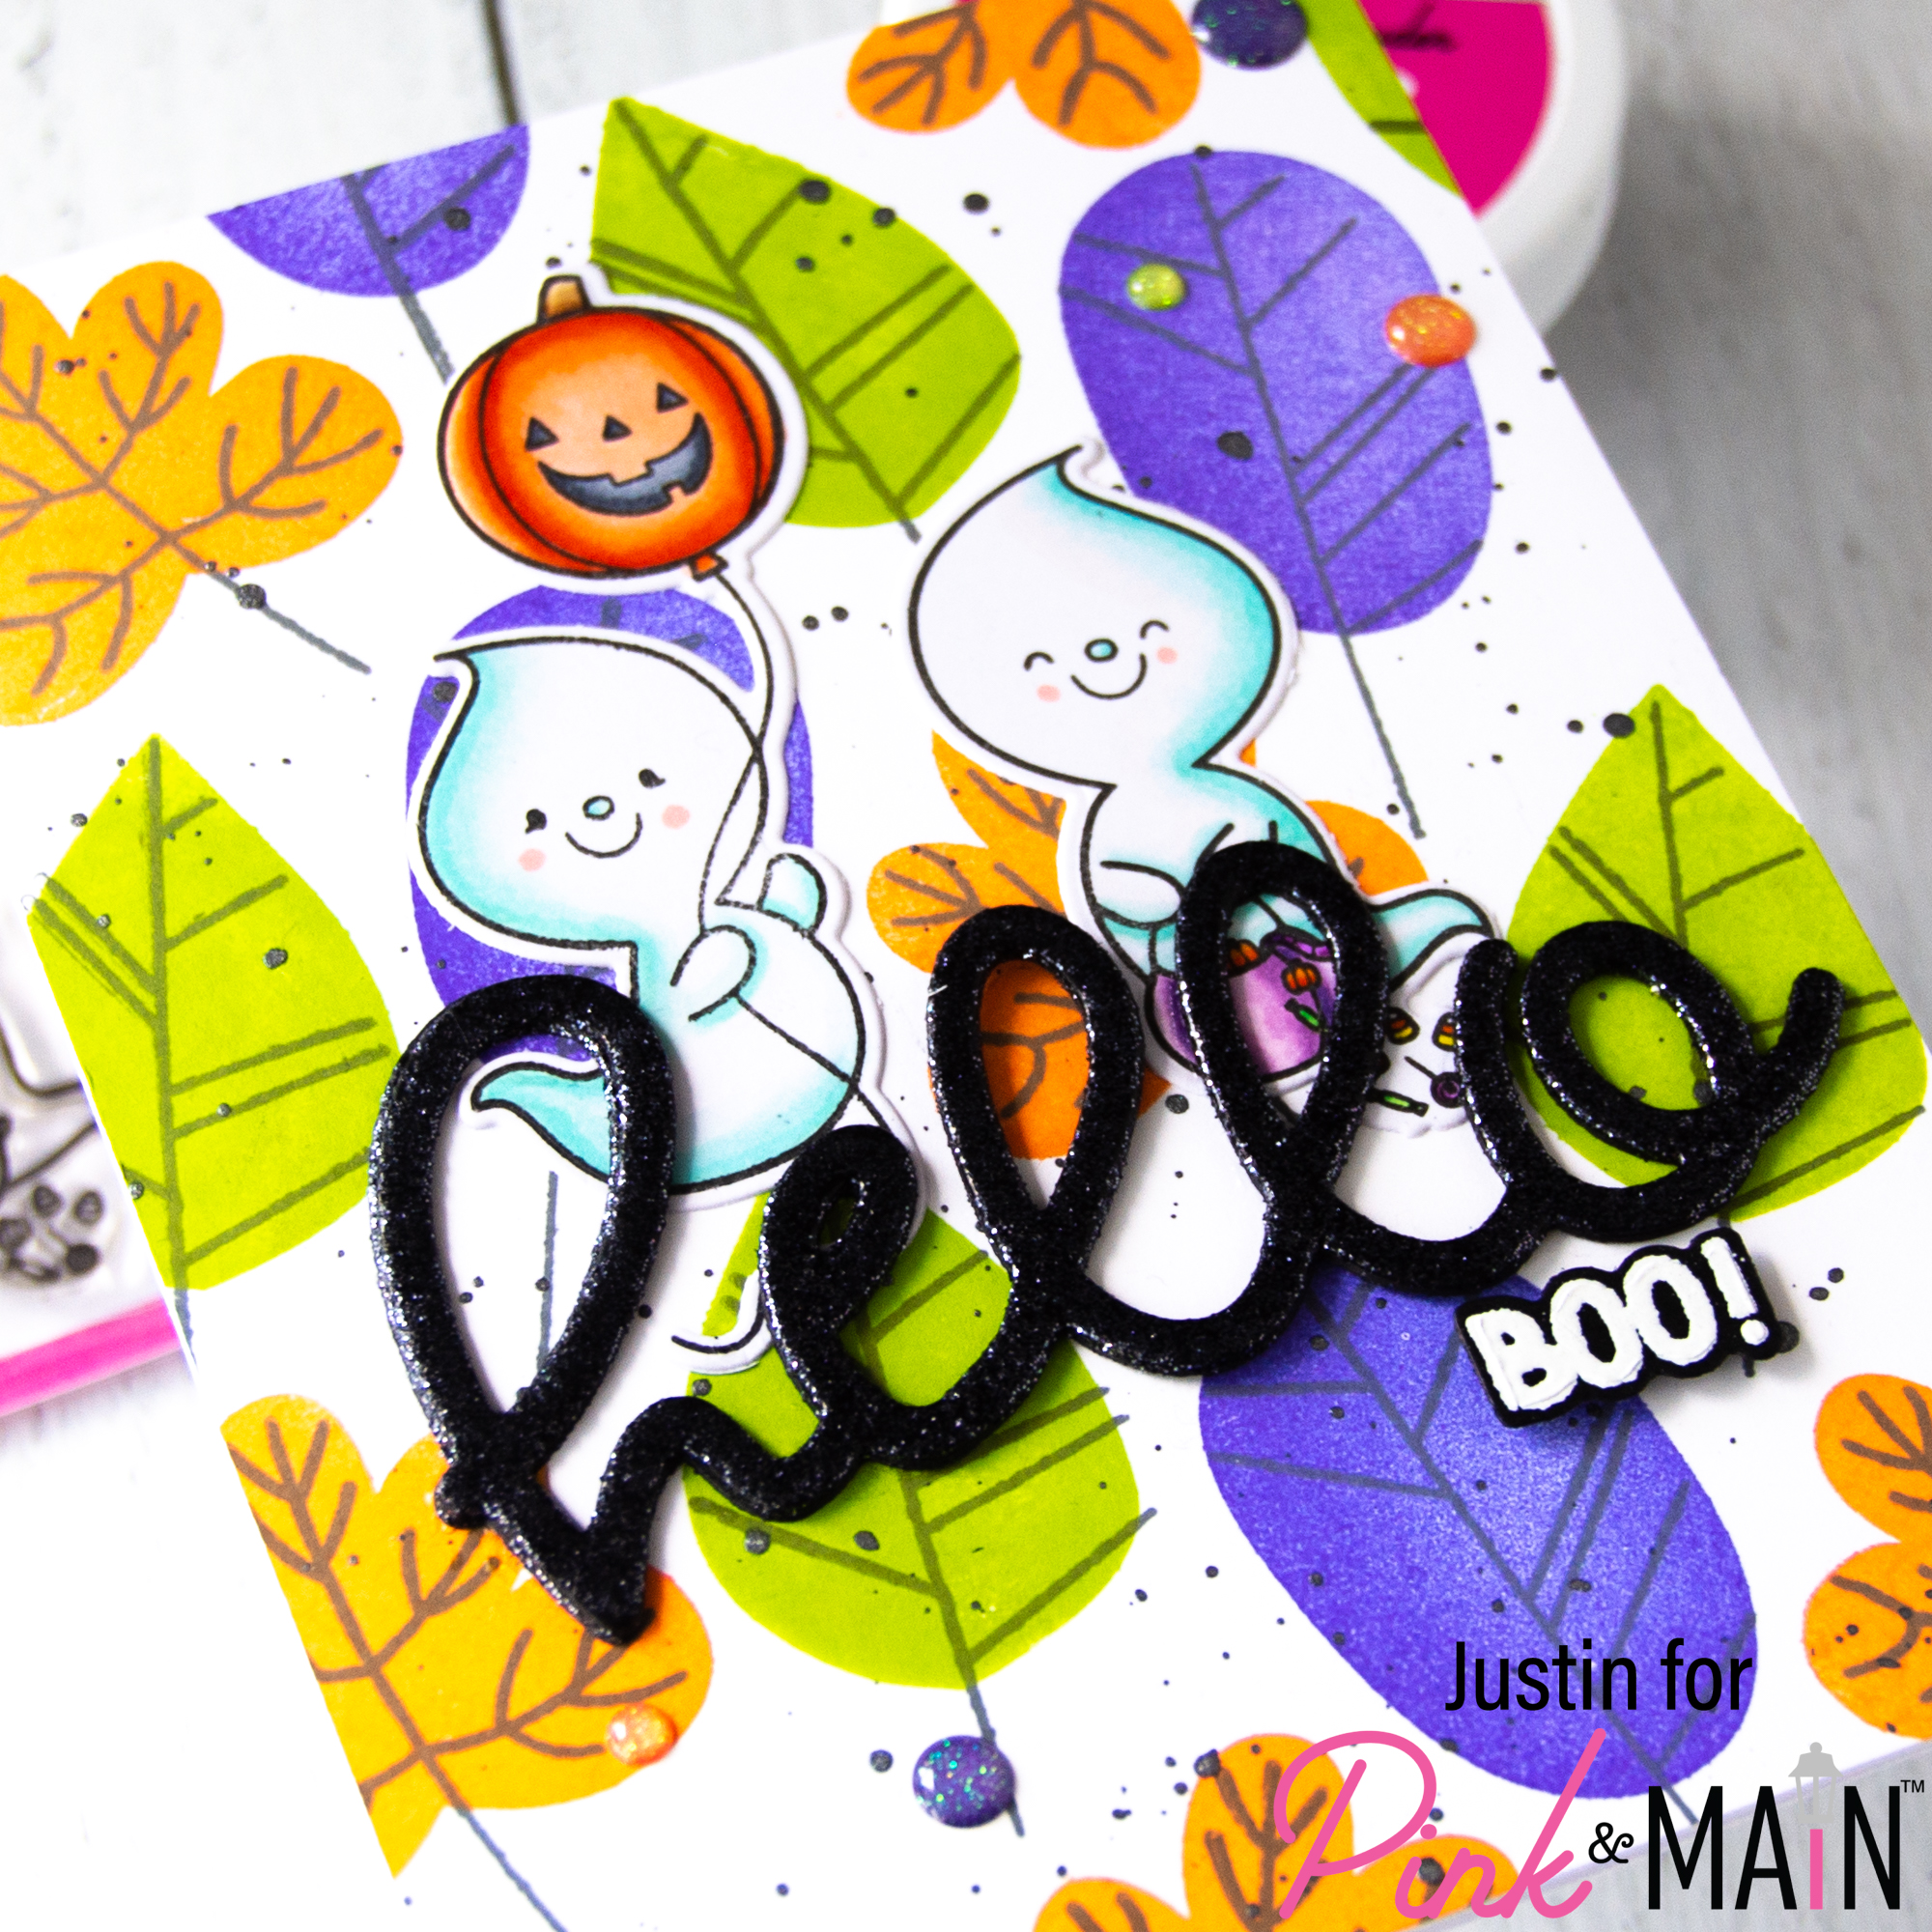
Hello spooky friends! Today I am sharing some Halloween inspiration with you all today using some of the products from the Pink & Main August release! I think the new Cute Ghosts stamp set is just pure Halloween adorable-ness, and I had a vision to use them with the new Modern Foliage stamp set as well!
Below is a listed of supplies used to create this card!
Pink & Main Products Used:
Cute Ghosts Stamp Set
Cute Ghosts Dies
Modern Foliage Stamp Set
Big Hello Dies
Asphalt Cardstock
Embossing Watermark In Pad
Magic Anti-Static Brush
Black Ice Embossing Powder
Frosting Embossing Powder
Rainbow Glitter Enamel Dots
Other Key Products Used:
Copic Markers
Copic-Safe Ink
Copic Coloring Paper
Hammermill Cardstock
Catherine Pooler Inks: Orange Twist, Lime Rickey, Grape Crush & Black Jack
Metallic Watercolor Accents
Foam Tape
Alright, let’s get to the details for how I put this card together!
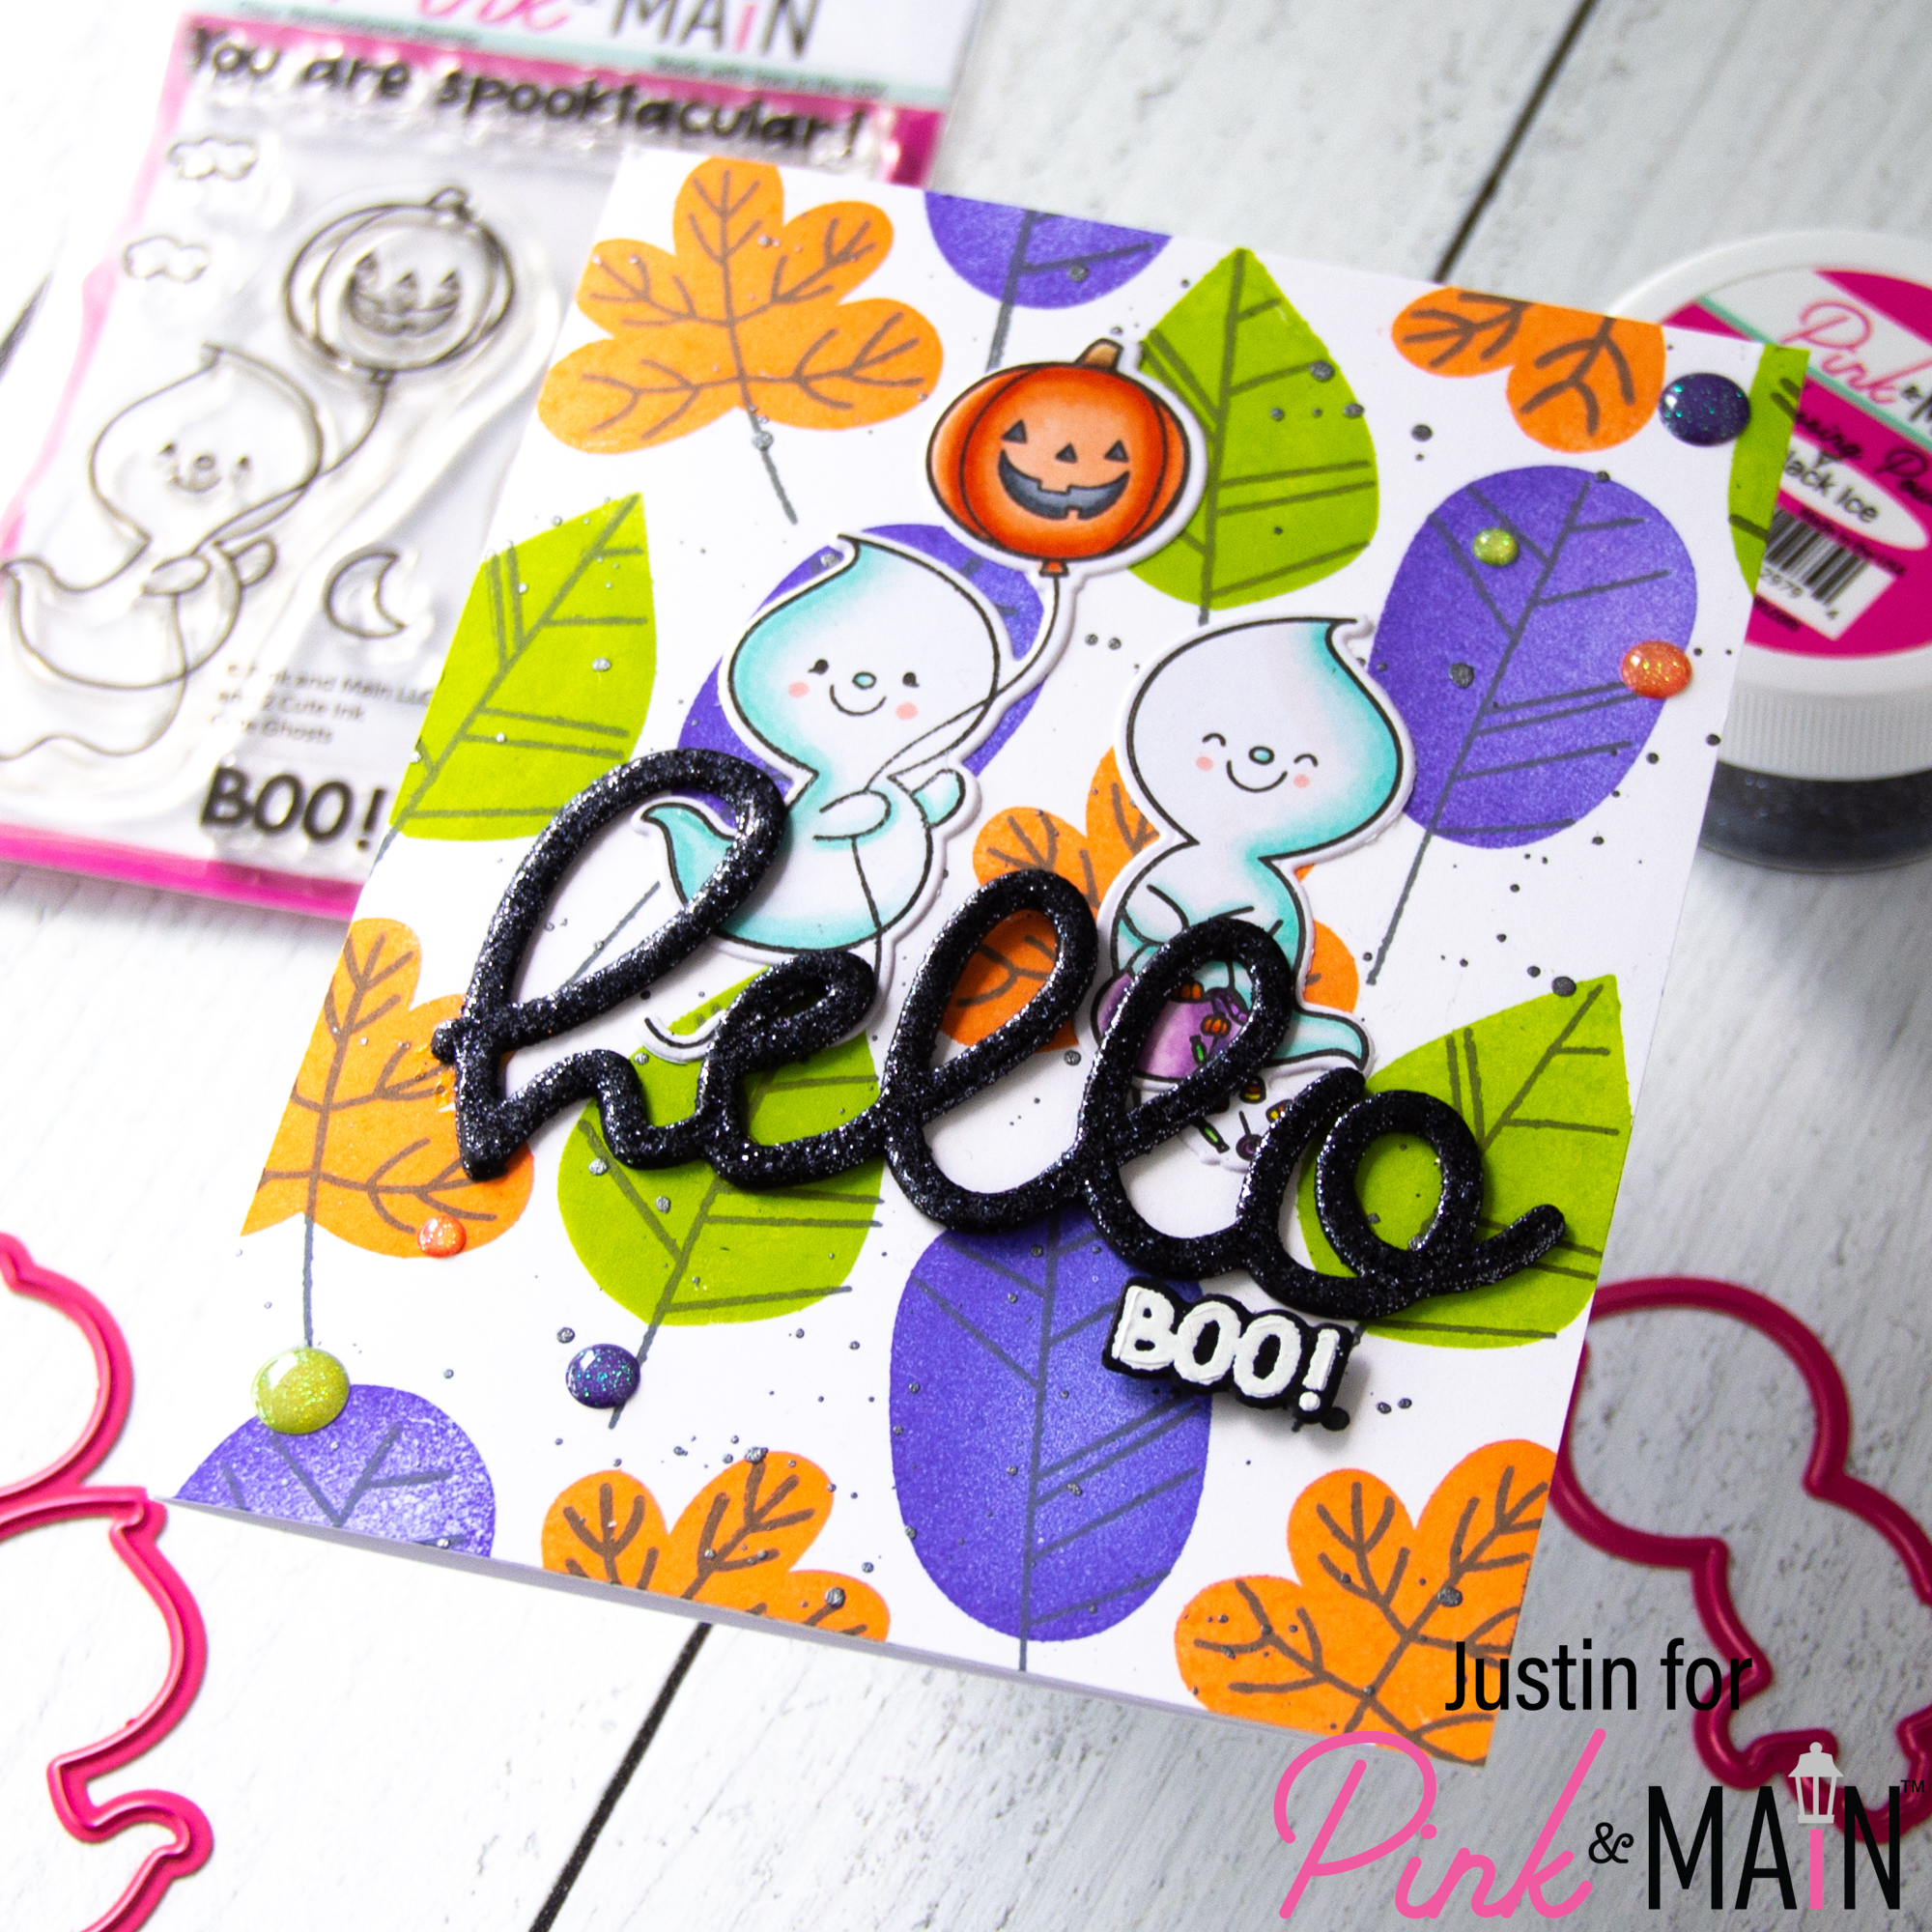
I started off by coloring up both of the ghosts from the Cute Ghosts stamp set with my Copic Markers. I used the coordinating dies to cut them out and set them aside.
For my background, I took an A2-sized piece of Hammermill Cardstock, which I found works very well when stamping solid images, and began to stamp out 3 different leaf shapes from the Modern Foliage stamp set. I used Orange Twist, Lime Rickey & Grape Crush ink by Catherine Pooler for these colors. Then, I went in and stamped the leaf veins with Black Jack ink.
Once my stamping was complete, I splattered the panel with black metallic watercolor and set it aside to dry.
I wanted a very bold sentiment, so I die cut the “hello” die from the Big Hello Die Set 3 times from Asphalt Cardstock. For one of my layers, I smooshed the Embossing Watermark Ink Pad all over the top, poured Black Ice Embossing Powder over top, heat embossed the powder, and repeated the process for a 2nd layer. This gave a really glossy and glittery word die cut. I also thought using the Asphalt Cardstock would act as a good base incase there were any small areas that may not have gotten embossing powder on it, as it would hide those imperfections. I adhered my 3 layers together with my glitter embossed layer on top, which really gave my sentiment some lift!
I then took a small scrap of Asphalt Cardstock, brushed it with the Magic Anti-Static Brush, and heat embossed the sentiment “Boo!” from the Cute Ghosts stamp set in Frosting Embossing Powder, and then used the coordinating dies to cut it out.
It was now time to assemble my card. I adhered my ghosts with liquid adhesive to my background, and then adhered my stacked hello die on top of them. I used foam tape to adhere my “Boo!” sentiment. I popped on some Rainbow Glitter Enamel Dots, and adhered my entire card front to an A2-sized card base. My card was complete!
Thank you so much for stopping by my blog today and for checking out my project! I am hoping that this card “leafs” you with some Halloween-crafting inspiration, along with some ideas on how the Modern Foliage stamp set can be used with so many color palettes!
Thank you again for stopping by, and happy crafting!
Justin
Justin
Be sure to follow me on Instagram at @justanotebyjustin for all my crafting projects!
Note: This blog does use affiliate links when possible. Please know that I only recommend products that I love and think you’ll love too!
Did you know that I have written a special blog post that I rank all of the current Distress Oxide colors?
Check it out if you haven’t yet! I have had a lot of great response from people who have used this list to start their Distress Oxide Journey!
Leave a Reply