

This post uses affiliate links at no additional cost to you! By clicking the links in this post, I earn a small commission should you make a purchase. Thank you in advance!
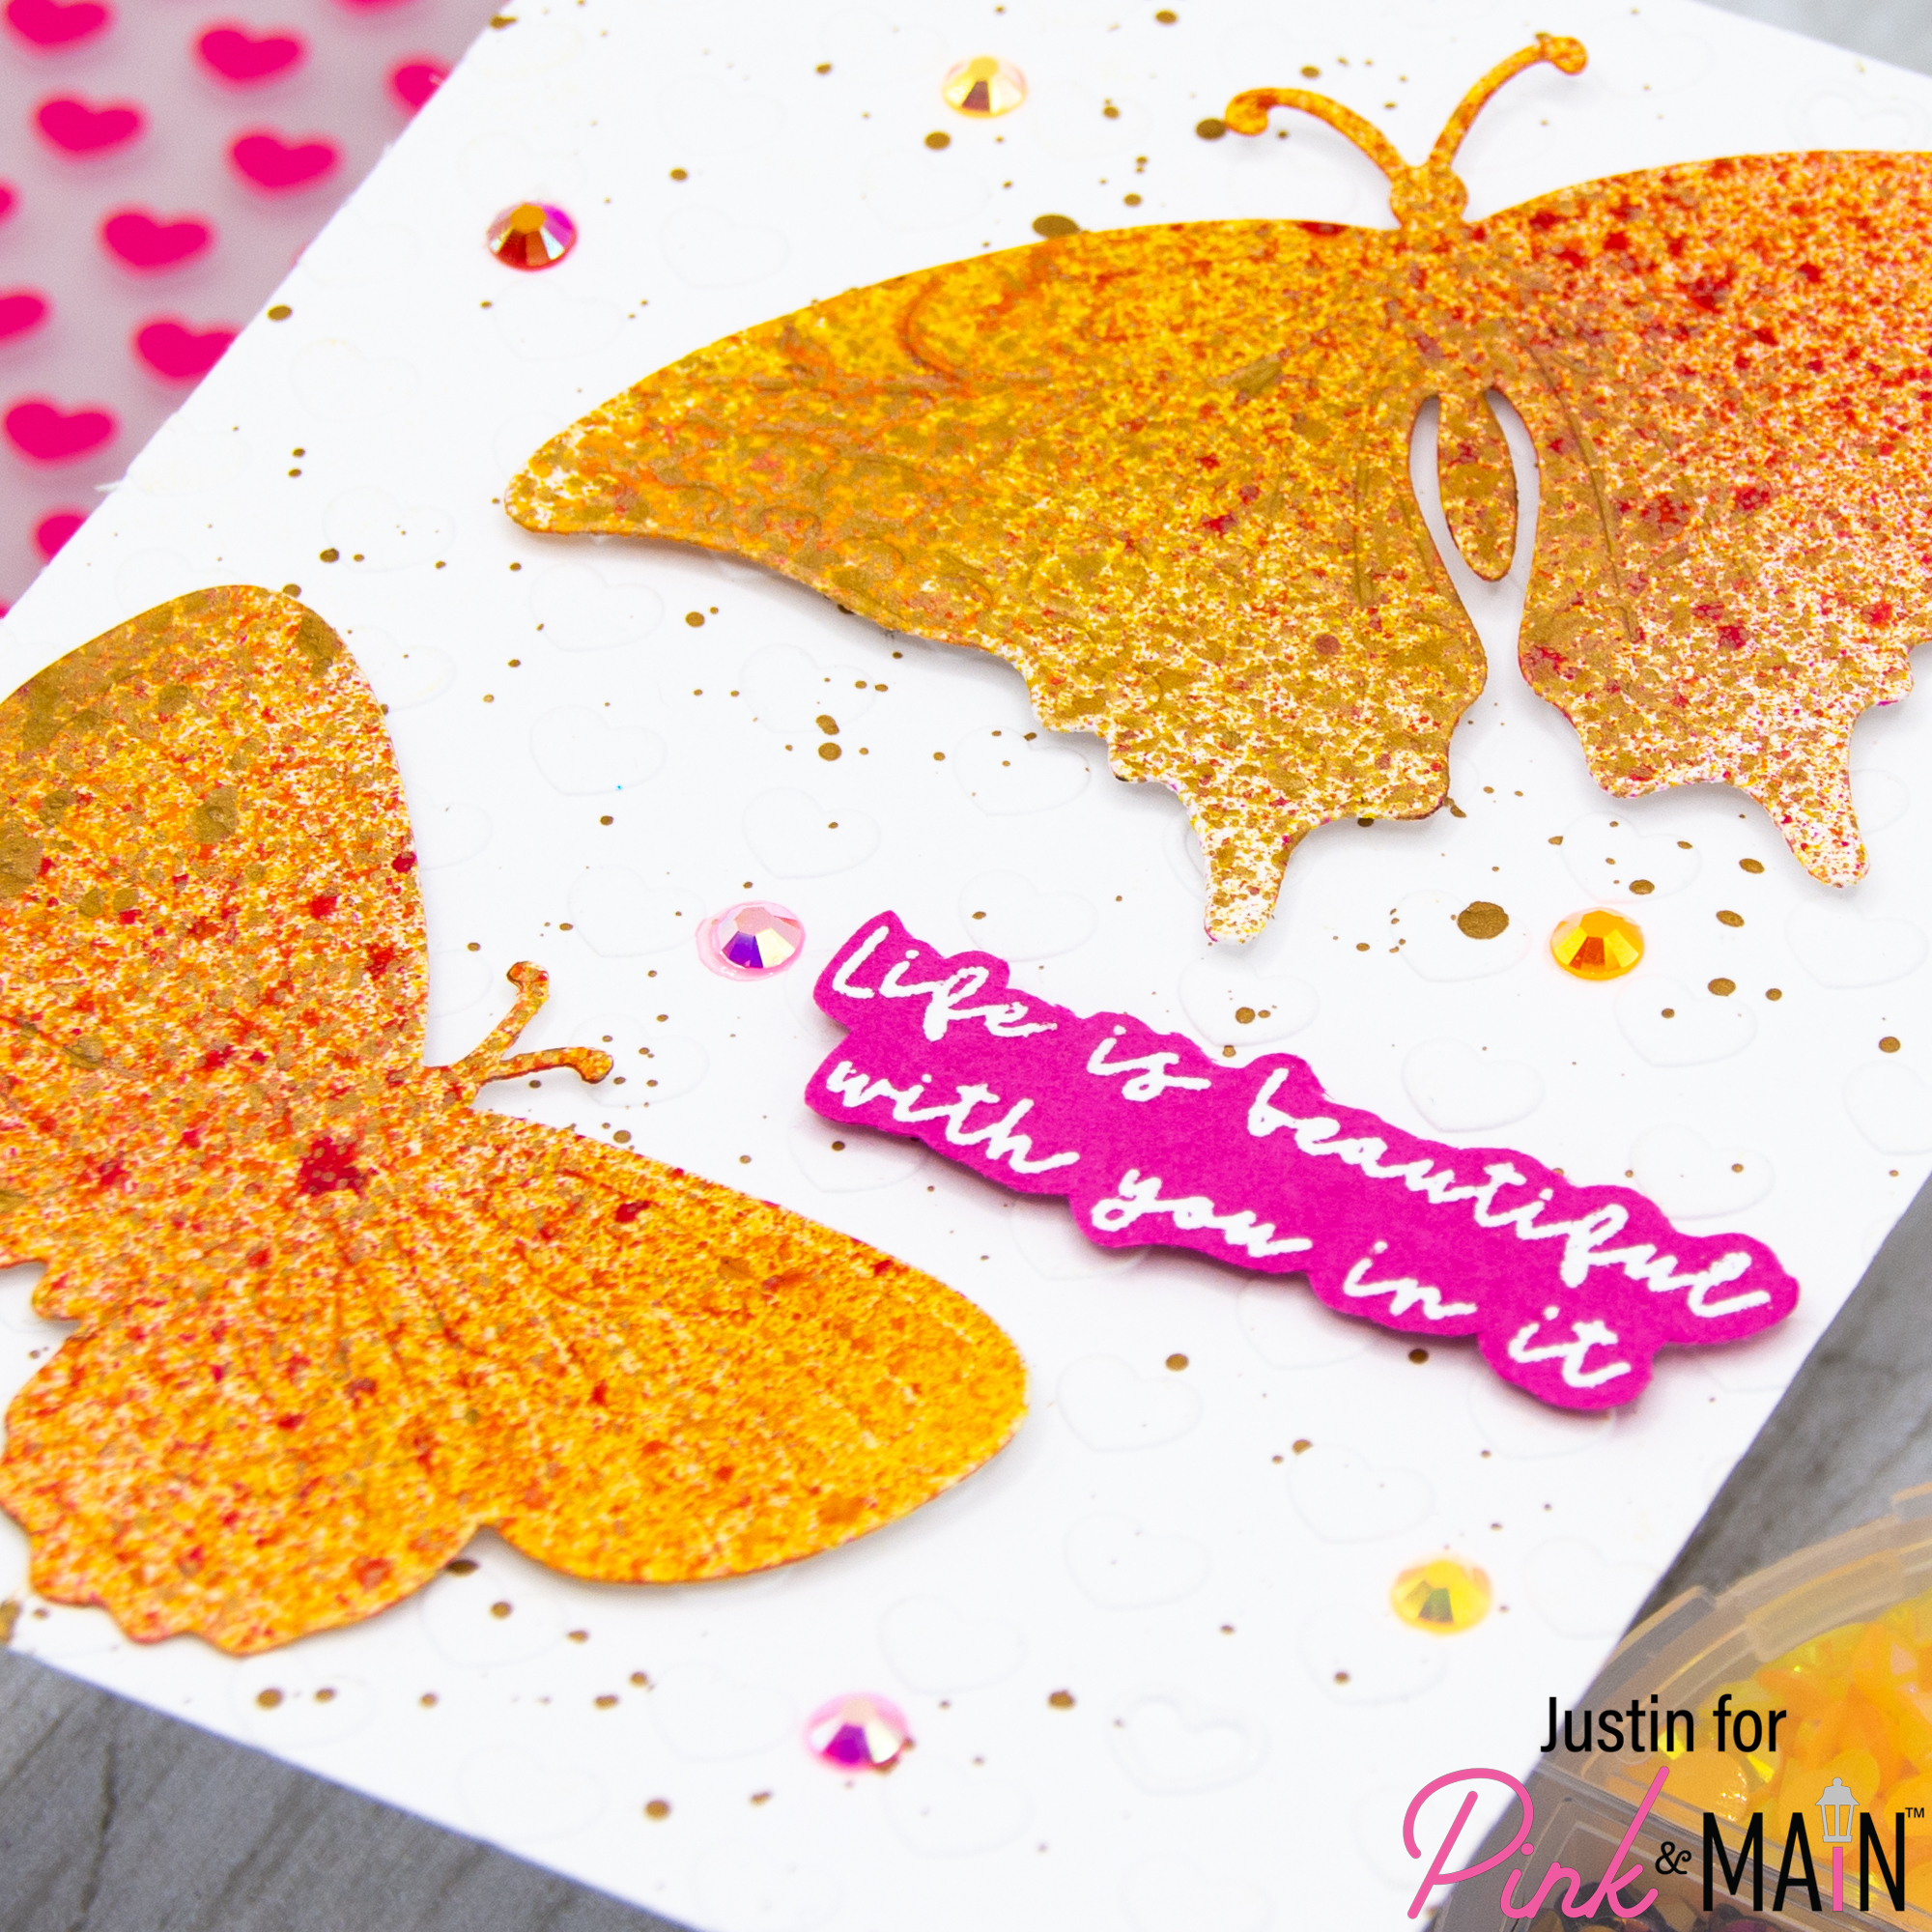
Hello everyone! Today I am so excited to be sharing with you this creation using so much spray and splattery-goodness with the Pink & Main July Release! I love the brand new Butterflies Cut & Emboss Folder so much, and I thought it would be so much fun to use some spray stains on them instead of ink-blending!
This post is also being featured over on the Pink & Main Blog, so be sure to click here to head on over and check it out!
Here is a list of products used:
Pink & Main Products Used:
Butterflies Emboss & Cut Folder
Floral Wings Stamp Set
Many Hearts 6″ x 6″ Embossing Folder
Dress Shop Cardstock
Frosting Embossing Powder
Embossing Watermark Ink Pad
Magic Anti-Static Tool
Warm Jellies Gems
Other Key Products Used:
Distress Spray Stains: Tarnished Brass, Saltwater Taffy, Picked Raspberry & Mustard Seed
Foam Tape
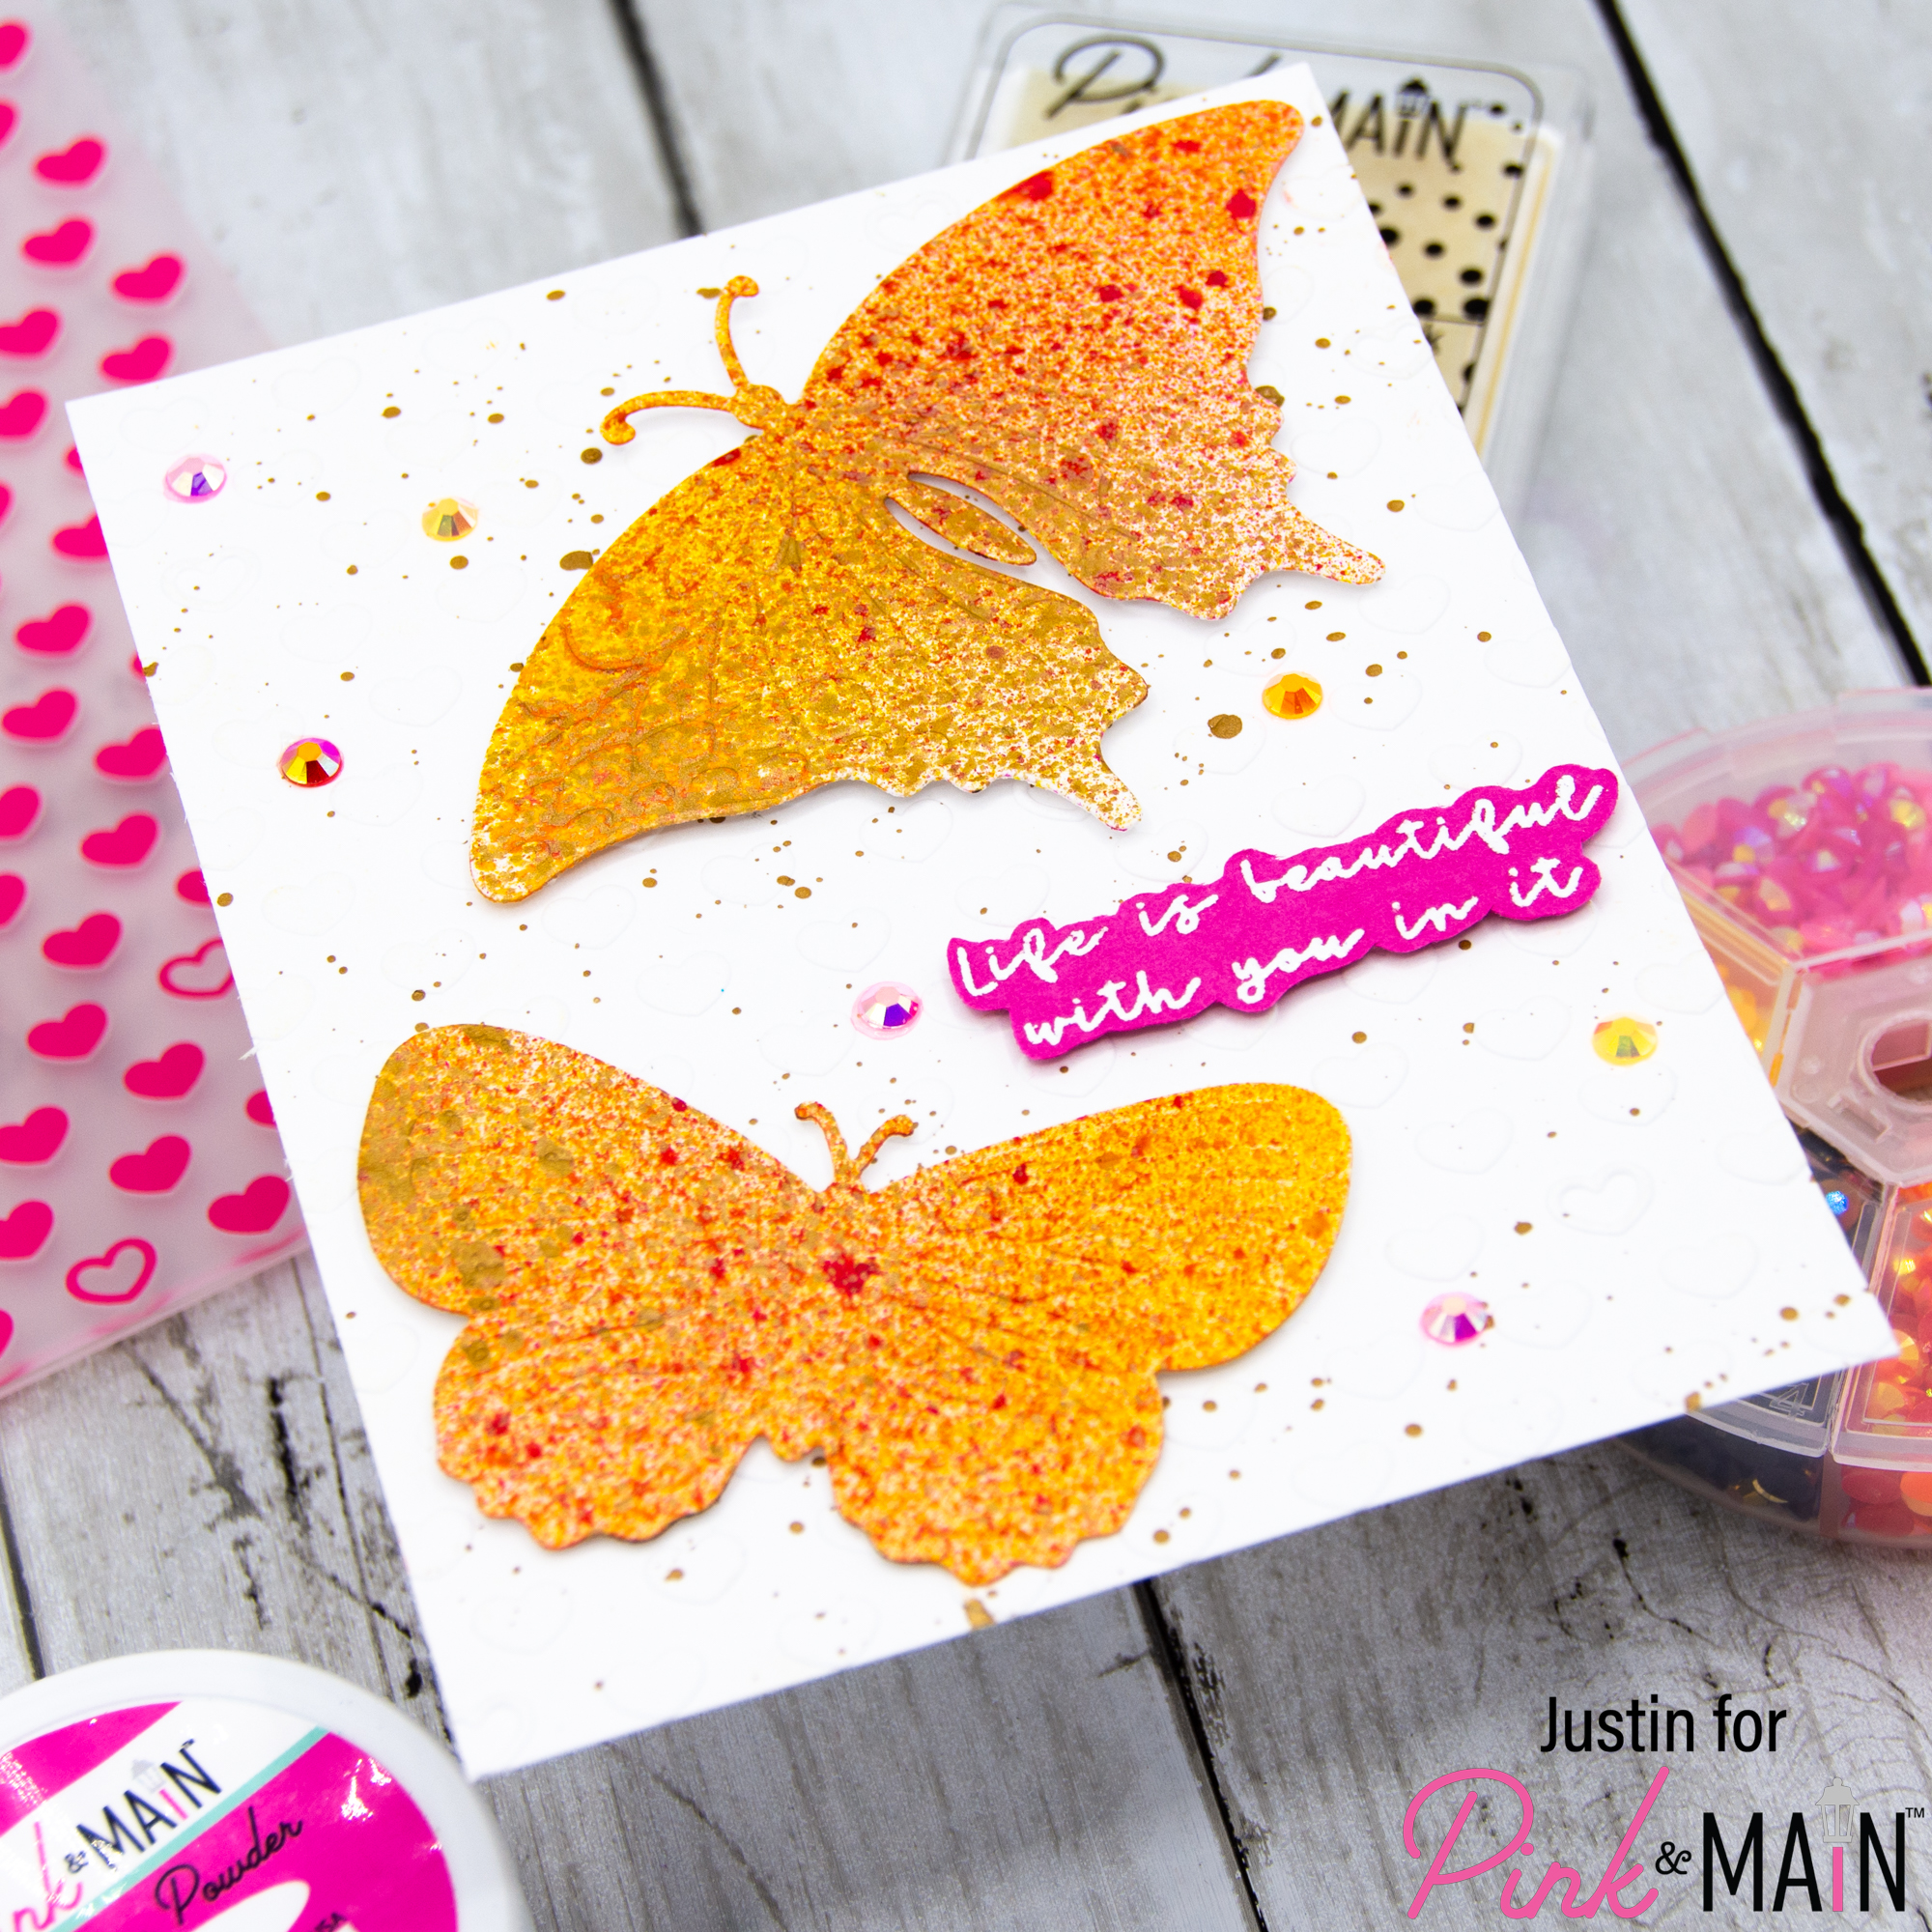
This card was really easy to make, and has so many fun textures going on. First. spritzed a piece of white blending paper with water, placed it into the Butterflies Emboss & Cut Folder, and processed it through my die cutting machine. I did the same process with the Many Hearts 6″ x 6″ Embossing Folder as well to create my A2-sized card front.
I placed my 2 butterflies cut from the Butterflies Emboss & Cut Folder into a splatter box and sprayed them Mustard Seed, Saltwater Taffy, & Picked Raspberry Distress Spray Stains. I finished my spraying them with Tarnished Brass Distress Spray Stain for a metallic finish. I took the same Tarnished Brass Distress Spray Stain, removed the nozzle, and tapped the nozzle over my card front, while in my splatter box, to get a splatter look on my card panel.
I heat embossed the sentiment “life is beautiful with you in it” from the Floral Wings Stamp Set in Frosting Embossing Powder onto Dress Shop Cardstock, which I brushed first with the Magic Anti-Static Brush, fussy cut it out, and set it aside.
Once everything was dry, I adhered my butterflies and sentiment with foam tape, and adhered a few Warm Jellies Gems. I finished by adhering the entire panel to my A2-sized card base, and was completed!
Thank you so much for stopping by! I hope you are loving the July release as much as I am, and that this project leaves you with some inspiration for how you can use some of these beautiful new products to create your next project!
Happy Crafting!
Justin
Be sure to follow me on Instagram at @justanotebyjustin for all my crafting projects!
Note: This blog does use affiliate links when possible. Please know that I only recommend products that I love and think you’ll love too!
Did you know that I have written a special blog post that I rank all of the current Distress Oxide colors?
Check it out if you haven’t yet! I have had a lot of great response from people who have used this list to start their Distress Oxide Journey!
Leave a Reply