

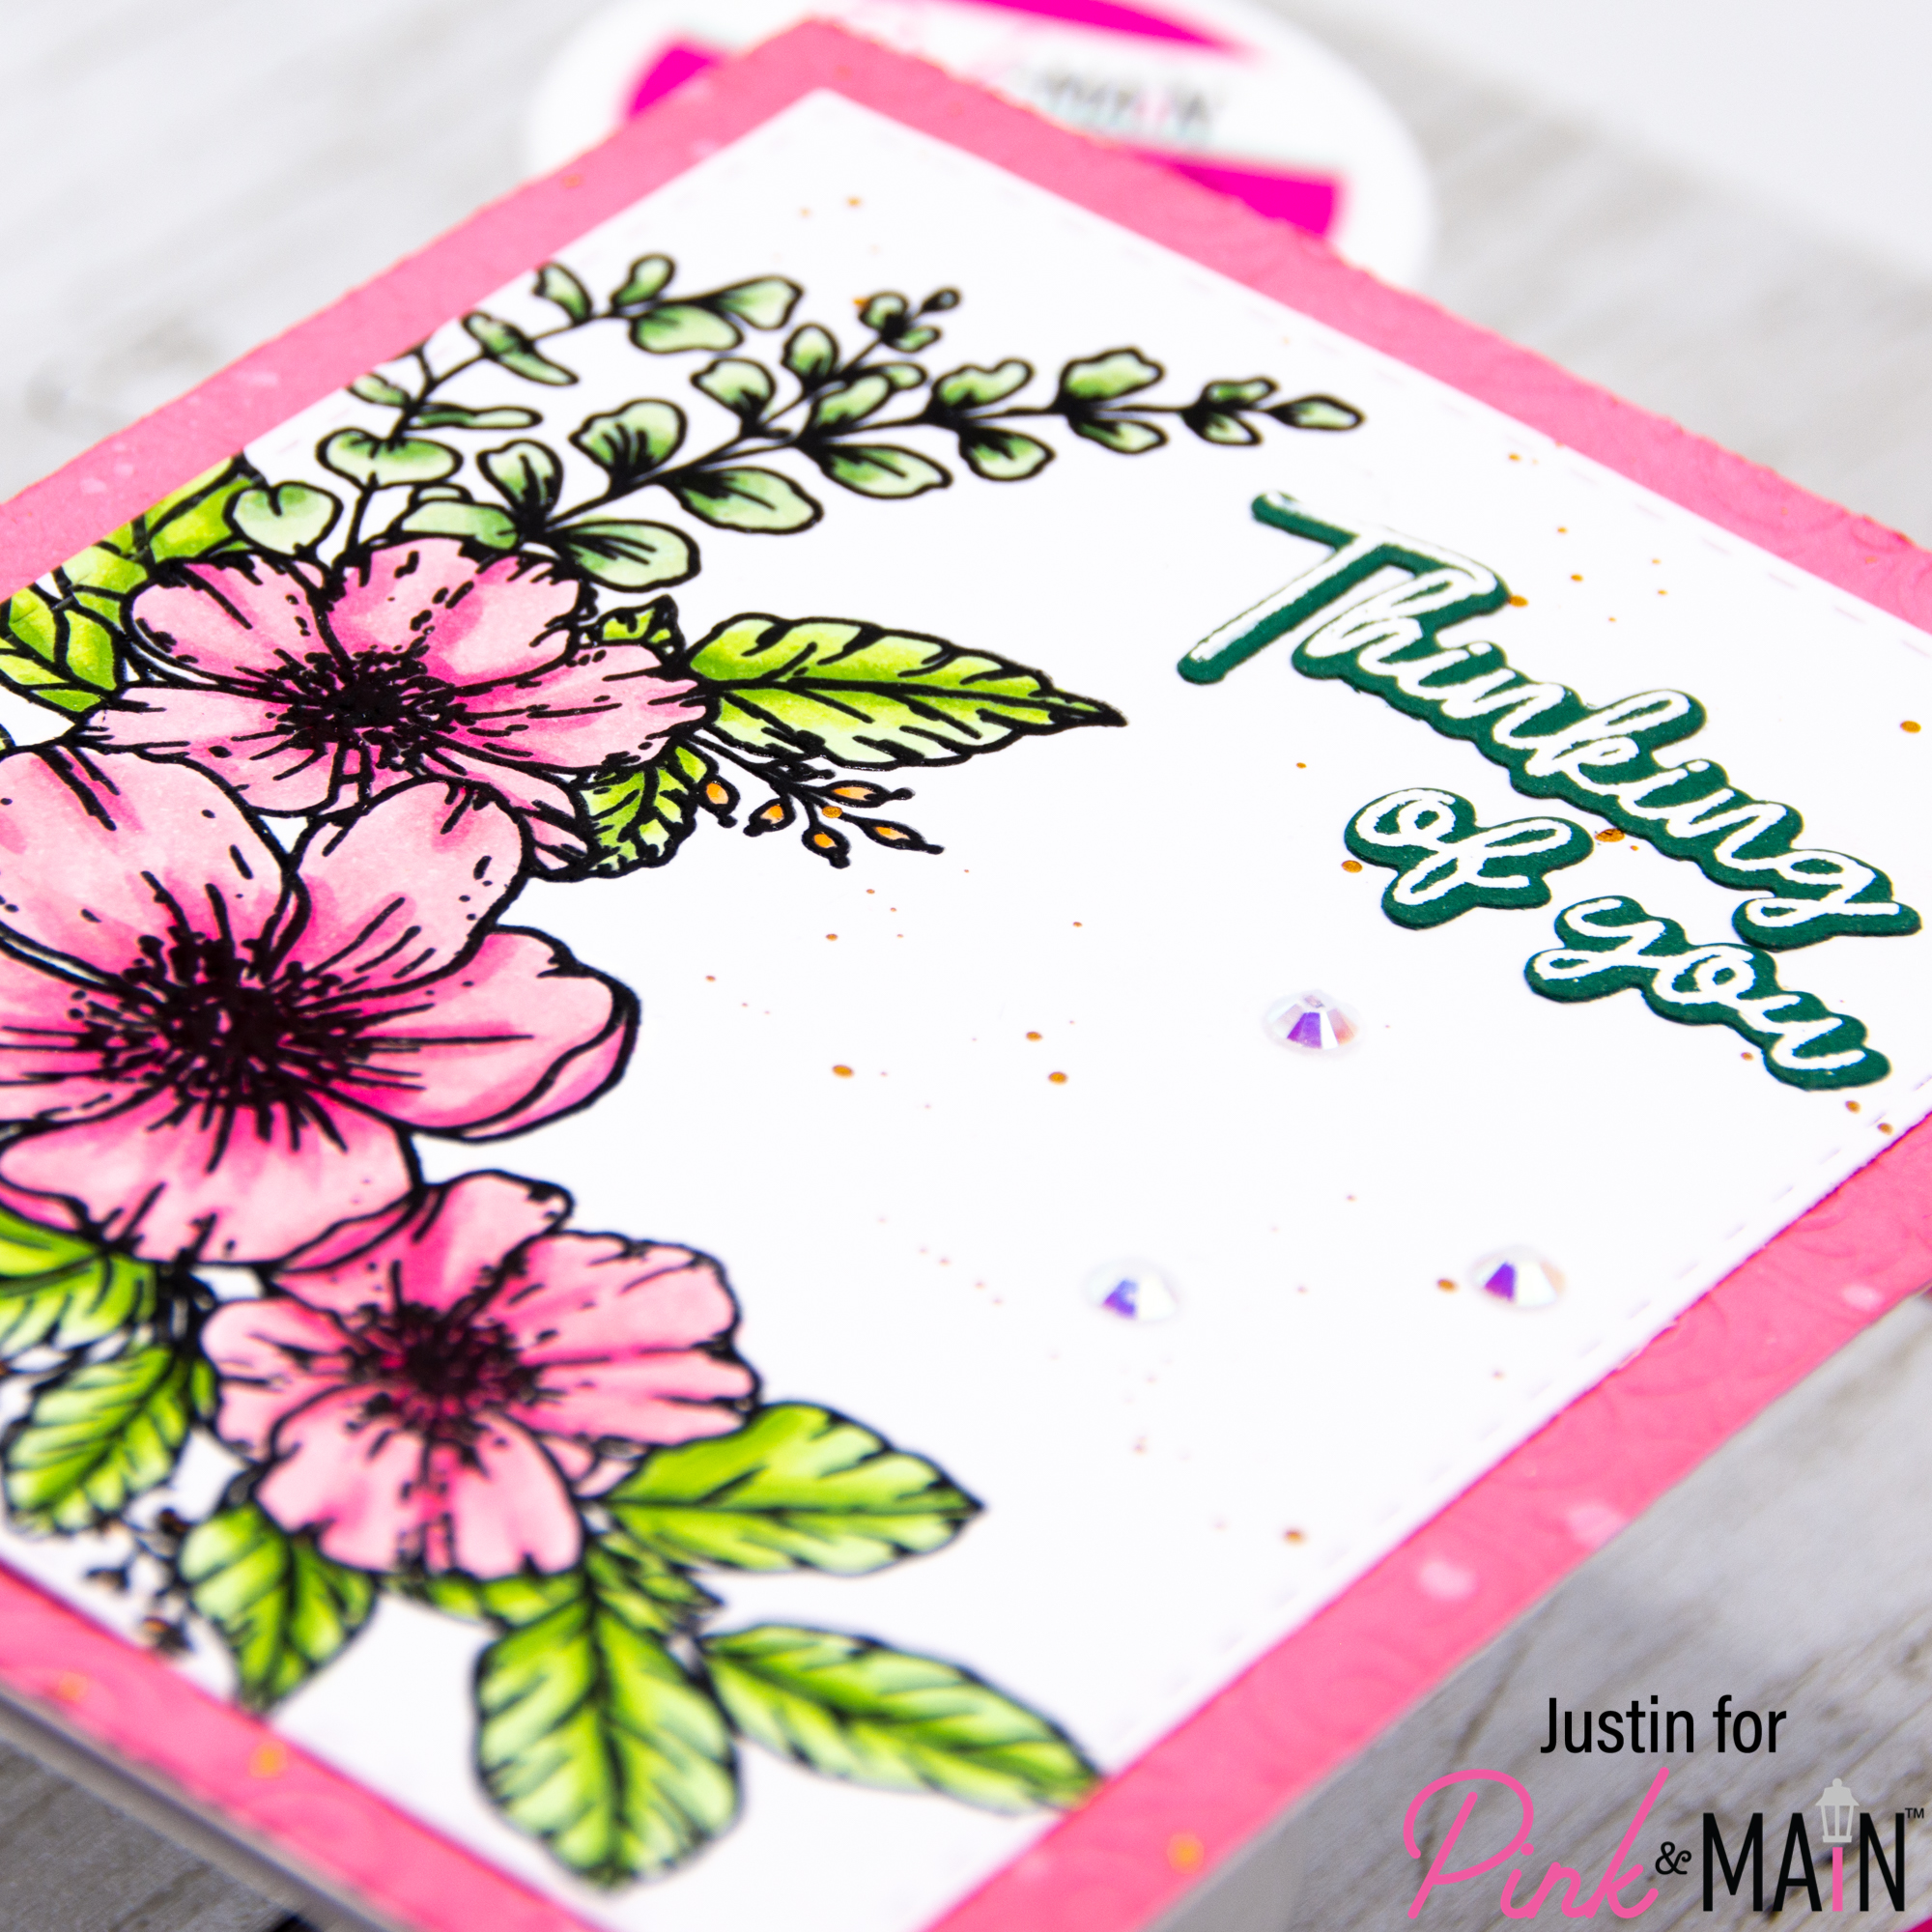
Hello everyone! I’m stepping a bit outside my comfort zone today and going ALL FLOWERS for my project! I used the new Floral Sprays Stamp Set by Pink & Main to make a really pretty card that is perfect to send to a friend, just to let them know their in your thoughts!
Before we jump into the project, I have my supply list of products used below:
(Note: Affiliate links are used in this post at no additional cost to you!)
Pink & Main Products Used:
Floral Sprays Stamp Set
Floral Sprays Coordinating Dies
Mod Stitched Rectangle Dies
Ornate Tiles Embossing Folder
Frosting Embossing Powder
Clear Embossing Powder
Embossing/Watermark Ink Pad
Cool Jellies Gems
Other Products Used:
Copic Markers
Copic Coloring Paper
Worn Lipstick Distress Oxide Ink
Versafine Clair Nocturne Ink
Metallic Watercolor Accents
Colored Cardstock
This card is also being featured on the Pink & Main blog today! Be sure to head over and give them some love!
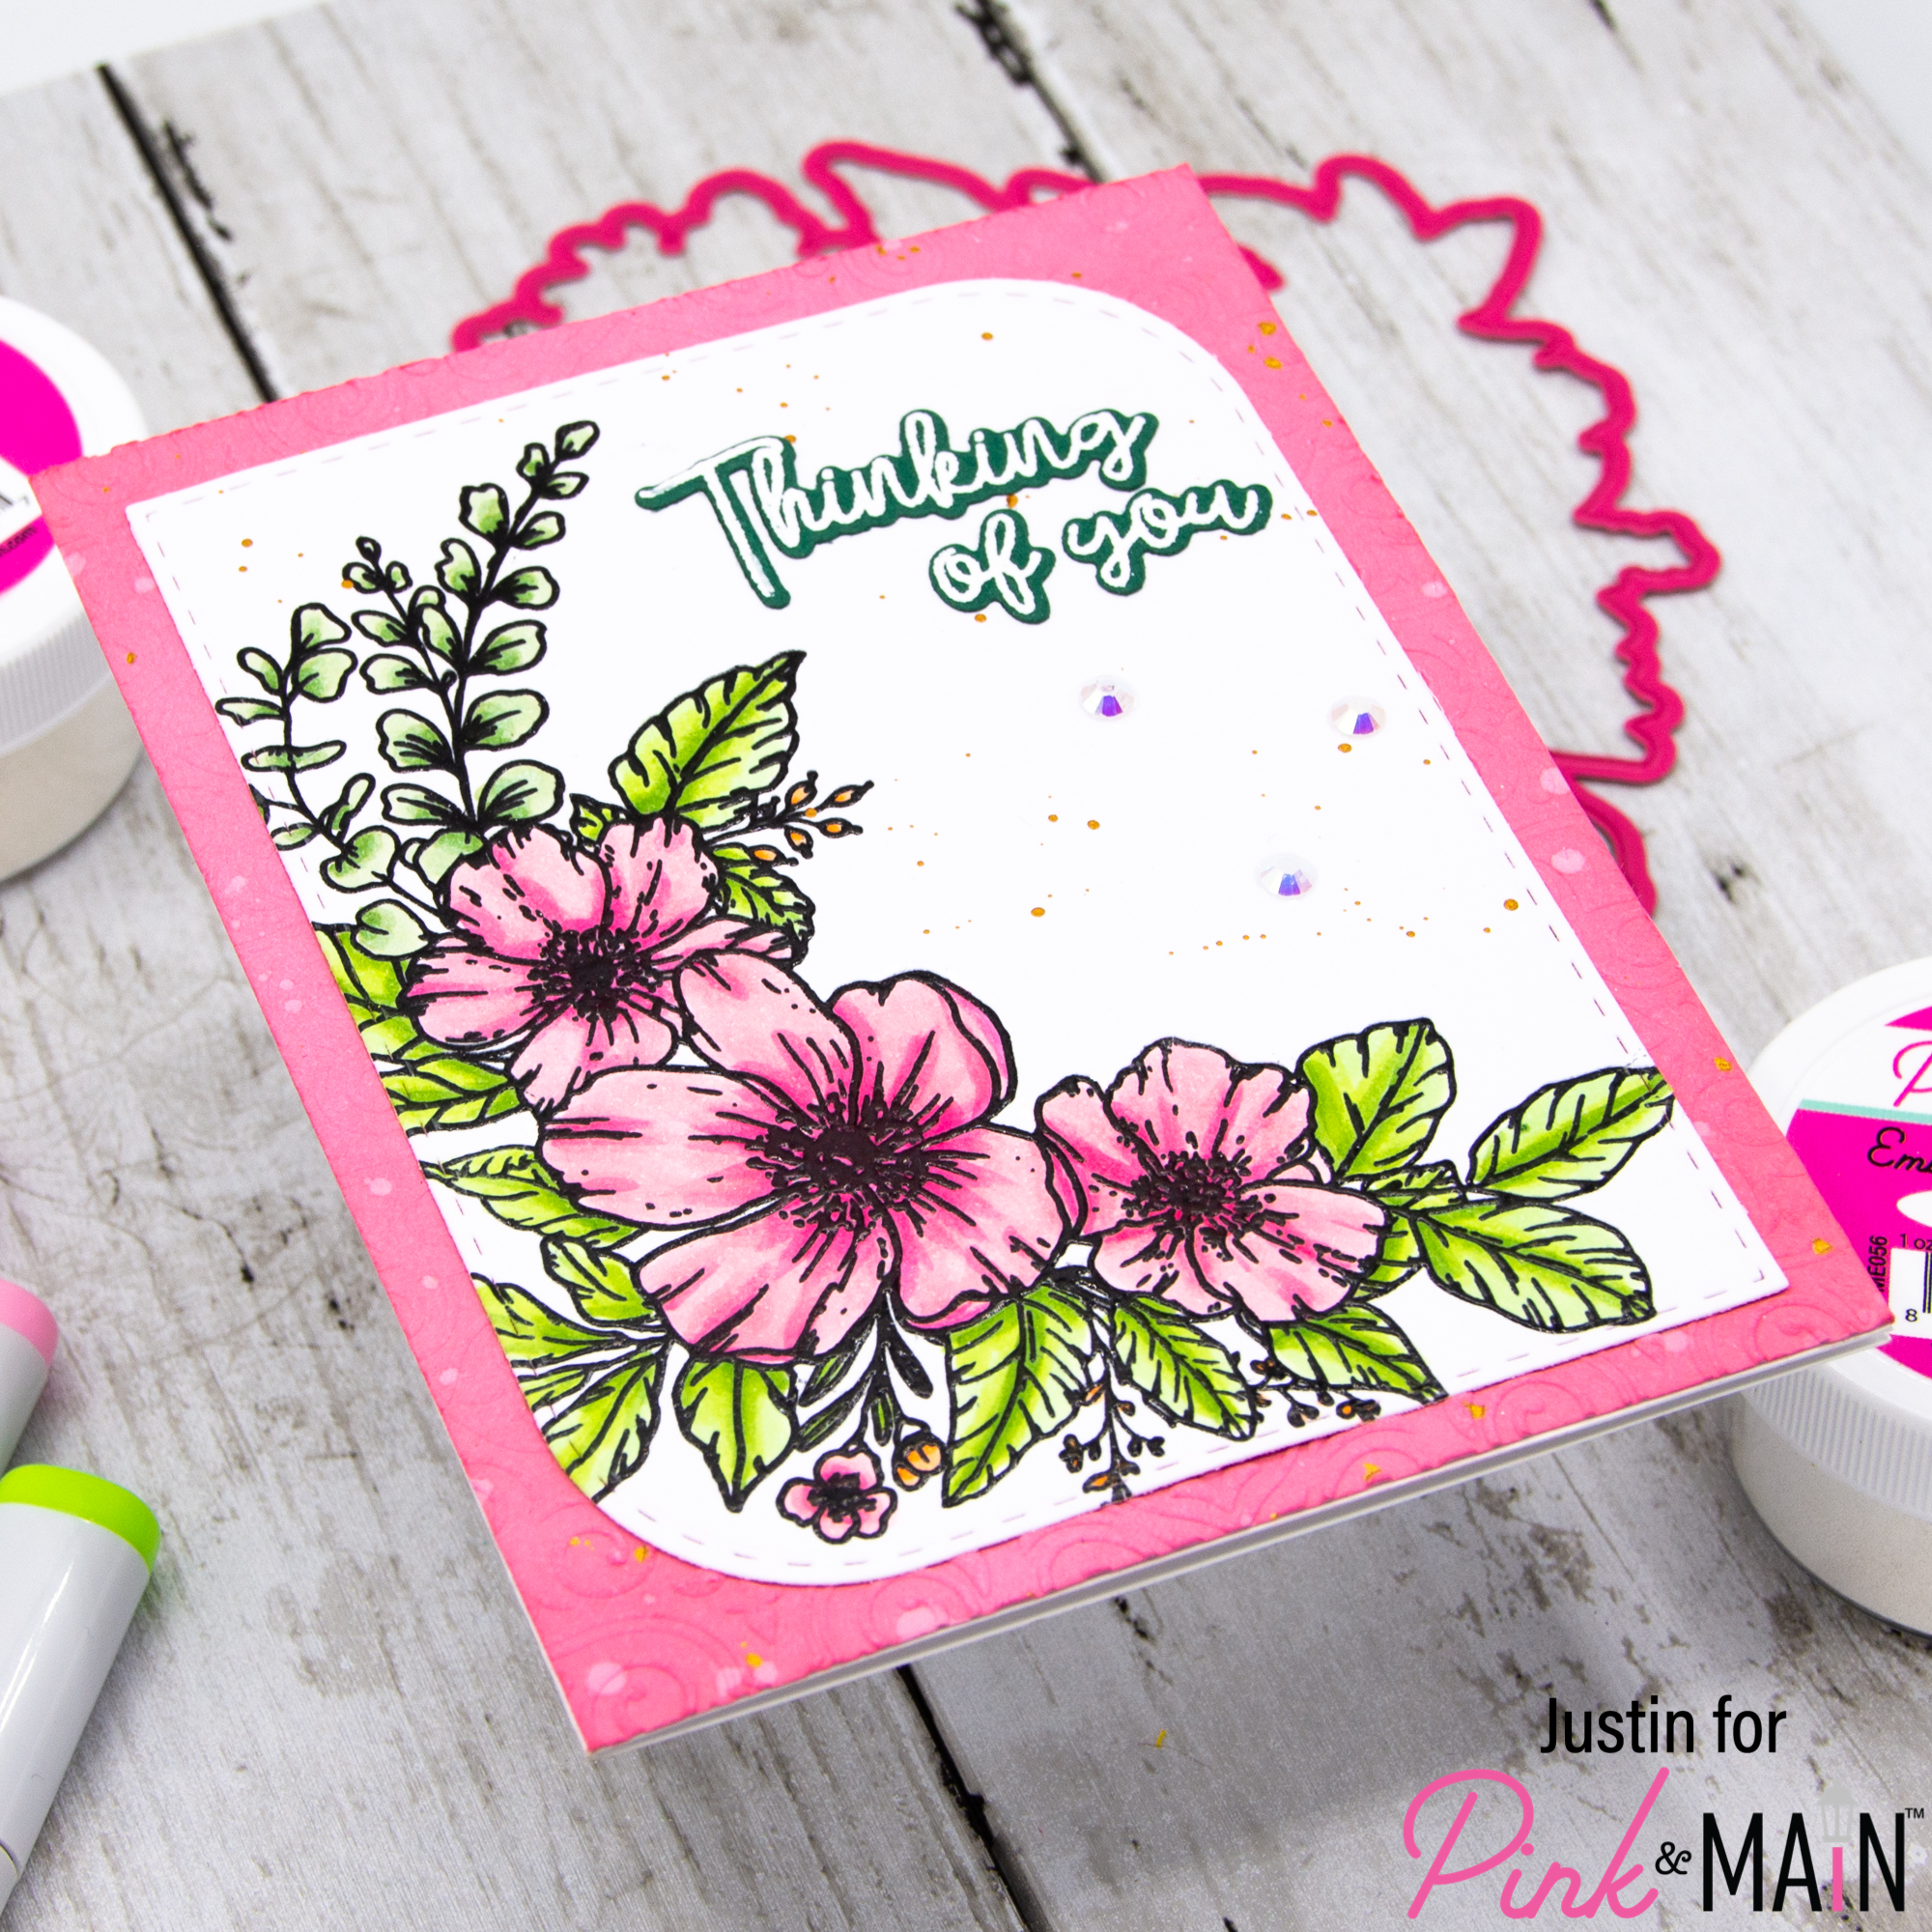
This card was really fun to pull together! Taking a piece of Copic Coloring cardstock and using my Anti-Static Brush across the paper, I stamped my flowers from the Floral Sprays set in Versafine Clair Nocturne Ink. I then shook Clear Embossing Powder over the image and heat embossed the image. I colored up my flowers with Copic Markers, and then used the Mod Stitched Rectangles Dies to cut my image.
Next, I grabbed an A2-sized piece of pink cardstock, blended up the edges with Worn Lipstick Distress Oxide Ink, and processed the paper through my die cutting machine with the Ornate Tiles Embossing Folder. I splattered both the embossed panel and colored panel with gold metallic watercolor.
Using the Floral Sprays stamp set, I stamped my sentiment in embossing ink and heat embossed the sentiment in Frosting Embossing Powder, and then used the Floral Sprays coordinating die set to cut the sentiment out. I adhered the sentiment to my Copic Colored Panel, and then adhered the panel to the embossed panel. To finish my card off, I adhered a few Cool Jellies Gems to the card and adhered it to an A2-sized card base!
Thank you so much for stopping by! Happy Crafting!
Justin
Be sure to follow me on Instagram at @justanotebyjustin for all my crafting projects!
Note: This blog does use affiliate links when possible. Please know that I only recommend products that I love and think you’ll love too!
Did you know that I have written a special blog post that I rank all of the current Distress Oxide colors?
Check it out if you haven’t yet! I have had a lot of great response from people who have used this list to start their Distress Oxide Journey!
Leave a Reply