

Before we jump into today’s project, I wanted to let you know that I sometimes use affiliate links to share my favorite products. Don’t worry, these links won’t cost you a dime – they’re just little crafty helpers behind the scenes that help support me if you use them to make a purchase! Let’s dive into today’s creative journey together!
Ahoy, friends! The Kindred Stamps May Release has pulled into port, and I’m sailing on over to share with you some of my projects using the brand new 4″ x 6″ set, Ahoy Matey! This stamp set features your favorite cartoon sailor, 3 other characters from his world, and a bunch of fun sentiments to help set the scene!
Be sure to stick around towards the end of this post for my Copic Marker combinations for each of the characters!
Now, let’s ship out as I share my (4) projects!

Kindred Stamps products used:
Ahoy Matey Stamp Set
Card Basics Die Set
Clear Embossing Powder
For my first Ahoy Matey project, I wanted to feature the Sailor and his eventual Wife on their own card as a couple. I love the buildable sentiment of “sailing by to say” and “olive you” because I think it perfectly encompasses both of these characters! I also opted for a simpler background, just by ink-blending white paper with some of my favorite blue Distress Oxide Inks!
Pro-Tip: become familiar with your favorite card sizes you like to create, and then become familiar with the appropriate sizes for that size to create layers of the main card base. For example, this card is an A2-sized card, meaning it is 4.25″ x 5.5″ in size. The stitched rectangle die cut that I used for this card is 4″ x 5.25″, which is .5″ shorter on each side of the card, allowing for a perfect layer. I also added a layer of yellow glossy cardstock to fit between these two layers, which I sized at 4.125″ x 5.375″. This will become really helpful as you begin to plan out different projects!

Kindred Stamps products used:
Ahoy Matey Stamp Set
Card Basics Die Set
Cityscape Border Die
Cherries On Top Paper Pad
Snowfall Embossing Powder
Embossing Ink Pad
For my 2nd Ahoy Matey project, I wanted to create a scene card featuring the main sailor, and imagine that he is docked at a port that doubles as a city. For this project, I actually die cut the Cityscape Border Die twice: once from gray paper, and once from light yellow. Once I adhered the gray Cityscape layer to my card panel, I used the die cut windows from the light yellow shape and adhered them into each window opening. Now, you don’t always need to do this, but I was wanting to make sure the windows weren’t see through, and that I wasn’t adding too much dimension to the card!
Pro-Tip: When creating a scene, don’t be afraid to pull in a patterned paper for different elements either as a shortcut tactic, or to add a bit of pattern for fun! I loved the chevron print included with the Cherries On Top Patterned Paper Pad, and thought it would be fun to use it as the sky for this scene card!

Kindred Stamps products used:
Ahoy Matey Stamp Set
Card Basics Die Set
Cherries On Top Paper Pad
Snowfall Embossing Powder
Embossing Ink Pad
For my 3rd Ahoy Matey project, I used the Baby image and created a simple card layout that combines both patterned paper and ink-blending. This baby is definitely a smaller image, so, if you are using them on their own, I think it’s a great idea to breakdown a section of your card for the image to exist on. I used the circle die cuts from the Card Basics Die Set, and figured this would be the portion of my card the baby would exist on, and that I would decorate the rest of my card to compliment the circular unit.
Pro-Tip: You should always keep a good vellum on hand, because there are so many fun uses for it! I like to incorporate vellum into my projects when I don’t want to fully cover up a portion of my card, and still allow the background to peek through a little bit!
Kindred Stamps products used:
Ahoy Matey Stamp Set
Card Basics Die Set
Cast a Spell Paper Pad
Weave Stencil
Snowfall Embossing Powder
Embossing Ink Pad
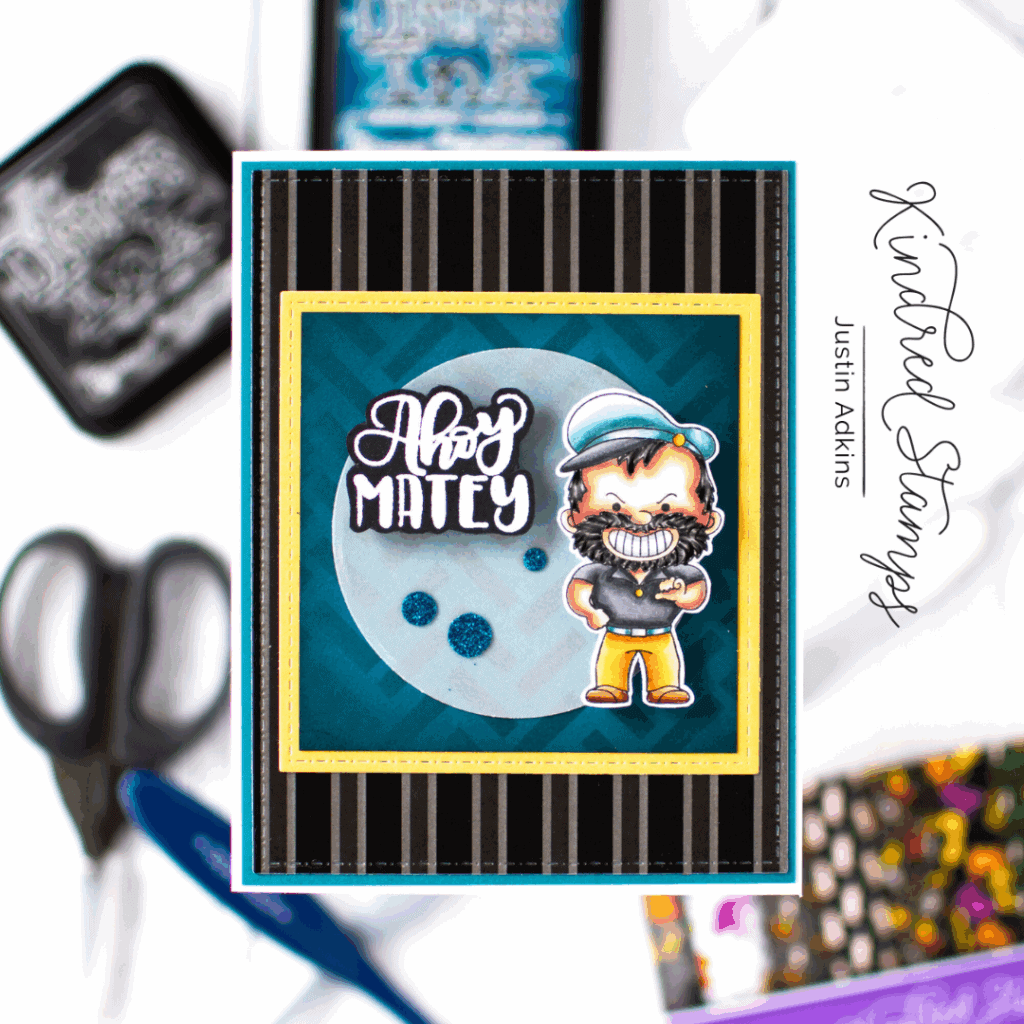
For my 4th and final Ahoy Matey project, I am featuring the Bearded Guy on a card all of his own! I wanted to pull in some gray paper, and when I came across this striped pattern from the Cast a Spell Paper Pad, I thought it was the PERFECT fit! I used dies from the Card Basics Die Set to create a layout for this card. I also wanted to add some more pattern work to this card, so I grabbed the Weave stencil and did a little bit of ink-blending to make the center square of this card!
Pro-Tip: Stumped on a color-palette for your card? Theme it after the main character of your card! If you look at the Bearded Guy on this card, you will see how the colors selected for all of the elements of this card correspond to the character himself!
Thank you so much for sticking through to the end of my blog post! As promised, here are the Copic Marker combinations I used to color up the Ahoy Matey stamp set!
Sailor
Skin: E04, E11, E21, E00, E000, R22, R20
Inner Mouth: RV34, RV32, RV10
Tongue: RV14, RV13, RV11
White Hat & Can: C3, C1, C00
Hat & Shirt Grays: T7, T5, T3
Hat, Pipe and Belt Yellows: Y19, Y15, Y11
Jeans: B97, B95, B93, B91
Shirt Collar: R29, R24, R22
Shoes: E18, E15, E13
Spinach Greens: G05, G00
Sailor’s Wife
Skin: E04, E11, E21, E00, E000, R22, R20
Hair: T7, T5, T3
Shirt: R29, R24, R22
Whites: C3, C1, C00
Earring and Skirt Stripe: Y19, Y15, Y11
Skirt: N7, N5, N1
Shoes: E18, E15, E13
Bearded Guy
Skin: E04, E11, E21, E00, E000, R22, R20
Hair: T8, T6, T4, T2
Teeth & Belt Buckle: C3, C1, C00
Hat & Belt Blues: BG75, BG72, BG70
Hat and Shirt Grays: N7, N5, N3
Pants & Buttons Yellow: E35, Y38, Y35, Y32
Shoes: E18, E15, E13
Baby
Skin: E04, E11, E21, E00, E000, R22, R20
Inner Mouth: RV34, RV32, RV10
Tongue: RV14, RV13, RV11
Hat & Onesie Whites: C3, C1, C00
Hat Grays: T7, T5, T3
Hat Yellows: Y19, Y15, Y11
Onesie Reds: R29, R24, R22
New to coloring with Copic Markers? Here are my go-to supplies you’ll need to start-up your collection:
Copic Markers
Coloring Paper
Alcohol-Marker Safe Ink
White Gel Pens (#10 Size)
Below is a bit of information for the Kindred Stamps May Release!
The entire Kindred Stamps release will be available this Friday at 8am PST/11am EST. Be sure to subscribe to the Kindred Stamps blog to see a daily line up of sneak peeks from our amazing Design Team! Come join the Fan Club and release event to be part of the release fun, and you may just win some Kindred Stamps credit!!
Thank you once again for stopping by! Happy Crafting!
Justin
Be sure to follow me on Instagram at @justanotebyjustin and subscribe to my YouTube Channel for even more crafting inspiration!
Note: This blog does use affiliate links when possible. Please know that I only recommend products that I love and think you’ll love too!
Did you know that I have written a special blog post that I rank all of the current Distress Oxide colors?
Check it out if you haven’t yet! I have had a lot of great response from people who have used this list to start their Distress Oxide Journey!
Leave a Reply