Merry Christmas, Everyone!
This has been so hard to resist sharing (without a spoiler disclaimer), and I’m super excited to share the fun projects that I made with the Kindred Stamps Advent Calendar set!
For my first project, I took the Santa Character stamp and colored him in with my Copic Markers, along with the ornament stamp as well.
Detour: The characters that are included in this Advent Calendar set are so incredibly fun. And, other than maybe the Santa character, you could really use most of these images outside of the holiday season too!
On a piece of Red Cardstock, I took the sentiment “merry & bright” (oh my I LOVE the style of this sentiment!) and stamped it in a pattern with a steady hand. My tip for making a sentiment filled background like this is to find a reference point that is easy to know where to place your stamp down. In this card, I took the sentiment and carefully stamped a horizontal line of it. Then, I went to the line above, and made sure the “g” in “bright” was in the center of the sentiment gap on the line below!
For my 2nd project, I took the fun Yeti character and colored him in with my Copic Markers. Another fun tip: when you want an icy-blue color, I like to shadow with BG10 and then go over the whole space with C00. It’ll look sorta dark when you first apply the color, but it will lighten up when it dries! I use this color combination very often when coloring snowy and wintery scenes.
I then took the Christmas Sweater Stencil, adhered it to a 4″ x 5.25″ piece of white cardstock with Pixie Spray, and applied Electric Blue Glitter Gloss. I was going for an icy blue snowflake look, and it definitely did the trick!
Finally, for some added pattern, I used the Country Quilt Stencil and applied Blueprint Sketch Distress Oxide Ink with my Picket Fence Studios Life Changing Blender Brushes over a scalloped circle that I die cut out.
For my next 2 projects, I went with a similar style but used a different color palette for different looks.
I started by using the Forest Stencil to blend out the line of trees with my Picket Fence Studios Life Changing Blender Brushes. I then used my Brother Scan n Cut to cut them out, in lieu of stenciling directly onto the paper. Now, when I cut them out, there were a few white areas still on the trees, and I liked the way this looked because it gave a little bit of a snow look to the trees.
To set the scene, I ink blended the background first, then adhered my forest layer, then I die cut out a snow mound for each card, and placed it as the last layer on top of the trees.
I colored up the Snowman and the reindeer with Copic Markers, and used a Sakura White Gelly Roll pen to give the Snowman’s jacket a plaid look. I also used Ranger Ink Glossy Accents to the male reindeer’s red nose to make it look almost like a light bulb!
Finally, I stamped the sentiments. For the reindeer card, I used embossing ink first and heat embossed the sentiment with Brutus Monroe Alabaster White Embossing Powder.
Now, I saved my favorite card for last, and this may be one of my favorite cards ever!
First, I colored up my Santa, each of the toys and 5 stockings with Copic Markers.
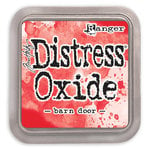
I then used the Distress Brick Stencil and Barn Door Distress Oxide Ink with my Picket Fence Studios Life Changing Blender Brushes on top of light gray paper, to make it look like red brick with a light gray grout.
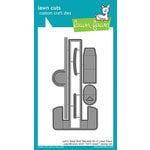
This is where the card gets a little tricky. I used my Cricut Explore Air 2 to cut out a fireplace with a tall rectangular opening (big enough for the big guy to fit inside). I then used the Lawn Fawn Let’s Toast Pull Tab on a black piece of cardstock (the same size as the fireplace piece WITHOUT the opening- so just a rectangle). I used the die to cut the pull tab slot onto the black cardstock rectangle, and placed it so it would hide under the chimney.
I lied the chimney piece on top of the black cardstock to figure out placement of my “jingle all the way” sentiment and heat embossed it in white.
I cut out the actual pull table, and placed it so it was fairly hidden. I lied the chimney/fireplace piece on top to figure out my placement of the Santa. Once I adhered my Santa, I used foam squares to adhere my brick chimney/fireplace piece directly on top of my black cardstock. I had to be very careful to place my foam squares in positions that would not obstruct Santa from traveling up the chimney.
I then placed the chimney piece on my card so it was all aligned on the top edge. I used some wood patterned paper to make a floor and mantle for the fire place, and finished by adhering the last of my colored images!
Be sure to check out my Instagram Post of this card to see a fun video of Santa going up and down the chimney!
And those are my 5 Kindred Stamps Advent Calendar projects from this year! Last I checked, there were still some sets in stock, and with no pressure to wait and open one section a day for 24 days, I would say now is the perfect time to get them before they sell out!
Leave a comment below if you have any questions or a favorite card. I’d love to hear what you think!
Happy Crafting!
Justin
Note: This blog does use affiliate links when possible. Please know that I only recommend products that I love and think you’ll love too!

Ranger Ink – Tim Holtz – Distress Oxides Ink Pads – Blueprint Sketch

Ranger Ink – Tim Holtz – Distress Oxides Ink Pads – Barn Door

Ranger Ink – Glossy Accents – Clear Dimensional Embellishment – 2 ounces

Lawn Fawn – Lawn Cuts – Dies – Let’s Toast Pull Tab Add-On

Cricut Explore Air™ 2, Black


These are so amazing, Justin!
Thank you so much, Yvonne!